
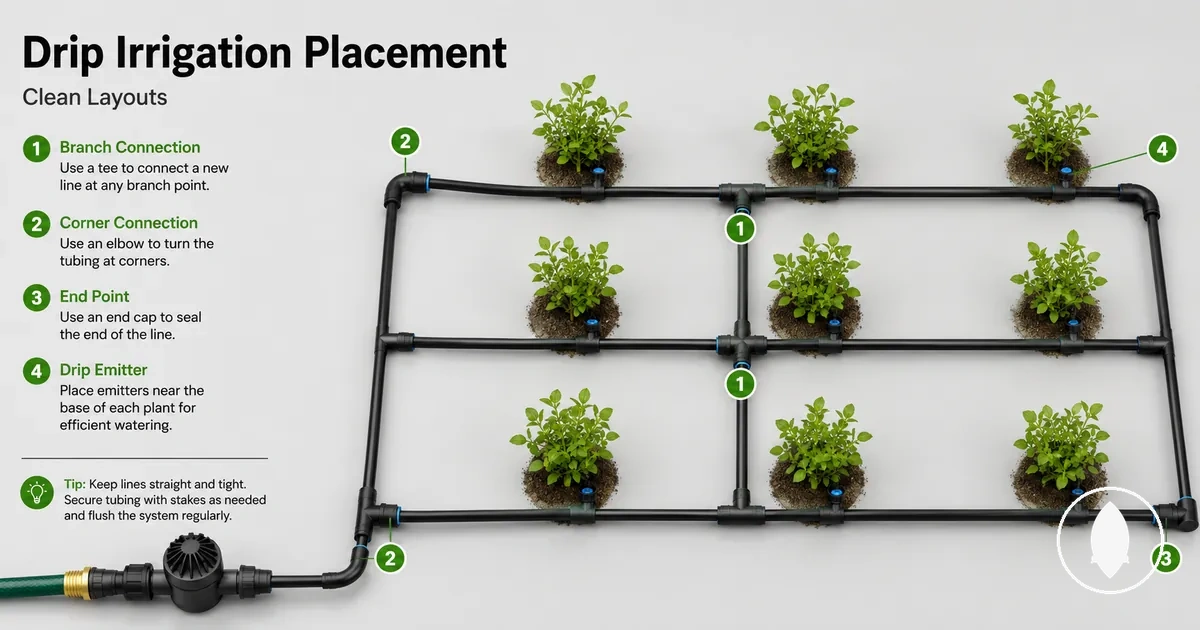
Drip Irrigation Fittings Placement for Clean Layouts
Drip irrigation fittings placement defines where fittings connect within a tubing layout so the system can follow planned paths through branches, turns, and line ends. Placement affects tubing direction, connection points, access, and how clean the overall layout remains. The main placement considerations include tubing runs, branch lines, corners, and endpoint locations.

Before cutting tubing in a bed, row, or planted area, fitting placement helps determine where connection points should sit within the layout. A clean tubing layout follows the shape of the area while keeping tees, elbows, end caps, and tubing connectors positioned where they support the intended path. The suitable placement can vary depending on bed shape, plant spacing, tubing size, and connector fit.
Poor fitting placement can lead to cluttered tubing paths, hidden line ends, or forced bends that make the layout harder to manage. Planning connection points before installation helps create a clearer arrangement while keeping compatibility considerations visible. This section focuses on placement logic rather than fitting selection or a complete installation process.
Clean fitting placement can be judged by checking whether connection points remain organized and suitable for the tubing layout. The checklist below verifies the main placement factors without turning the process into an installation sequence.
- Branch points: Check that tees or split connections are positioned where branch lines need to leave the main tubing path.
- Turns: Review corners and direction changes while considering elbows, bend radius, and tubing stress.
- Line ends: Place end caps or closure points where they remain visible and accessible within the layout.
- Access points: Keep important connection areas reachable for future checks or adjustments.
- Compatibility: Confirm that tubing connectors match the tubing size and connection conditions required by the layout.
- Plant layout: Consider plant spacing and bed shape so the tubing path supports practical water delivery across the area.
How fitting placement controls tubing direction and water delivery
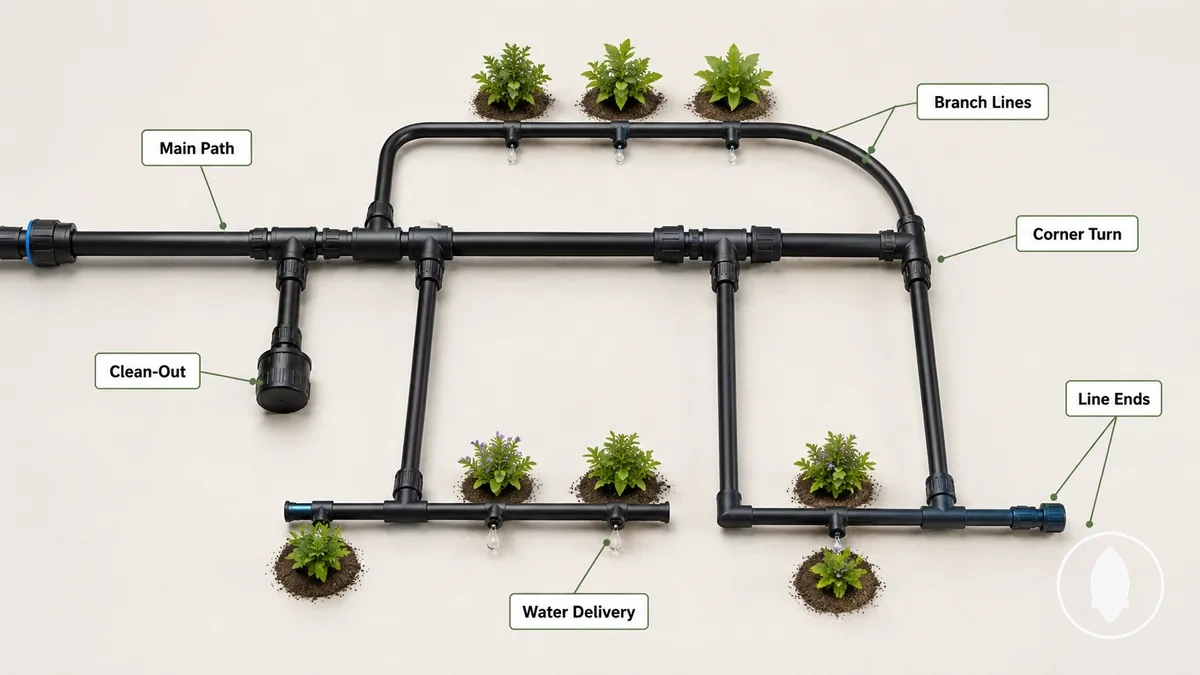
Fitting placement controls where drip tubing turns, branches, and ends, shaping the tubing direction and water delivery path through a layout. Connection points influence how branch lines leave the main route, how corners are managed, and where line ends remain accessible. These placement decisions help organize the tubing layout before installation details are addressed.
Fitting placement defines the relationship between the tubing path and delivery points by determining where connections redirect or extend drip tubing. Branch creation, corners, and endpoint locations can influence how water reaches different areas, while emitter reach may depend on factors such as tubing size, run length, slope, and overall system design. Placement planning focuses on arranging connection points rather than choosing individual fitting types.
Poor placement can create cluttered tubing paths, difficult-to-access clean-out points, or connection layouts that are harder to service. Reviewing branch lines, corners, and line ends before installation helps improve installation readiness and keeps the layout organized. For the broader category context, see the drip irrigation fittings hub; this section remains focused on placement logic rather than full installation technique or fitting selection.
How fitting placement controls tubing direction and water delivery can be shown by mapping the main tubing path, direction changes, branch points, and endpoints. The diagram below illustrates how connection locations organize delivery points and access areas within a drip irrigation layout.
Layout points that usually need drip irrigation fittings
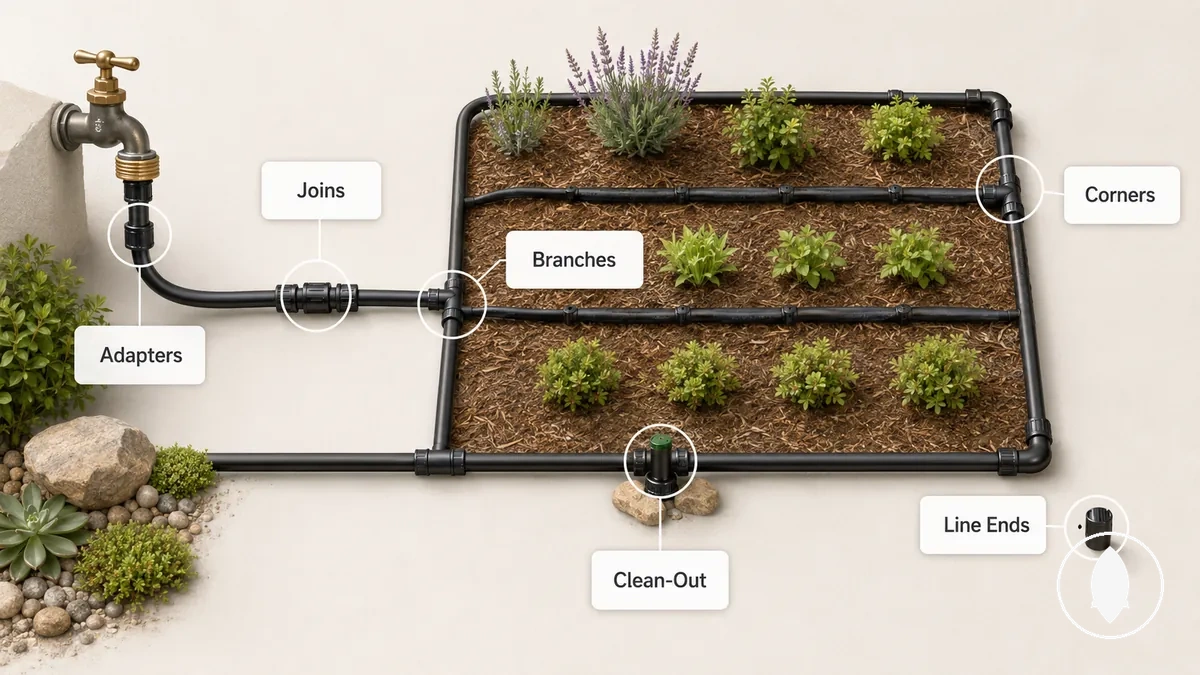
Drip irrigation fittings usually belong where tubing joins, extends, branches, turns, adapts, or ends within a layout. These layout points define the connection role of each fitting location and help organize tubing direction through the system. Mapping each point by function shows how fittings support different parts of the tubing path.
In rows, beds, or irregular runs, layout points appear where tubing needs a connection change, a separate branch, a direction change, or an accessible endpoint. These locations can vary depending on the tubing route, layout shape, tubing size, and connection requirements. Understanding connection roles for layout points helps separate where a fitting is needed from the specific fitting style used.
Layout points that usually need drip irrigation fittings can be organized by connection role and tubing direction. The table below maps each point by fitting role, placement condition, and layout effect.
| Layout point | Fitting role | Placement condition | Layout effect |
|---|---|---|---|
| Joins and extensions | Connect tubing sections | Used where tubing continuity needs to continue or extend | Maintains a connected tubing path |
| Branch points | Create separate tubing routes | Placed where branch lines leave the main run | Directs tubing toward separate areas |
| Corners | Support direction changes | Used where the tubing path changes direction | Helps organize turns within the layout |
| Adapters | Support different connection needs | Depends on tubing size and layout requirements | Allows connection conditions to be managed |
| Line ends | Close tubing runs | Placed at the end of a tubing route | Defines the endpoint of the layout |
| Clean-out points | Provide access at selected locations | Depends on layout design and service access needs | Supports easier inspection of connection areas |
Mainline joins and tubing extensions
Mainline joins extend or reconnect a straight tubing path when a layout needs continuity through a longer tubing run. Straight couplers act as connection points that help maintain a clean continuation path between tubing sections.
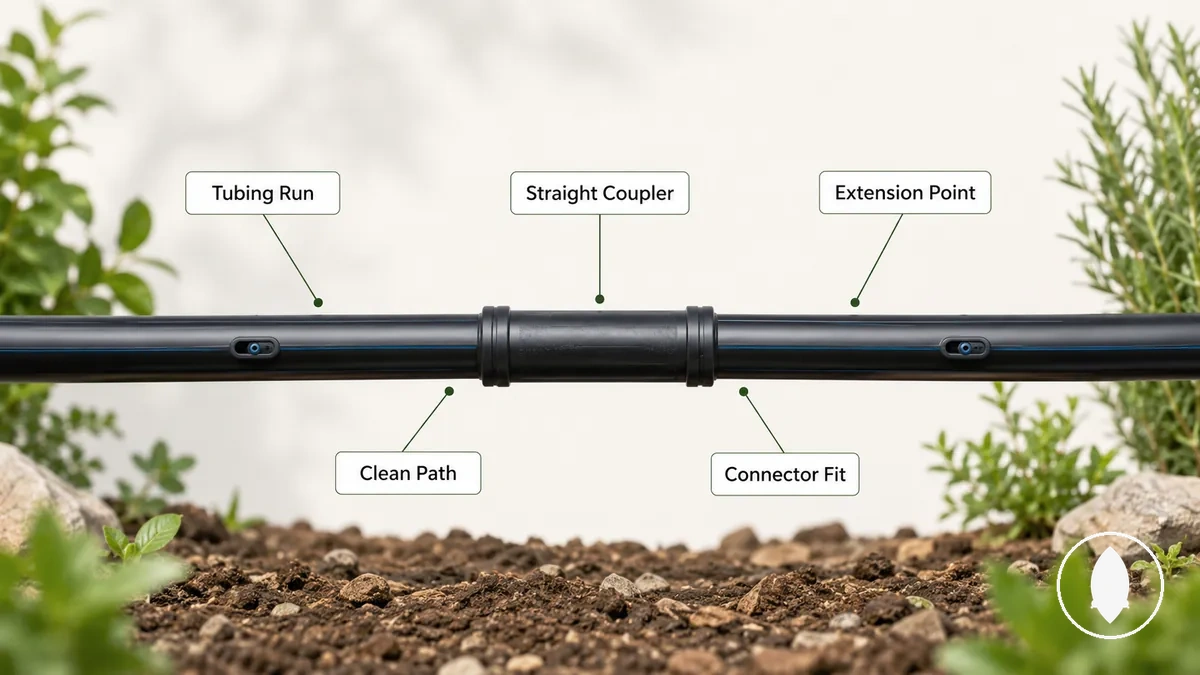
An extension point can be useful when a tubing run needs to continue through a planned area such as a longer row or connected section. Mainline joins support layout continuity by keeping the tubing path connected, while connector fit depends on the tubing size, connector style, and condition of the connection point.
Branch lines and tee or splitter points
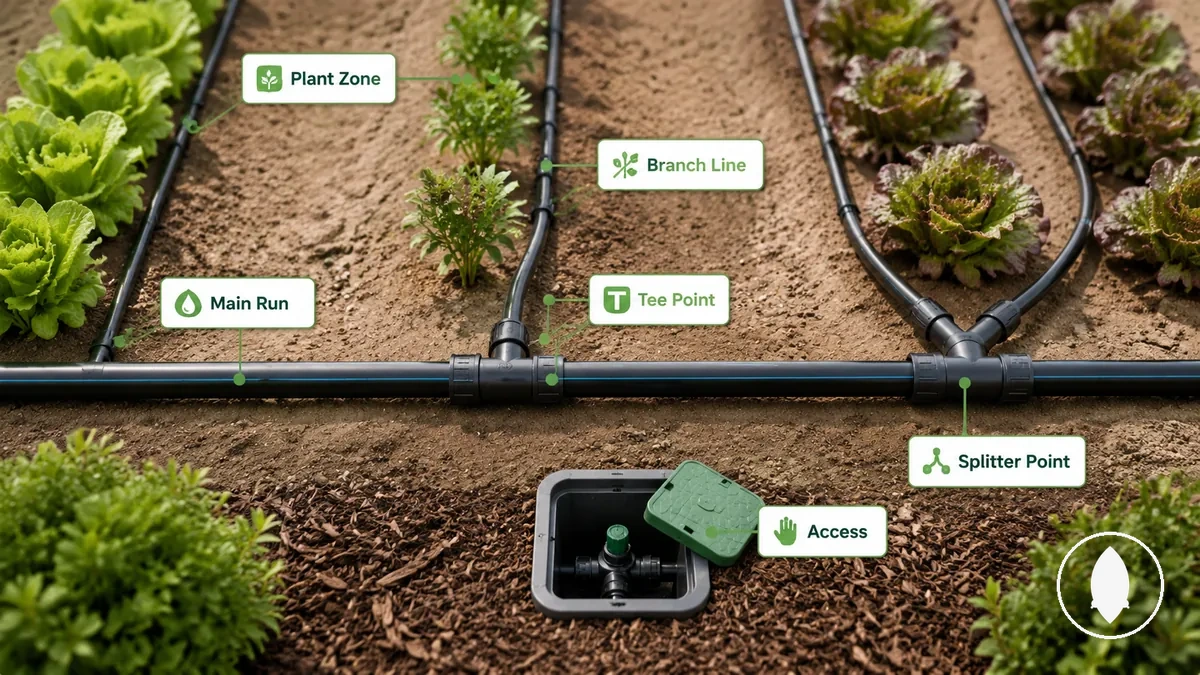
Branch fittings belong where a separate row, bed, or plant zone leaves the main run. Tee points and splitter points create branch lines that route tubing toward another area while keeping the branch purpose clear.
A branch point in a row or raised-bed layout can help separate the main run from a side run that follows the planting arrangement. The placement of branch lines depends on plant spacing, tubing direction, and access needs. Choosing a suitable fitting style is a separate decision covered in choose fittings by layout.
- Tee points: Used where a branch line leaves the main run, helping create a connection point for a separate row or plant zone.
- Splitter points: Used where a layout needs multiple branch directions, with placement depending on the tubing path and access requirements.
- Branch angle: Considered where the side run leaves the main tubing route, helping keep the layout organized and easier to follow.
- Plant spacing: Influences where branch points may be placed so tubing can follow the intended planting arrangement.
- Access points: Kept visible where possible so connection areas remain easier to check and adjust.
Corners and direction changes
Corners are direction-change points where drip tubing may need to follow a different route through a layout. Elbows or a gentle curve can help manage these turns, depending on the bend radius, tubing flexibility, and tubing stress at the turn point.
Not every corner needs an elbow because some layouts may allow a gentle curve instead. Elbow placement depends on the corner angle, bed edge, access needs, and the way the tubing path can remain organized. The main placement cue is whether the turn can follow the intended route without creating a forced bend.
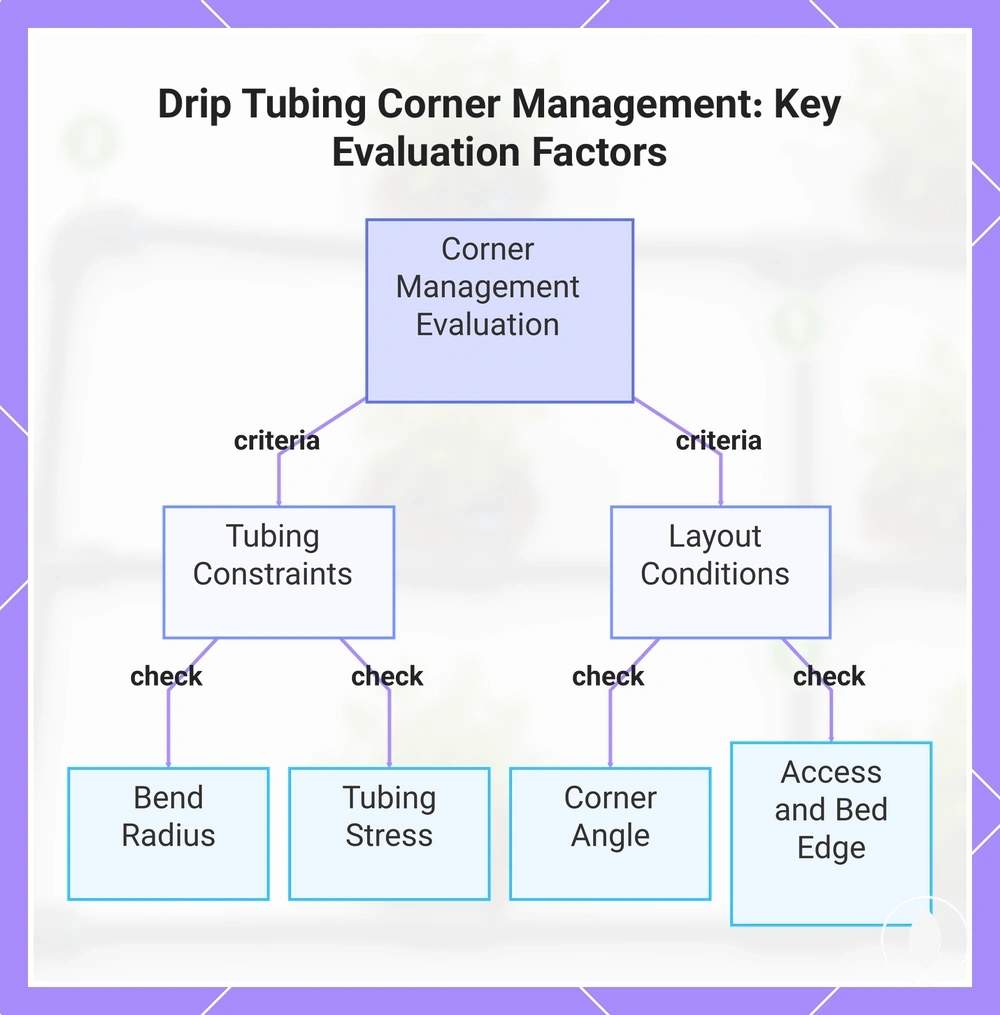
A corner can be evaluated by comparing a natural tubing curve with an elbow placement based on the layout conditions.
- Corner angle: Check how the tubing direction changes and whether the route remains clear along the intended path.
- Bend radius: Consider the available curve space and whether the tubing can follow the turn without excessive bending.
- Tubing stress: Review the turn point to reduce the chance of creating a strained or forced tubing route.
- Access and bed edge: Keep corner areas visible enough for future checks and layout adjustments.
This chart shows the main criteria to evaluate when deciding whether to use an elbow or a gentle curve for drip tubing corners.
Line ends and clean-out points
Line ends close tubing runs and can also serve as clean-out points when endpoint access is needed. End caps and plugs act as closure points while keeping service access visible and practical within the layout.
Hidden or difficult-to-reach endpoints can make future adjustments harder because the closure point is less accessible. Placing line ends near accessible edges can help keep endpoint locations easier to inspect, while clean-out points depend on the layout design and service needs. This placement choice supports access without becoming a maintenance or replacement process.
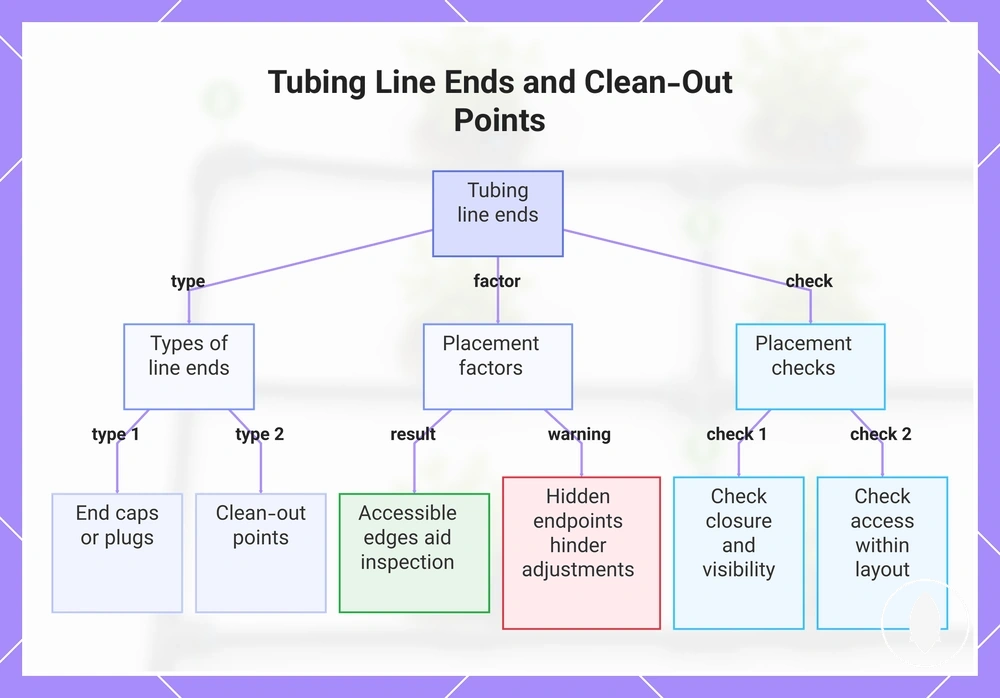
Line-end placement can be checked by considering closure, visibility, and access within the tubing layout.
- Closure points: End caps or plugs define where tubing runs finish and create a clear endpoint.
- Flushable ends: Clean-out points may be positioned where flushing access suits the layout conditions.
- Accessible edges: Endpoint locations can remain easier to view and reach when visibility is considered.
- Dead-end placement: Hidden endpoints may create adjustment challenges when access is limited.
This chart explains what line ends and clean-out points are, their types, placement considerations, and how to check their placement.
Placement criteria before cutting drip tubing
Placement criteria should be checked before cutting drip tubing so fitting locations remain adjustable while the layout is reviewed. Evaluating cutting points before making changes helps preserve flexibility when plant coverage, tubing path, and connector fit still need to be confirmed.
In a garden row, bed, or irregular area, plant coverage and bed shape can influence where tubing should travel and where fitting points may be needed. A clear tubing path can help identify suitable branch locations while keeping optional fitting points separate from necessary connection points. The layout check should consider how the tubing route follows the intended watering area before cuts are made.
Connector fit and flow limits are also important placement criteria because tubing size, branch count, and connection conditions can affect layout decisions. Checking size compatibility before placement helps qualify fitting locations before committing to tubing cuts and connection points.
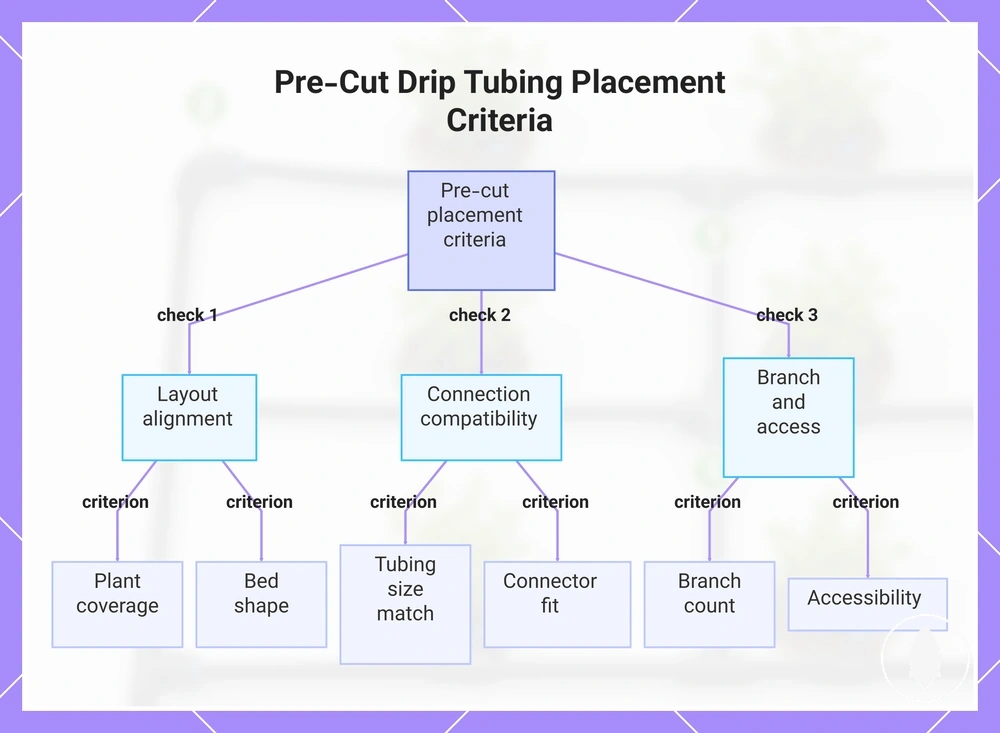
The following checklist verifies cutting readiness by connecting each criterion to a placement decision.
- Plant coverage: Check the intended coverage area and adjust fitting points if the tubing path does not align with the layout.
- Bed shape: Review the shape of the area to determine whether branches, turns, or extensions are needed.
- Tubing size: Confirm that the tubing size matches the planned connection points before cutting drip tubing.
- Connector fit: Verify that connection points suit the tubing and connector conditions required for the layout.
- Branch count: Consider how many branches are needed so the layout remains organized and accessible.
- Accessibility: Keep fitting locations reachable when future checks or adjustments may be required.
This chart shows the placement criteria to verify before cutting drip tubing, grouped into layout, connection, and access checks.
Plant spacing, bed shape, and root-zone coverage
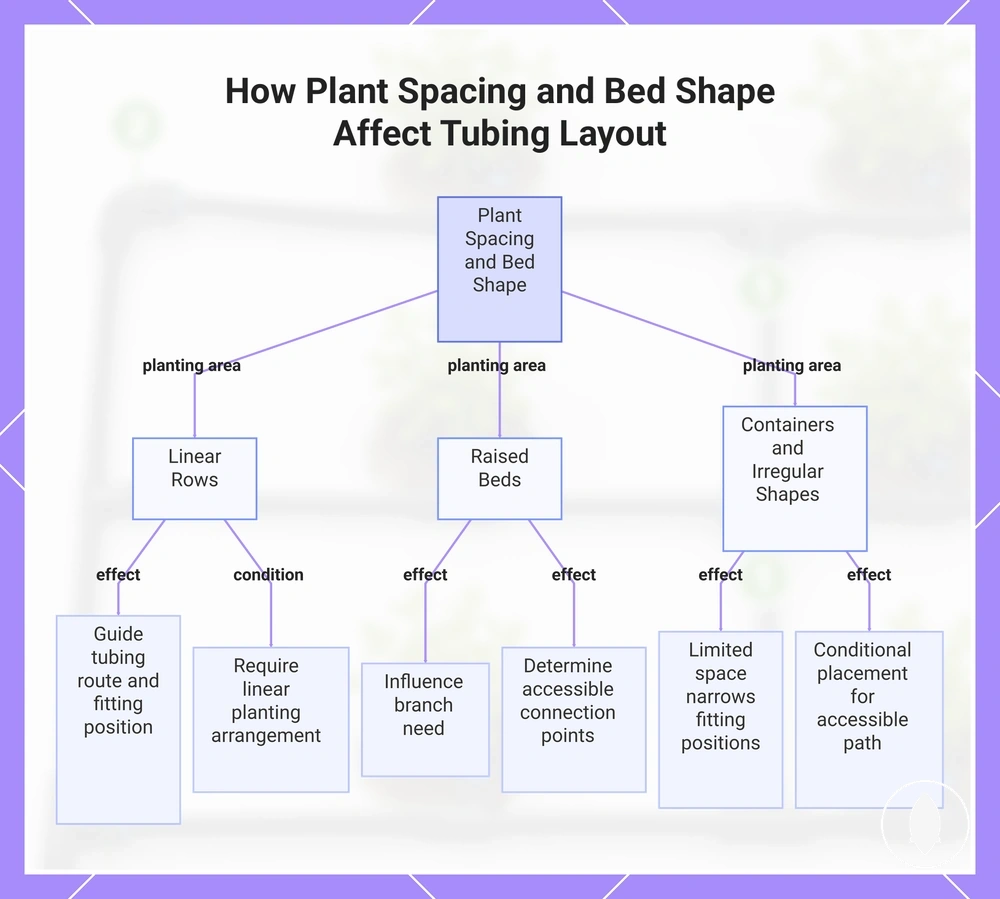
Plant spacing and bed shape influence fitting positions by narrowing where the tubing route and connection points can follow the intended layout. A row, raised bed, container, or irregular area may require different placement decisions to support root-zone coverage.
Plant location helps determine where the tubing route should align and where branch need may occur within the layout. The fitting position should consider emitter reach, plant arrangement, and access to fittings so the final layout remains practical.
- Rows: Plant spacing can guide the tubing route and fitting position when the layout follows a linear planting arrangement.
- Raised beds: Bed shape can influence branch need and where connection points remain accessible around the growing area.
- Containers: Limited space can narrow fitting positions based on plant location and the available tubing route.
- Irregular shapes: Uneven bed geometry may require conditional placement so the tubing path remains organized and accessible.
This chart shows how different planting area types (rows, raised beds, containers, irregular shapes) influence tubing route alignment, fitting positions, and connection points.
Tubing size, connector fit, and flow limits
Tubing size and connector fit must match the placement decision so fitting locations remain secure within the tubing layout. The tubing diameter and connector style help determine whether a connection point is suitable for the intended placement conditions.
Flow limits can influence placement choices when branch load, long runs, or connection changes create different layout conditions. Reviewing tubing diameter and connector style through size compatibility before placement helps qualify fitting locations before final connection decisions are made.
Placement reliability can be reviewed by checking the following compatibility conditions.
- Tubing size: Check the tubing diameter against the planned fitting point to support a suitable connection fit.
- Connector fit: Verify that the connector style matches the tubing conditions required for the placement.
- Branch load: Consider how connected branches may affect placement decisions when the layout expands.
- Long runs: Review longer tubing paths because run length can influence how placement choices are qualified.
- Reducers and adapters: Confirm that these connection changes suit the tubing conditions before including them in the layout.
Placement roles versus fitting type choice
Placement roles decide where a connection belongs in the layout, while fitting type choice decides how that connection is made. These decisions are related, but layout planning starts with identifying the connection role before selecting a suitable fitting style.
Role-first logic separates the purpose of a placement point from the component used at that location. Understanding connection roles for layout points helps clarify how layout planning determines where a connection belongs before fitting selection begins. Connector style and tubing compatibility are then considered as part of the type decision.
A single placement point may accept different fitting styles depending on the tubing route, connector style, and layout use. Moving from a placement role to a fitting selection decision requires considering the conditions of that location, which is why it helps to choose fittings by layout after the role is clear.
| Decision | What it answers | Example signal | What to avoid |
|---|---|---|---|
| Placement role | Where the connection belongs in the tubing layout | Branch point, corner, extension, or endpoint requirement | Selecting a fitting before understanding the layout need |
| Fitting type choice | Which fitting style suits that placement point | Connector style and tubing compatibility conditions | Assuming one fitting style suits every placement situation |
Clean tubing layout patterns for beds, rows, and irregular shapes
Beds, rows, and irregular shapes create different layout contexts where clean tubing layout patterns can support organized fitting placement. Straight rows, raised beds, and irregular areas each require a pattern choice based on bed shape, row direction, and fitting role rather than a single universal approach.
Clean tubing layout patterns reduce clutter by aligning fittings with row direction, bed edges, and the intended tubing route. Branches, corners, and end closures can be positioned around the layout shape to keep the pattern easier to review. The table below organizes patterns by layout shape and watch point.
| Layout shape | Fitting placement pattern | Why it stays clean | Watch point |
|---|---|---|---|
| Straight rows | Align fitting roles with row direction, branches, and end closures | Keeps the tubing route organized along a clear path | Check access to connection points at row ends |
| Raised beds | Place fittings around bed edges and planned branch areas | Supports a neat layout with visible connection roles | Consider corners and access around the bed shape |
| Rectangular beds | Use the bed outline to guide tubing direction and turn points | Helps maintain a predictable layout pattern | Review corner placement and end closures |
| Curved areas | Adapt the tubing route around the shape with conditional fitting placement | Allows the layout to follow irregular boundaries | Check routing clarity and service access |
| Irregular shapes | Adjust fitting roles based on the available tubing route | Keeps complex areas organized without forcing one pattern | Evaluate branches, corners, and access conditions |
These examples show how layout-pattern criteria can guide practical fitting positions across different shapes. Inspection access and fitting roles remain important when adapting the tubing route to the available space.
Practical pattern decisions come from matching the layout shape with the required connection points and reviewing the final route before use. The suitable approach depends on bed shape, row direction, and the fitting role within the layout.
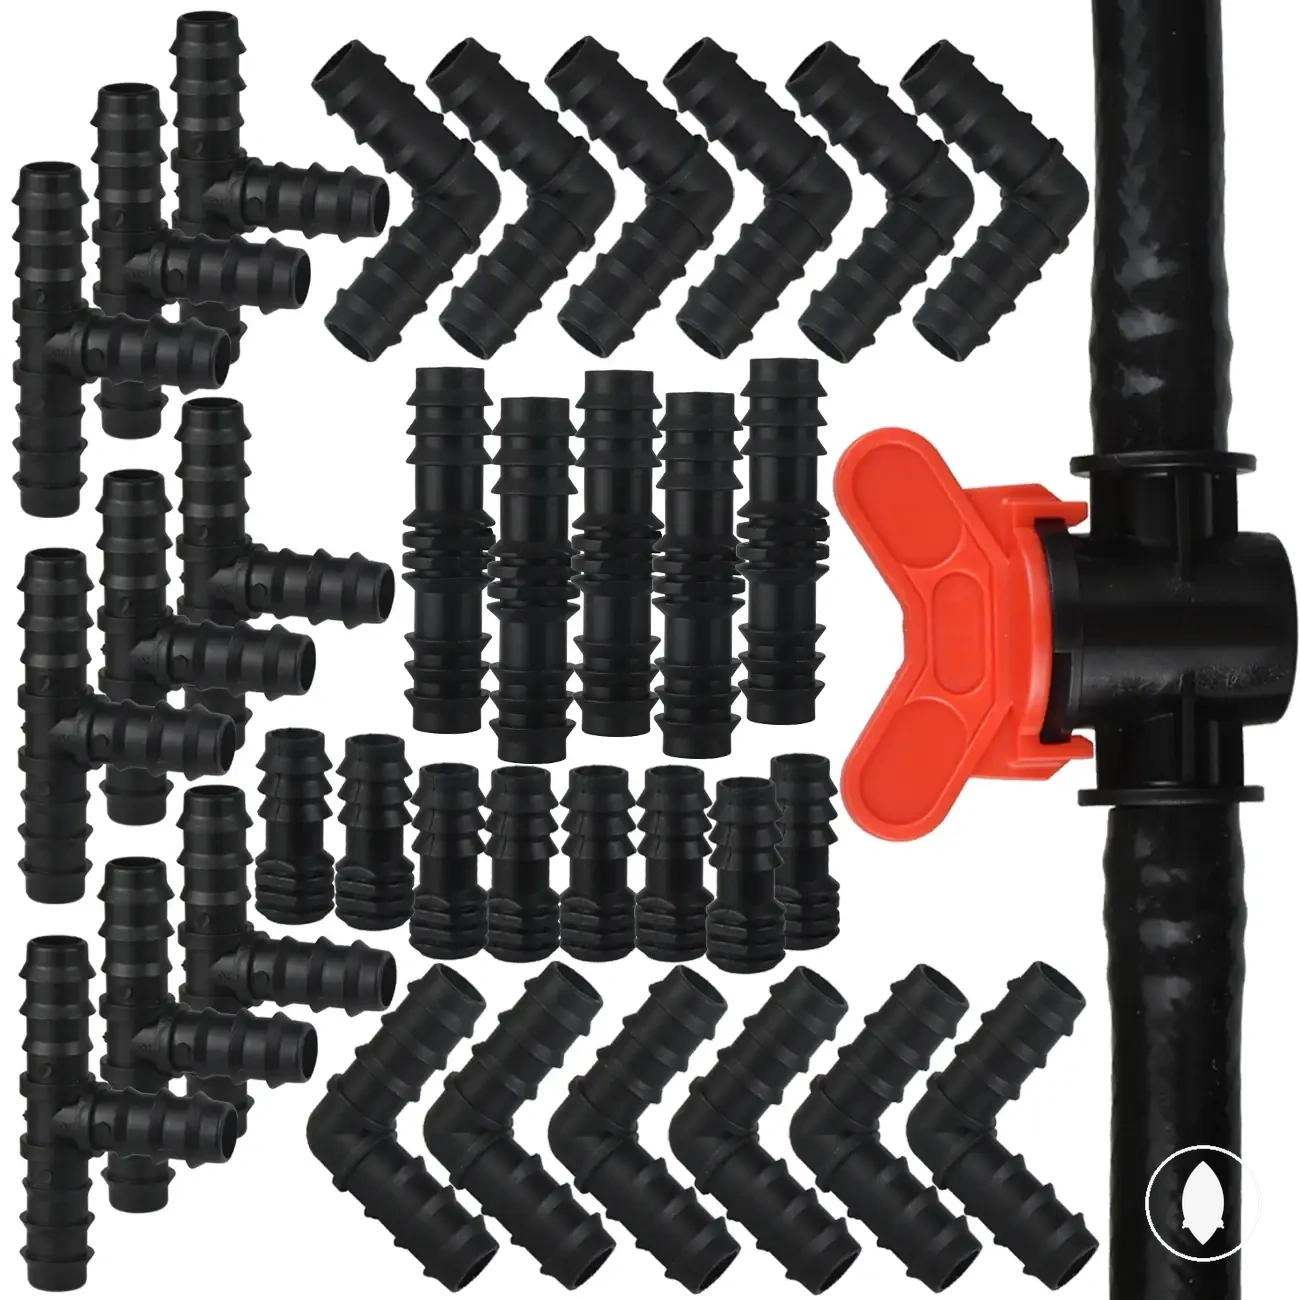
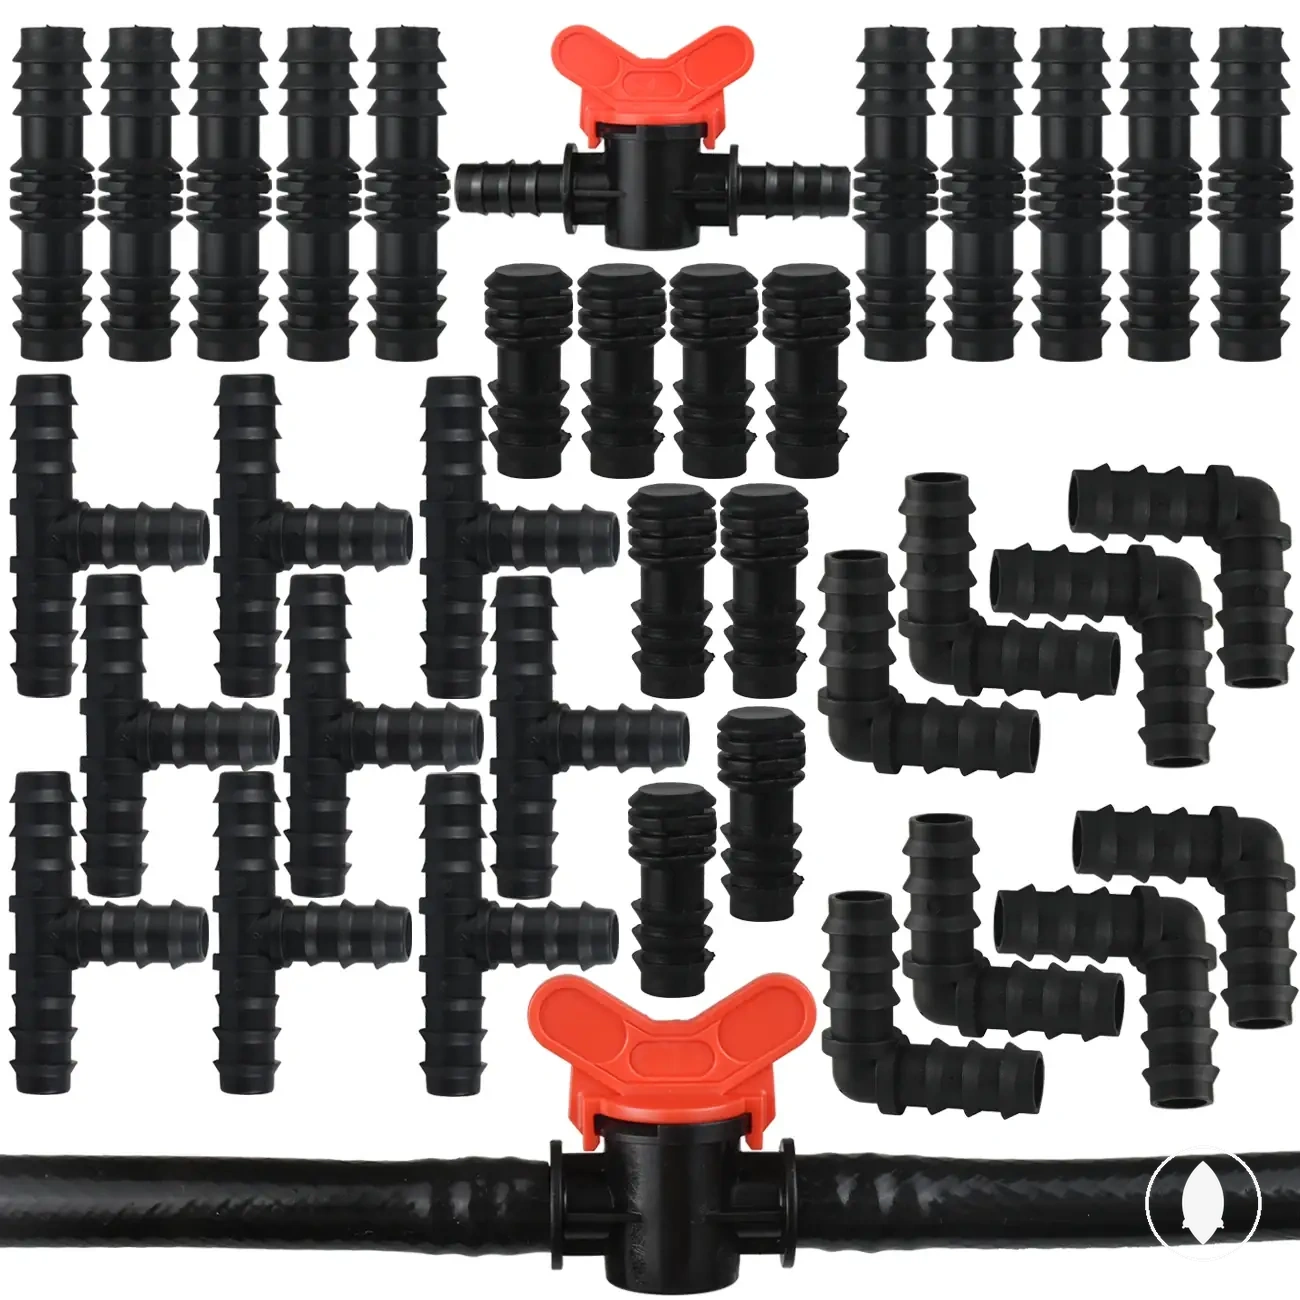
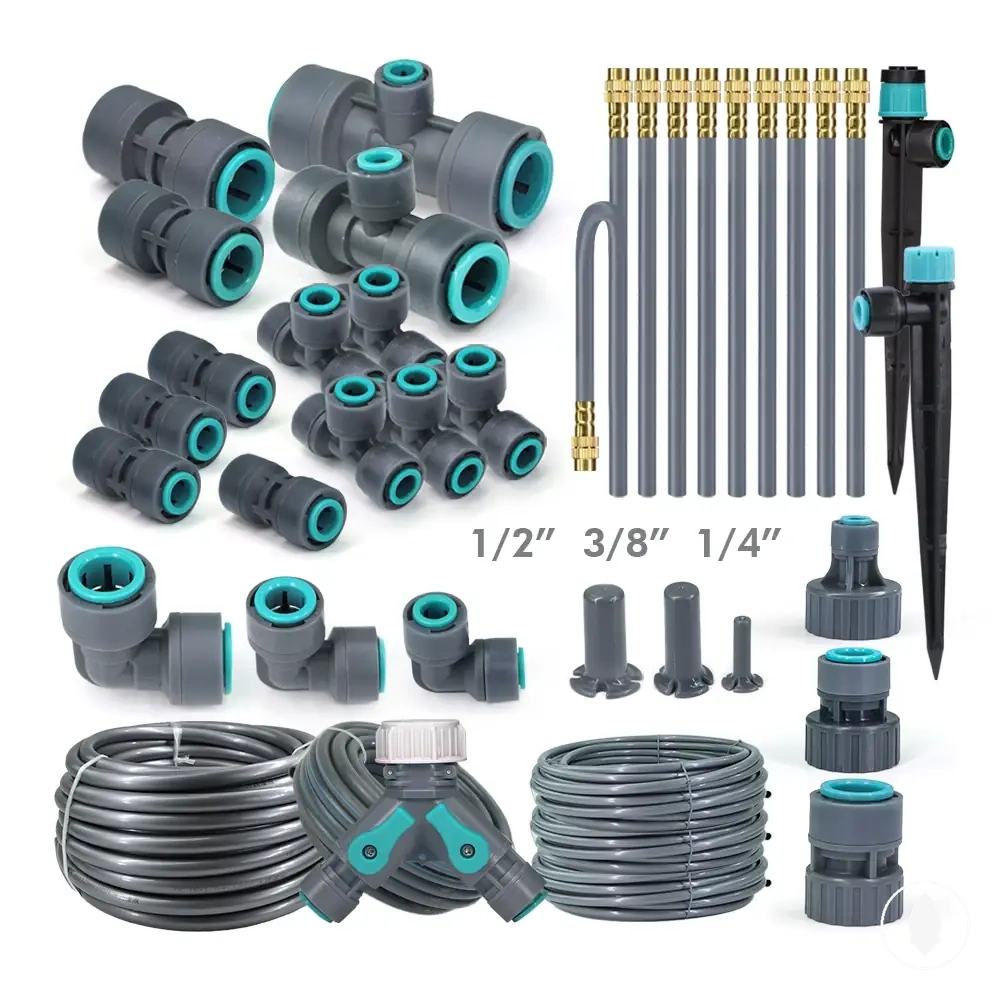
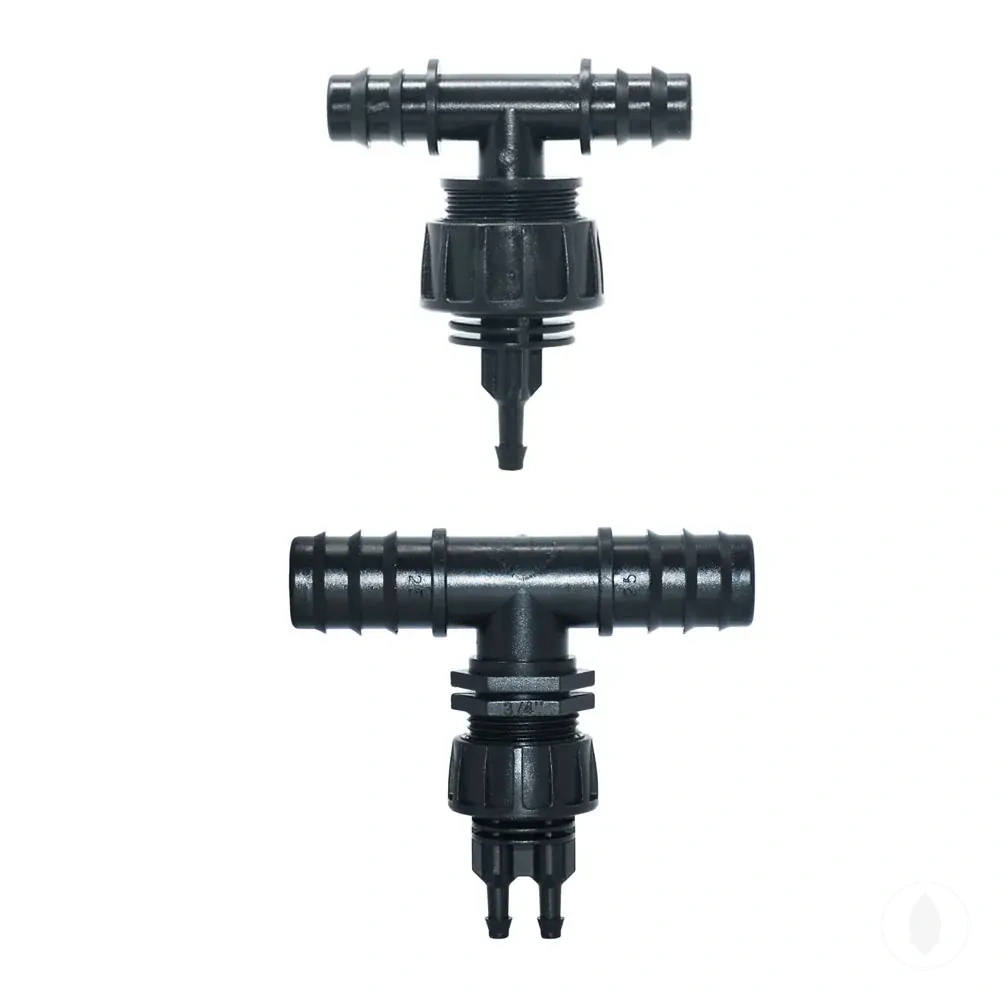
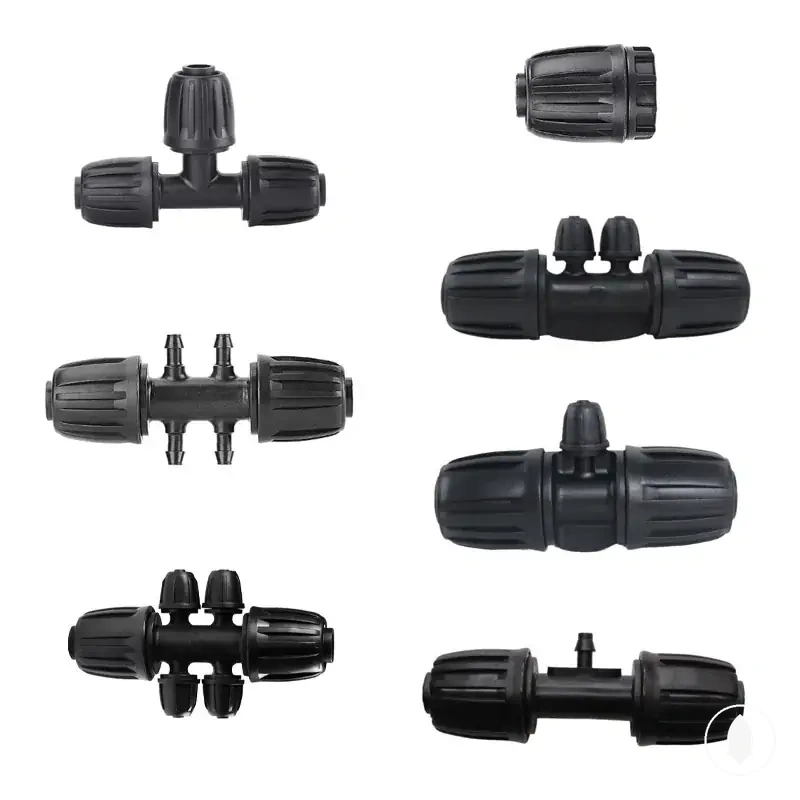
Here are product examples that may make comparison easier. Before buying, always review the compatibility criteria, essential features, and product details.
Placement checks before installing fittings
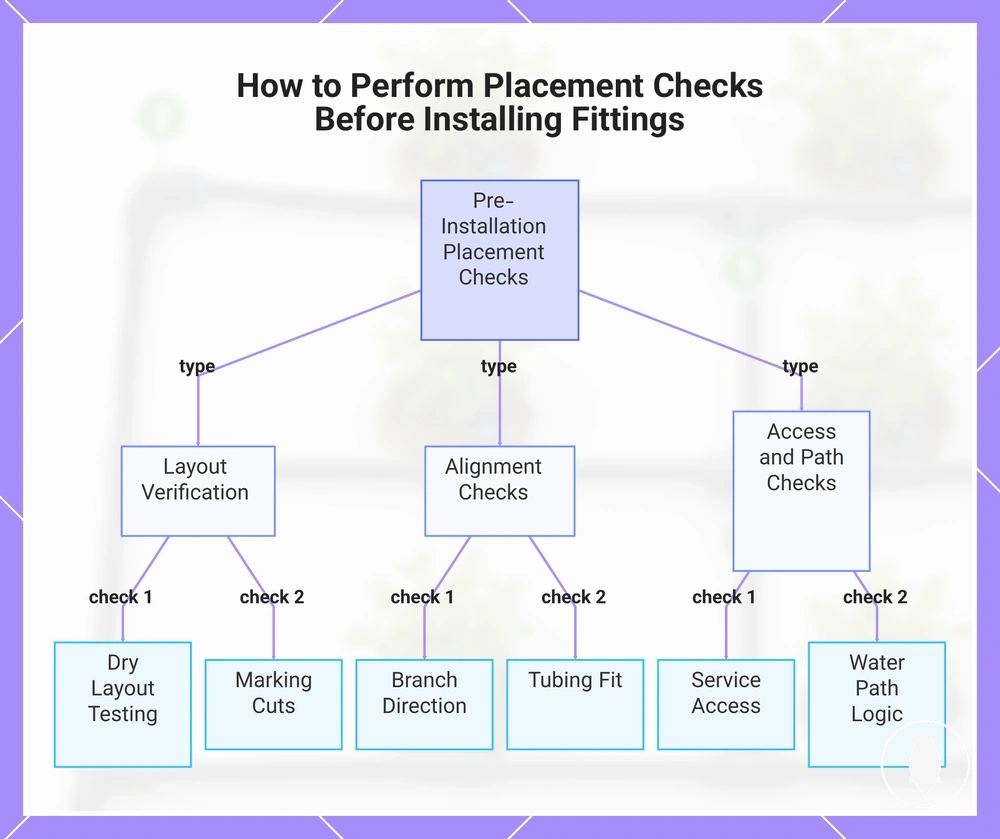
Placement checks confirm fitting positions before installation actions begin, helping verify that the layout is ready before tubing is cut or fittings are locked in place. This final review supports placement readiness by identifying adjustments before the layout becomes fixed.
Dry layout testing helps confirm fitting positions before committing to cuts or connection points. Reviewing the tubing route in place can show whether the planned arrangement follows the intended path. Once the layout is confirmed, marking cuts can preserve the planned fitting locations.
Branch direction and tubing fit should be verified before installing fittings so connection points match the planned route. A fitting position may need adjustment if the branch path creates an unclear route or the tubing does not align with the intended connection conditions. The layout is ready to proceed when these placement checks support a practical connection arrangement.
Service access and water path logic also affect whether a fitting position remains suitable after installation begins. Keeping connection areas reachable and reviewing the intended route can identify situations where it is better to adjust placement before committing. These adjustment signals help maintain a clearer layout.
Placement checks provide the final verification before moving from layout planning to the next installation stage. When fitting positions, tubing fit, branch direction, service access, and water path logic are suitable, the layout can move forward with fewer placement uncertainties. The next stage is to install fittings after layout planning.
Here are product examples that may make comparison easier. Before buying, always review the compatibility criteria, essential features, and product details.
- Dry layout testing: Review the planned tubing route and confirm fitting positions before cutting or locking connections.
- Marking cuts: Check that cut marks match the verified layout and adjust locations if the tubing path changes.
- Branch direction: Confirm that branches leave the main route in the intended direction and adjust placement if needed.
- Tubing fit: Verify that tubing and connection points align before committing fittings to the layout.
- Service access: Check that important connection areas remain reachable for future checks or adjustments.
- Water path logic: Review the overall tubing route and adjust placement if the path does not follow the intended layout.
This chart shows the three categories of placement checks—layout, alignment, and access—that confirm fitting positions before cutting or locking connections.
Common fitting placement mistakes in drip irrigation layouts
Fitting placement mistakes usually happen before fittings are installed, when connection points are chosen too early or without reviewing the final layout. Identifying these layout mistakes creates a correction path that helps keep drip irrigation layouts clearer and easier to manage.
Cutting too early and creating too many branches can make a layout harder to follow. Misplaced tees may split the tubing route in unsuitable locations, while excessive branches can add unnecessary complexity. Simplifying the connection plan can restore a cleaner fitting arrangement.
Hidden endpoints, mismatched connector points, and tubing stress can create placement issues that affect clean-out access and layout clarity. Inaccessible end caps may reduce service access, while connector points that do not match the intended conditions may require repositioning. These effects can vary depending on the layout and connection conditions.
Correcting fitting placement mistakes usually involves moving, removing, or simplifying connection points before the layout is finalized. Reviewing layout mistakes to avoid can help separate placement decisions from other fitting considerations.
| Mistake | Why it happens | Layout effect | Correction |
|---|---|---|---|
| Misplaced tees | Branch points are added before the tubing route is fully reviewed | Can create unclear branch paths and a cluttered layout | Move the tee to a position that better matches the intended route |
| Unnecessary elbows | Direction changes are added without reviewing the available tubing path | Can introduce avoidable turns and tubing stress | Review whether a simpler route or gentle curve suits the layout |
| Inaccessible end caps | Endpoint locations are hidden or difficult to reach | Can reduce clean-out access and endpoint visibility | Position closure points where access remains practical |
| Mismatched connector points | Connection locations are chosen without confirming fit conditions | Can create uncertainty around tubing connections | Adjust the placement point to better match the tubing conditions |
| Excessive branches | Multiple branch points are added without considering layout clarity | Can make the tubing route more complex | Simplify branch locations and keep only needed connection points |
| Tubing stress | Fitting locations force the tubing into unsuitable paths | Can make the route harder to organize | Adjust the fitting location to create a cleaner tubing path |
| Unclear clean-out access | Service points are not considered during placement | Can make future checks more difficult | Keep clean-out points visible and reachable within the layout |