Drip Irrigation Fitting Installation Without Leaks
Drip irrigation fitting installation starts with compatible tubing, a clean cut or hole punch, the correct fitting style, and pressure testing before the system is placed into regular use. Drip irrigation fittings can reduce leak risk when the tubing is in good condition and the connection is fully seated. Leak risk still depends on fit, tubing condition, and connection quality.
In a typical irrigation system, drip irrigation fittings connect mainline tubing, feeder line, and other connectors. Barbed fittings usually depend on a clean hole punch and proper seating depth, while compression fittings depend on the tubing outside diameter reaching the fitting stop point. Preventing leaks during installation is different from fixing leaks after damage or wear has already occurred.
A loose connection may result from mismatched tubing, poor hole quality, rough cut quality, or incomplete seating. Barbed fittings can help reduce seepage when the punched hole is clean and the fitting is inserted correctly. Compression fittings rely on proper tubing fit and should be checked with pressure testing because connection performance can vary with installation conditions. These installation factors provide the basis for the detailed fit checks covered later in the page.
Drip irrigation fitting installation is the controlled process of joining tubing and fittings so the connection can operate with lower leak risk under normal system pressure. For broader fitting types, selection, and connection guidance, visit the drip irrigation fittings hub. This creates a natural transition from page-level installation principles to the detailed installation methods that follow.
Drip Irrigation Fitting Installation Basics
Drip irrigation fitting installation means creating a secure tubing-to-fitting connection before the irrigation system is put into regular use. The installation process brings the fitting, tubing, and connection point together so they can work as a single assembly under operating conditions. Connection quality remains the central concern because sealing performance depends on fit, tubing condition, and system pressure.
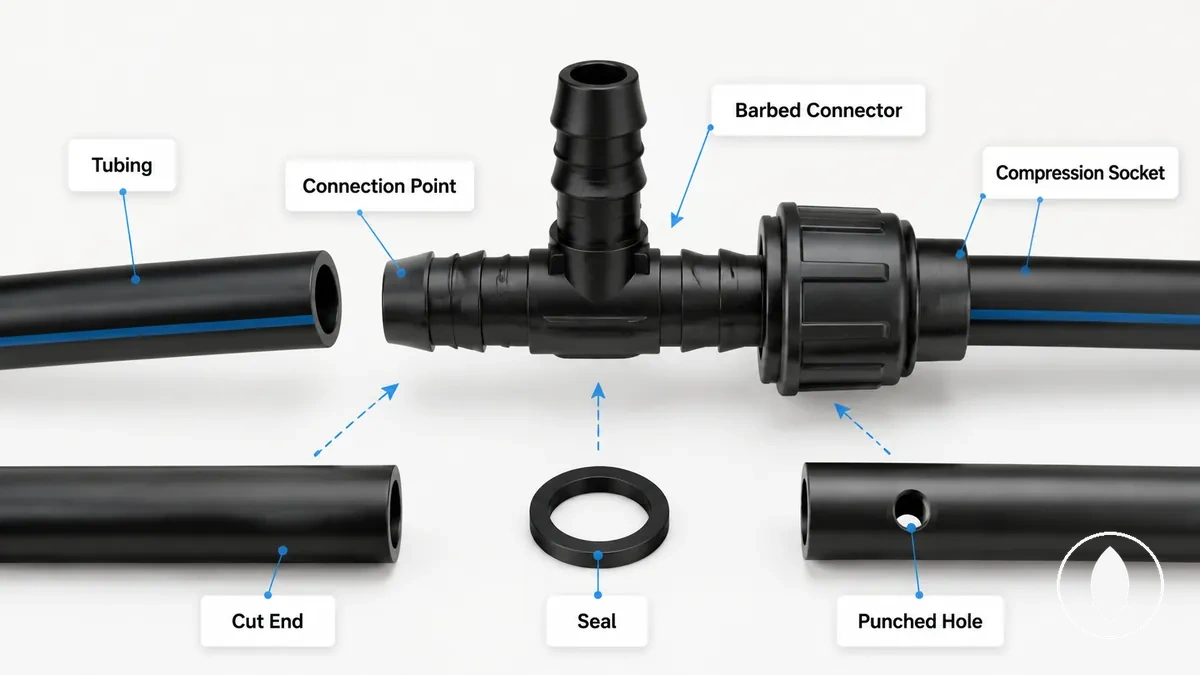
Drip irrigation fitting installation starts by understanding how the basic connection parts work together rather than treating each part separately. A barbed connector engages the tubing through a punched hole or suitable connection point, while a compression socket grips a clean cut end around the tubing outside diameter. Each part supports the connection for a different reason, and the seal may vary with fit, tubing condition, and installation quality. The main connection elements include:
- Drip irrigation fitting: Forms the connection between tubing sections or irrigation components.
- Tubing: Provides the water path and should be in suitable condition before installation.
- Connection point: Brings the fitting and tubing together in the intended location.
- Cut end or punched hole: Prepares the tubing for the selected connection style.
- Seal: Helps reduce leakage when the fitting, tubing, and connection are compatible.
Installation covers making the initial connection, while a damaged system may require separate evaluation for repair or replacement instead of repeating the installation process. Understanding connection roles during installation provides useful context for later sections without turning this overview into a full procedure or fitting comparison.
Fit and Tubing Checks Before Installation
Fit checks should be completed before any tubing insertion or hole punching begins because compatibility affects how securely the connection can form. Confirming tubing size, tubing condition, fitting size, and connection style before installation can help reduce leak risk. The checklist below shows the key conditions to verify before installation.
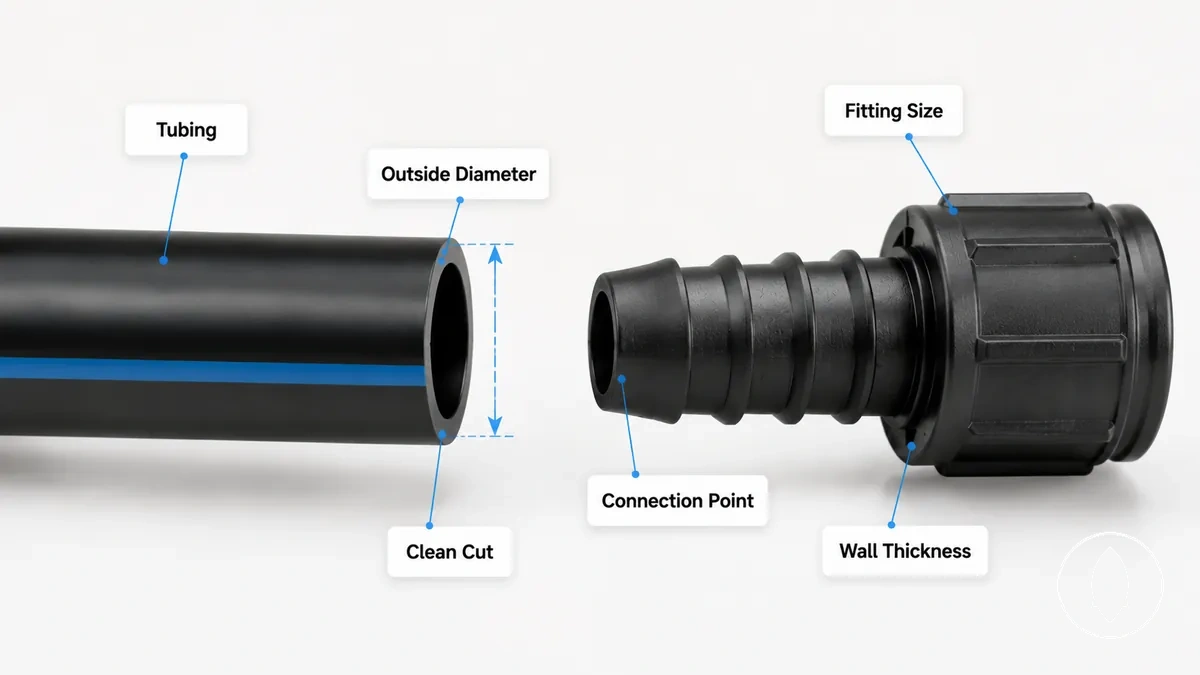
Tubing diameter, outside diameter, wall thickness, and fitting size should be compatible with one another before installation. A clean cut can help the fitting seat more evenly, while worn or distorted tubing may reduce the quality of the connection even when the nominal size appears suitable. Pressure remains a condition to consider because a weak fit may become more noticeable during operation. If compatibility is uncertain, avoid forcing the connection.
Old, stiff, oval, cracked, or mismatched tubing may not provide a reliable hold even when the installation technique is correct. Check tubing diameter, tubing condition, fitting type, and pressure condition together instead of relying on a size label alone. A mismatched diameter may increase seepage risk, while unsuitable wall thickness may reduce grip. For more detailed compatibility criteria, see fit checks before installation.
- Size match: Verify tubing diameter and fitting size are compatible; a mismatch may increase leak risk.
- Wall thickness: Confirm the tubing wall thickness suits the fitting; unsuitable thickness may reduce hold.
- Tubing condition: Use tubing that is round and free from cracks or excessive stiffness; damaged tubing may not seal reliably.
- Clean cut: Prepare a square, clean cut; rough edges may affect seating and sealing.
- Connection point: Align the tubing and fitting without excessive force; forcing the connection may damage the tubing.
- Pressure condition: Check the connection under normal operating pressure because fit performance can vary with system conditions.
A careful installation technique cannot overcome poor compatibility between the tubing and fitting. When tubing condition or compatibility is unsuitable, correcting those issues is usually more effective than applying additional force during installation.
Tools for Clean Fitting Holes and Connections
Using the right tool or aid can improve hole shape, cut quality, and insertion control during drip irrigation fitting installation. Cleaner preparation helps create more consistent connections, while compatibility between the tubing and fitting still affects the final outcome. The table below summarizes the purpose of common installation tools and the conditions they help manage.
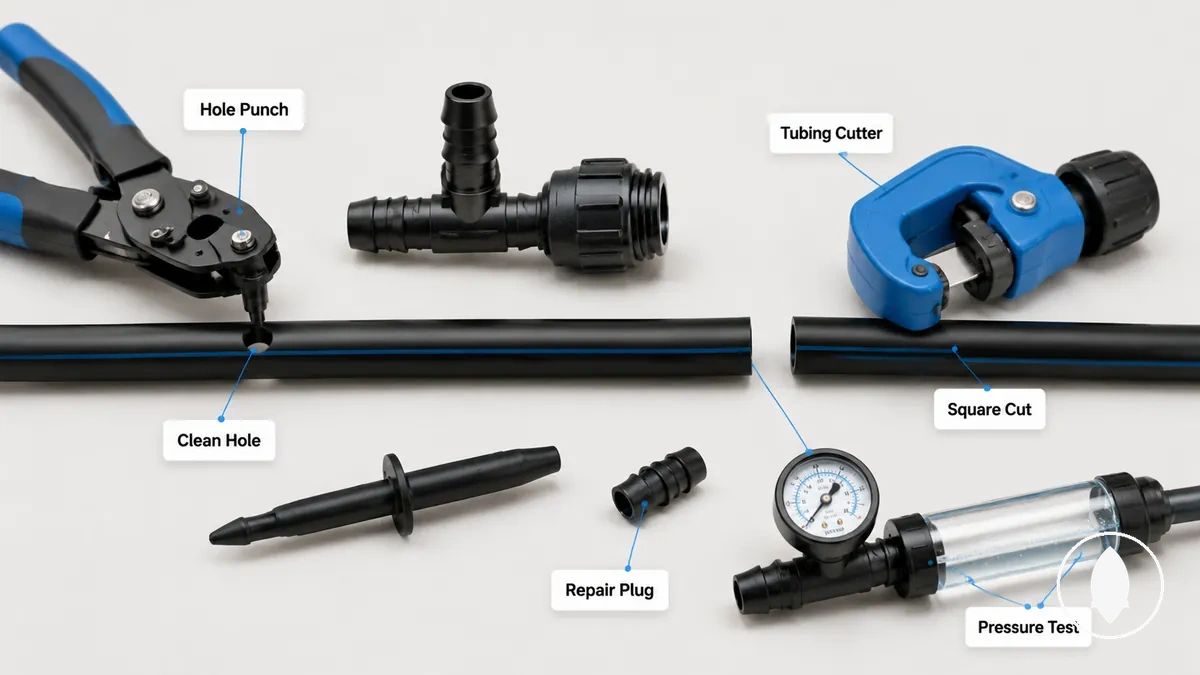
| Tool or aid | Installation task | Condition it helps control | Boundary or caution |
|---|---|---|---|
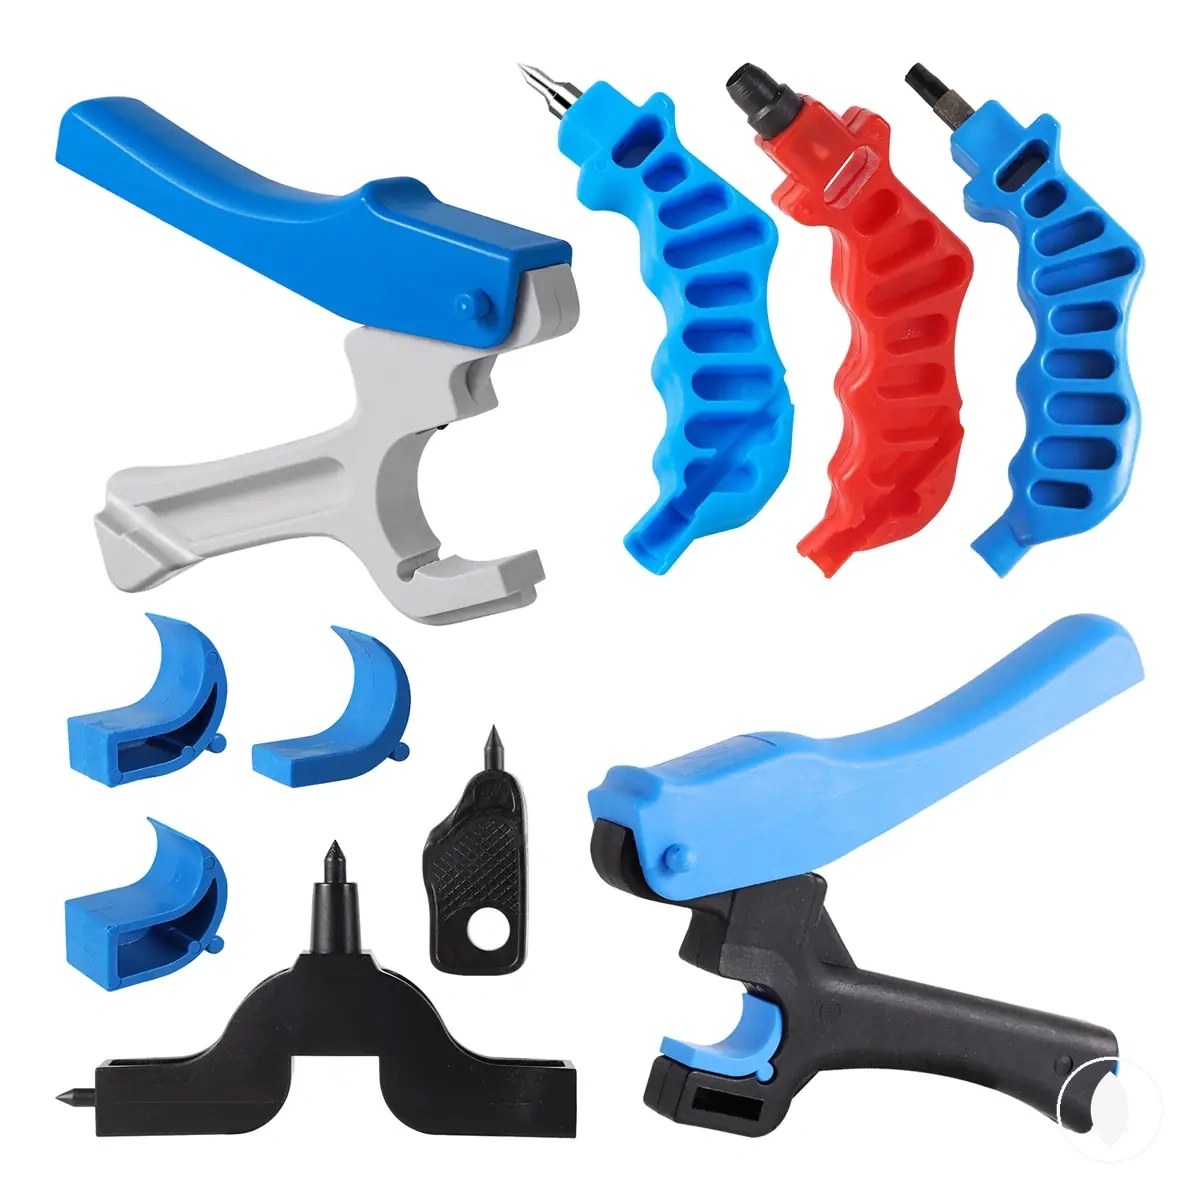
| Hole punch tool | Create a clean hole | Hole shape for a barbed connector | A ragged or oversized hole may increase leak risk. |
| Tubing cutter | Produce a square cut | Cleaner seating for a compression fitting | Angled or rough cuts may reduce sealing quality. |
| Warm water | Soften tubing before insertion | Insertion force with stiff tubing | Softening does not correct incompatible tubing. |
| Insertion tool | Support controlled fitting insertion | Insertion alignment | Avoid forcing the connection if the fit is unsuitable. |
| Repair plug | Close an unwanted or torn hole | Minor installation damage | Severely damaged tubing may require replacement instead. |
| Pressure test | Check the completed connection | Possible seepage under operating conditions | Testing helps identify issues but does not guarantee a leak-free result. |
A hole punch tool can help create a clean hole, while a tubing cutter can produce a square cut that may improve fitting alignment. Warm water may make insertion easier when tubing has become stiff, and an insertion tool can improve control during assembly. If a hole becomes torn, a repair plug may help with minor installation damage. Even with suitable tools, avoid forcing a connection when compatibility or tubing condition is uncertain.
When the tubing is in good condition, simple installation tools are often enough to support a clean connection. If the tubing is cracked, badly distorted, or otherwise damaged, changing tools alone may not resolve the problem because the tubing condition remains the limiting factor.
How to Install Barbed Drip Irrigation Fittings
Installing barbed fittings starts by using the method intended for a punched hole in mainline tubing or for compatible quarter-inch tubing connections. Barbed fittings are inserted into the tubing until the connector reaches an appropriate seating depth, while the final seal still depends on tubing condition and fit. Follow the steps below to complete the installation.
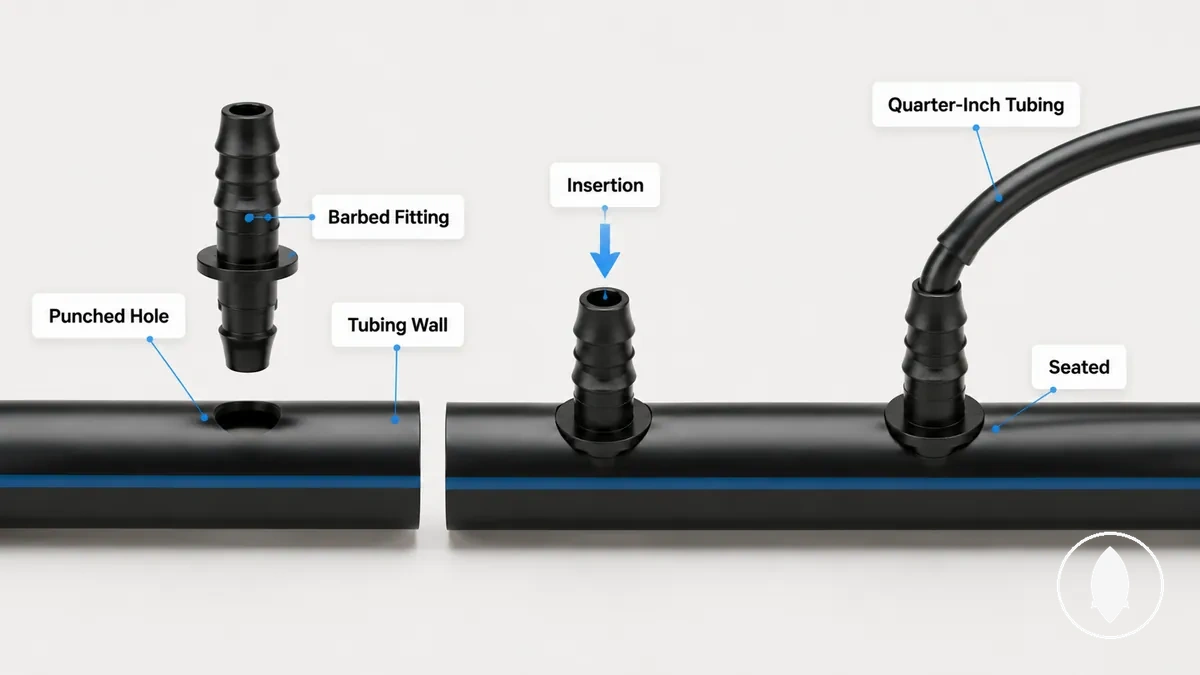
- Prepare the tubing. Make a clean punched hole in the mainline tubing or prepare the end of compatible quarter-inch tubing. A clean opening helps the barbed connector seat more evenly against the tubing wall and may reduce leak risk.
- Align the connector. Position the barbed fitting straight with the punched hole or quarter-inch tubing before insertion. Correct alignment can help limit damage to the tubing wall during installation.
- Insert the barbed fitting. Push the connector into the tubing using steady hand pressure until it reaches the intended seating depth. If insertion becomes unusually difficult, check the hole size and tubing condition instead of forcing the barb.
- Check the connection. Confirm that the connector is fully seated and that the tubing wall remains intact around the barbed fitting. A properly seated connection may help reduce seepage when the tubing and fitting are compatible.
- Test the installation. Run water through the drip line and inspect the connection for signs of a leak around the tubing wall. If seepage appears, recheck the punched hole, seating depth, and tubing condition before repeating the installation.
Preparation affects the final connection because a ragged punched hole or damaged tubing can reduce the connector hold. Check that the opening is clean and that the tubing wall has not been torn before insertion. Continue only when the tubing remains suitable for the barbed fitting.
Insertion should remain smooth and controlled rather than forceful. Steady hand pressure is usually sufficient when the connector and tubing are compatible. Stop and reassess the fit if excessive force is required because difficult insertion may indicate a preparation or compatibility issue.
Confirmation comes after the connector reaches the intended seating depth. Inspect the tubing around the barbed fitting and perform a simple water test to check for seepage. Continue only if the connection appears stable under normal operating conditions.
A tight push does not guarantee a reliable seal. Forcing barbed fittings into undersized, brittle, or poorly punched holes can increase the risk of a leak or split tubing. If the tubing condition or fit appears unsuitable, correct those conditions before continuing with the installation.
Punching Clean Holes in Mainline Tubing
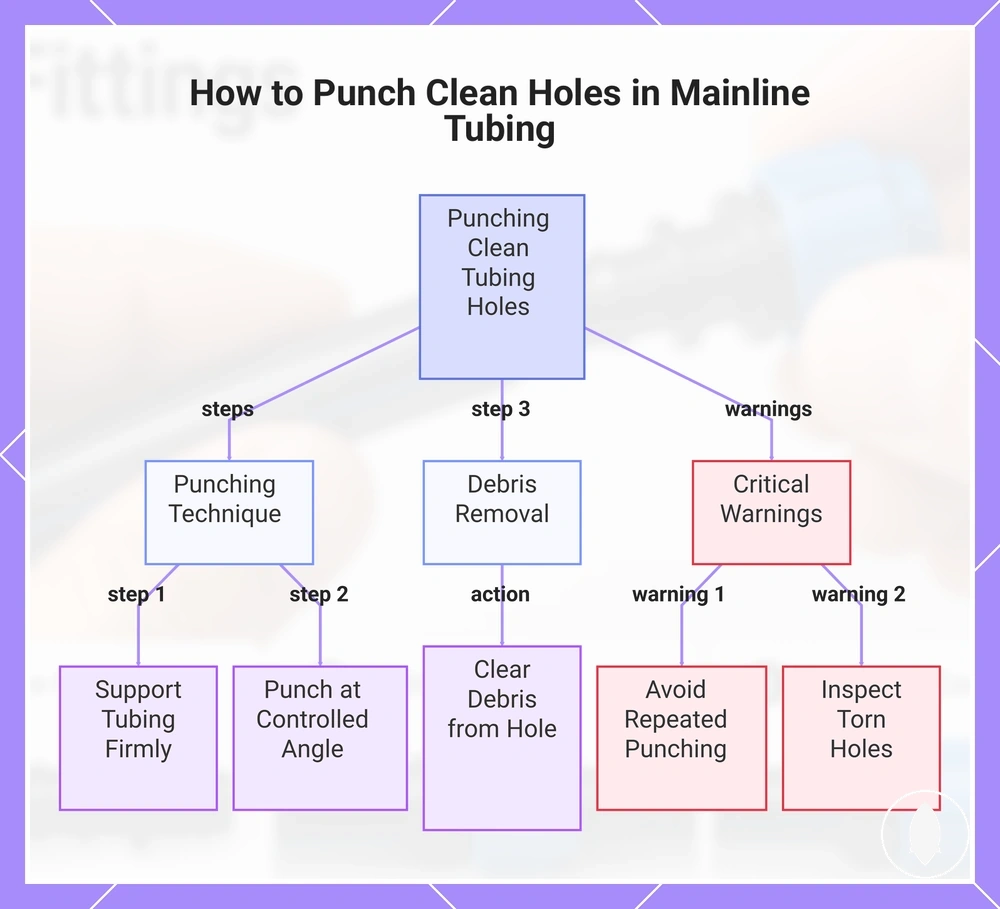
A clean hole starts with a hole punch that creates an opening the barb can seat against the tubing wall. A clean punched hole can help the barb form a more consistent seal, although the result still depends on tubing condition and fitting size. Follow these micro-steps to improve hole quality before inserting the barbed connector.
Use these steps to create a clean punched hole:
- Support the mainline tubing. Hold the mainline tubing firmly before using the hole punch, and verify that the tubing stays stable during punching.
- Punch at a controlled angle. Press the hole punch straight into the tubing wall and check that the punched hole is round and clean.
- Remove debris. Clear any debris from the punched hole, then confirm that the opening is unobstructed before inserting the barb.
- Avoid repeated punching. Do not punch the same location again because repeated punching can weaken the tubing wall. If the punched hole becomes torn or enlarged, inspect it before continuing because it may increase seepage risk.
This chart shows the key steps and warnings for creating a clean punched hole in mainline tubing before inserting a barbed connector.
Inserting Barbed Connectors Fully Into Tubing
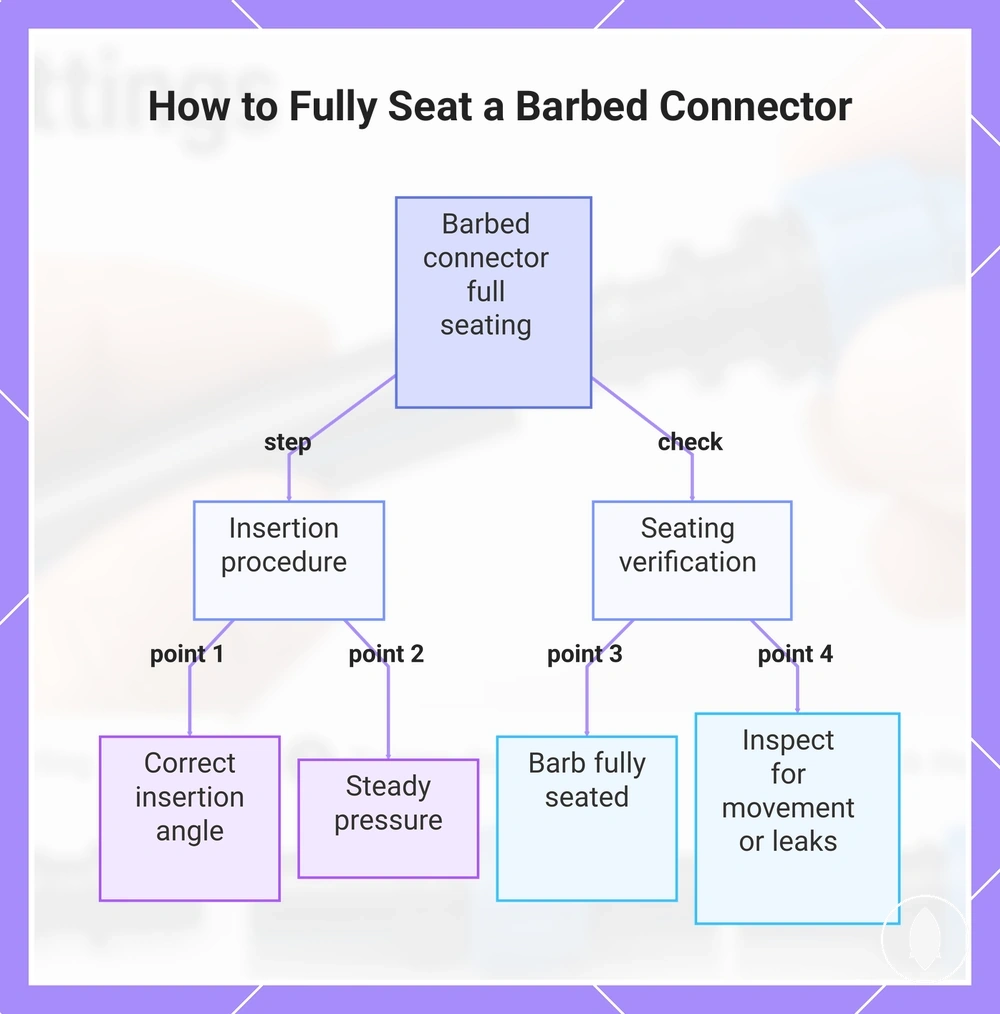
A barbed connector should be fully seated so the barb engages the tubing wall instead of remaining partly exposed. Insert the barbed connector with the correct insertion angle and steady pressure until it reaches its intended seated position. Confirm visually that the barb is fully seated before moving to the next connection.
Use this checklist to confirm proper seating:
- Check the insertion angle. Keep the barbed connector aligned with the tubing so it enters straight without twisting, and verify that the connector remains aligned during insertion.
- Apply steady pressure. Push the barbed connector into the tubing with steady pressure, and stop if unusual resistance suggests the connection should be checked.
- Confirm full seating. Check that the barb is fully seated rather than partly exposed and that the tubing wall sits evenly around the connector.
- Inspect the final connection. Confirm that the barbed connector remains secure with no obvious movement. If an exposed barb or visible seepage appears during testing, inspect the connection before continuing.
This chart outlines the checklist for inserting a barbed connector fully into tubing, covering insertion steps and post-insertion verification.
Connecting Quarter-Inch Tubing to Mainline Barbs
Connecting quarter-inch tubing to a mainline barb starts with a clean tubing end, correct alignment, and controlled pressure to reduce the chance of stretching or splitting. Quarter-inch tubing should be inserted onto the mainline barb to the intended insertion depth without forcing the connection. Check the tubing position before confirming the connection.
Align the tubing end with the mainline barb before applying steady pressure so the feeder tubing enters straight. If quarter-inch tubing feels stiff, gentle warming may improve tubing flexibility because material condition and age can vary. Push the tubing to the intended insertion depth, then check that the connection provides reasonable pull resistance without excessive movement. If the tubing stretches, begins to split, or shows limited pull resistance, inspect the connection before continuing because the hold may depend on tubing condition.
How to Install Compression Drip Irrigation Fittings
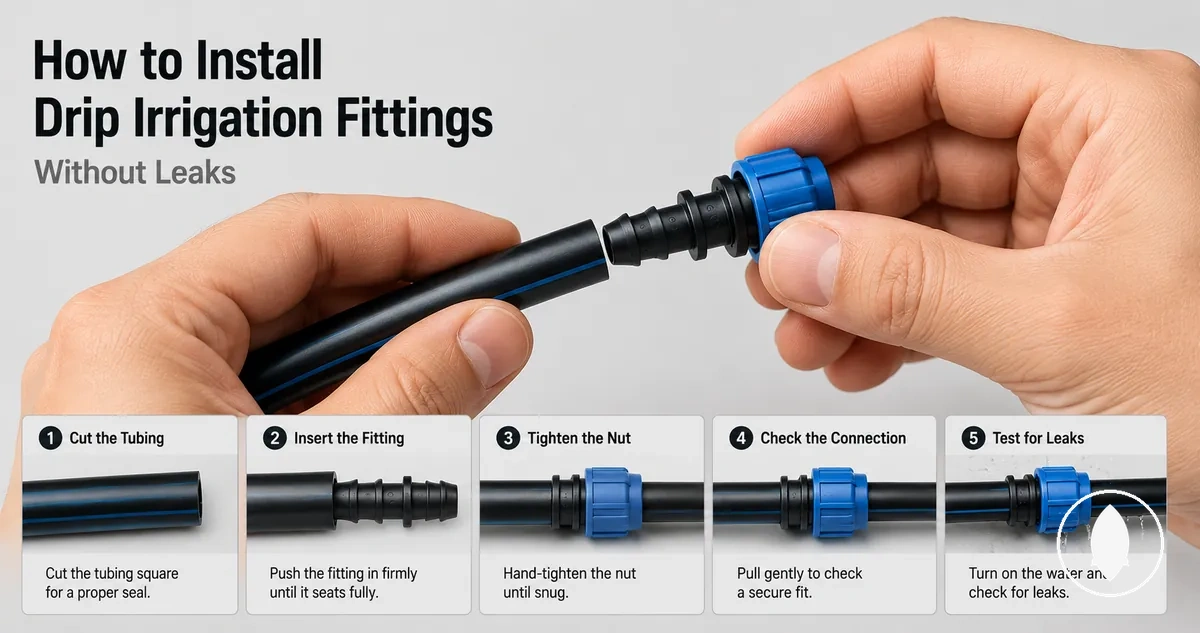
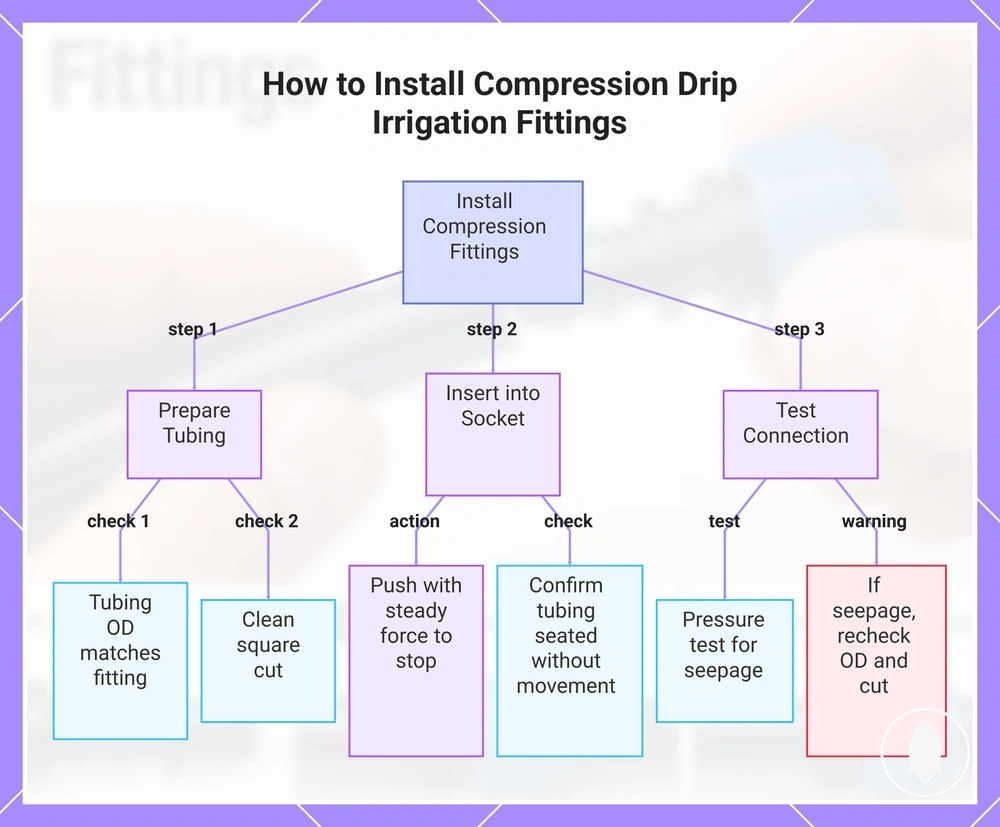
Installing compression fittings starts with tubing that matches the fitting because compression fittings seal by gripping the tubing outside diameter. A clean tubing end and correct seating help the fitting socket grip the tubing, while the final fit depends on the tubing outside diameter and the fitting design. Follow the steps below to complete the installation.
Prepare the tubing with a square cut because a clean tubing end can enter the socket more evenly. If the tubing feels stiff, gentle warming may improve tubing softness and reduce insertion force, although it does not correct a diameter mismatch. Insert the tubing with steady pressure rather than forcing it if resistance becomes excessive. Continue only when the tubing appears to fit the socket correctly.
- Check the tubing. Confirm that the tubing outside diameter matches the compression fitting design and that the tubing end has a clean square cut.
- Prepare the tubing end. If needed, gently warm stiff tubing to improve tubing softness before insertion because tubing condition can vary.
- Insert into the socket. Push the tubing into the socket with steady insertion force until it reaches the stop point or the intended seated position for that fitting.
- Confirm the seating. Check that the tubing remains seated in the socket without obvious movement or damage around the tubing end.
- Perform a pressure test. Run the system and inspect the connection for seepage. If seepage appears, recheck the tubing condition, seating, and fit because the result may depend on the connection condition.
A compression fitting does not seal because of insertion force alone. Compression fit depends on the tubing outside diameter matching the fitting design, and damaged tubing or the wrong diameter may reduce grip even when the tubing reaches the stop point.
This chart shows the essential checks and steps for installing compression drip irrigation fittings, covering tubing preparation, insertion, and testing.
Softening Tubing Before Compression Fitting Insertion
Softening tubing can help when tubing stiffness prevents the tubing end from seating correctly in a compression fitting. If stiff tubing resists insertion, gentle softening may improve flexibility before installation. Use the method below only as an aid for insertion.
Place the tubing end in warm water for a short time until it becomes more flexible, then check that the tubing end keeps its shape before insertion. Insert the tubing into the compression fitting with steady pressure instead of forcing it. If the tubing still resists seating, recheck the tubing condition and fitting compatibility because softening tubing does not correct the wrong size, cracked tubing, or incompatible fittings. Avoid overheating because excessive heat may increase the risk of distortion or splitting.
Pushing Tubing to the Correct Compression Stop Point
Incomplete insertion is a common cause of leakage because the tubing end may not reach the correct stop point inside a compression fitting. Push the tubing until the seated tube reaches the stop point provided by the fitting design. Confirm the position with a visual or tactile check before continuing.
Check that the tubing end has a clean, square cut because an angled cut may contribute to partial insertion. As the tubing moves into the compression fitting, a change in resistance may indicate that the insertion depth is approaching the socket stop, although the feel can vary between fitting designs. After full insertion, confirm that the seated tube remains fully engaged and perform a leak check if the connection is placed into service. If the tubing appears partially inserted or the resistance feels unusual, remove the tubing, inspect the tubing end, and retest because stop-point confirmation depends on the fitting design and tubing condition.
Testing New Fitting Connections for Leaks
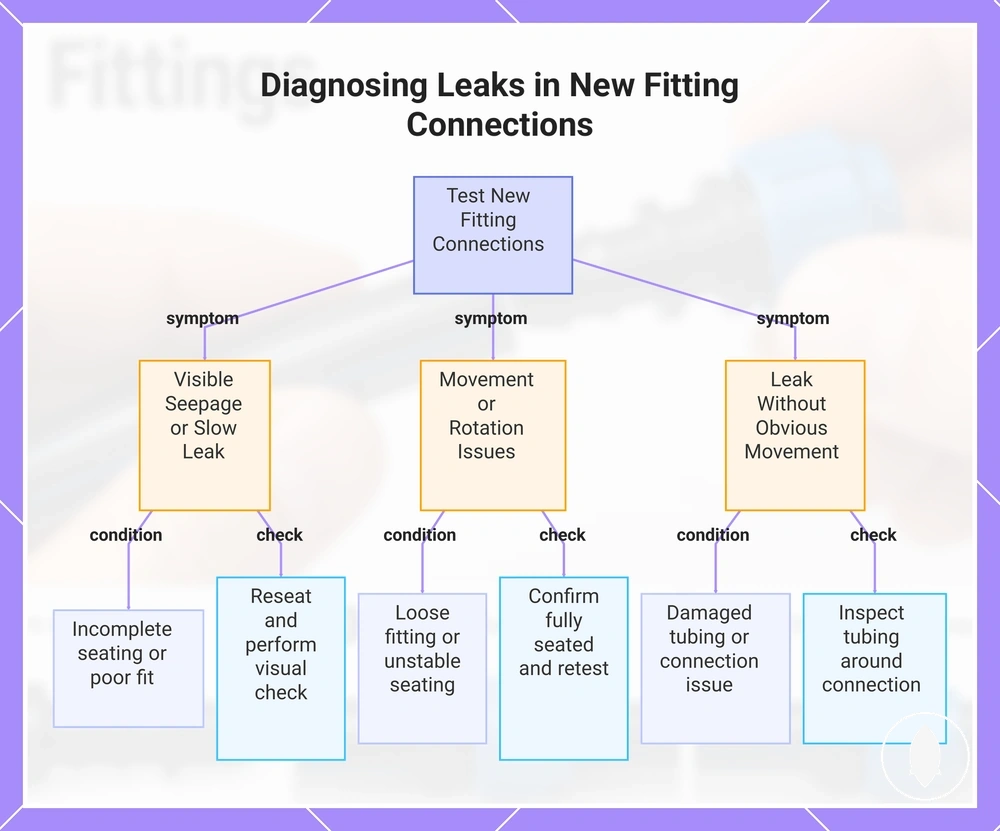
Test every new fitting connection before covering or leaving the irrigation line because early testing can identify a leak while the connection is still easy to correct. A water test helps reveal seepage, loose seating, pressure-related movement, or poor fit before the installation is treated as complete. Use the diagnostic checklist below to identify the most likely condition and the next immediate check.
- Connection point with visible seepage: Likely condition: incomplete seating. Immediate check: reseat the fitting and retest.
- Tubing movement during pressure build-up: Likely condition: loose fitting or partial insertion. Immediate check: confirm the tubing remains fully seated and perform another pressure test.
- Connector rotation after installation: Likely condition: unstable seating. Immediate check: inspect the connection point and retest after confirming the fit.
- Slow leak after water flow begins: Likely condition: minor seating issue or poor fit. Immediate check: perform a visual check and confirm the connection before continuing.
- Leak without obvious movement: Likely condition: damaged tubing or another connection issue. Immediate check: inspect the tubing around the connection point before further diagnosis.
If a leak stops after the fitting is reseated, incomplete seating was likely the cause. If seepage continues after the connection has been checked, damaged tubing or pressure-related stress may also contribute to the leak. When the cause remains uncertain, separate seating issues from tubing damage before escalating the diagnosis.
A leak after installation does not automatically mean the fitting has failed. New connections should first be checked for seating, movement, and visible seepage because these conditions are often easier to correct immediately after installation. If the leak continues after those checks, continue with fixing leaks after installation for more detailed diagnosis.
If the connection cannot be reseated or the tubing is visibly damaged, additional testing may provide limited value. After the basic installation checks have been completed, removing and replacing fittings may become the appropriate next step for parts that cannot be seated correctly or that show damage.
This chart shows common symptoms of leaks in new fitting connections, their likely conditions, and the immediate check to perform.
Installation Mistakes That Cause Leaks or Loose Fittings
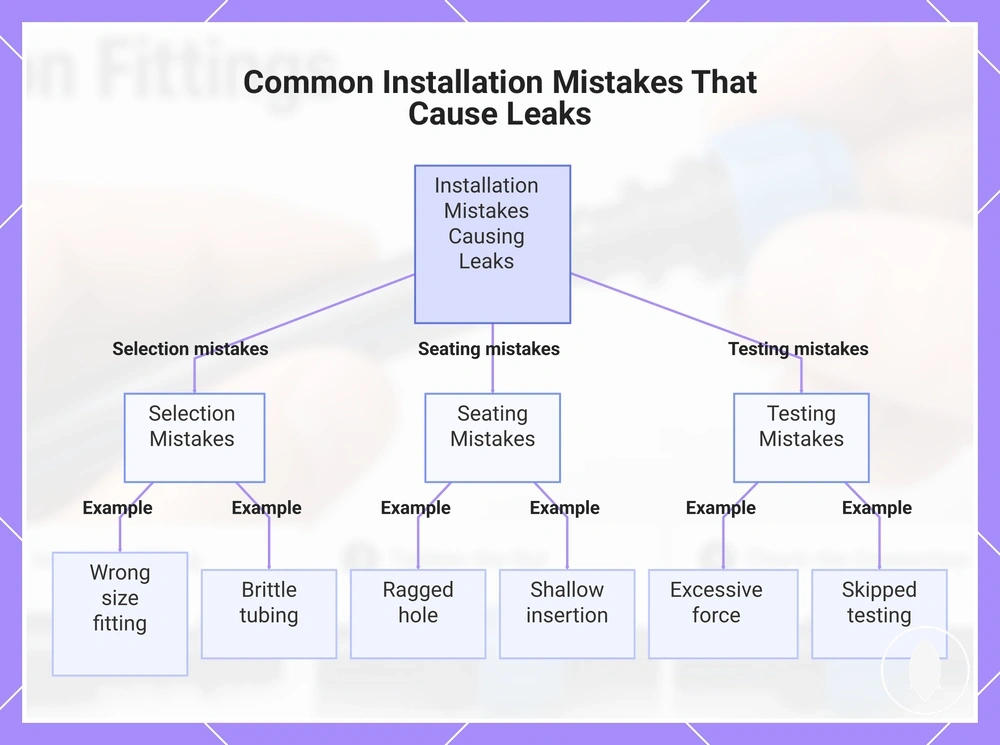
Installation mistakes are a common cause of leaks and loose fittings because poor fit, incomplete seating, or damaged tubing can weaken a new connection. Most problems begin with wrong size selection, ragged hole quality, shallow insertion, brittle tubing, excessive force, or skipped testing. Use the checklist below to identify each mistake, understand why it creates risk, and apply the appropriate prevention step.
- Wrong size: A wrong size fitting can create a poor fit that may lead to leaks. Confirm tubing and fitting compatibility before installation.
- Ragged hole: A ragged hole can prevent a barbed fitting from sealing evenly and may cause seepage. Create a clean hole and inspect it before inserting the fitting.
- Angled tubing cut: An uneven tubing cut can reduce seating quality. Make a clean square cut before connecting the fitting.
- Shallow insertion: A connector that is not fully seated can become a loose fitting when pressure increases. Confirm full insertion and retest the connection.
- Brittle tubing: Brittle tubing can split when force is applied during installation. Check tubing condition before continuing.
- Excessive force: Forcing a connector into an unsuitable fit can damage the tubing or enlarge the opening. Stop and recheck fit instead of applying more force.
- Skipped testing: Skipped testing can leave a slow leak unnoticed. Perform a water test before considering the installation complete.
Wrong size, poor hole quality, and shallow insertion can produce similar symptoms, but the correction depends on the underlying cause. A compatibility problem differs from a ragged hole, and incomplete seating differs from damaged tubing. Identify the likely cause before making further changes to the connection.
A new leak does not always result from an installation mistake alone because poor compatibility or an already damaged component can create similar symptoms. Confirm seating, tubing condition, and fit before assuming a fitting has failed. For broader prevention guidance, review installation mistakes to avoid after completing the installation-specific checks.
Leaks and loose fittings are not prevented by force or repeated adjustment alone. Prevention starts with compatible parts, clean preparation, correct seating, and testing before the system is left in service. If those checks do not resolve the issue, reassess the connection before proceeding.
This chart groups the most common installation mistakes that lead to leaks or loose fittings, organized by category.
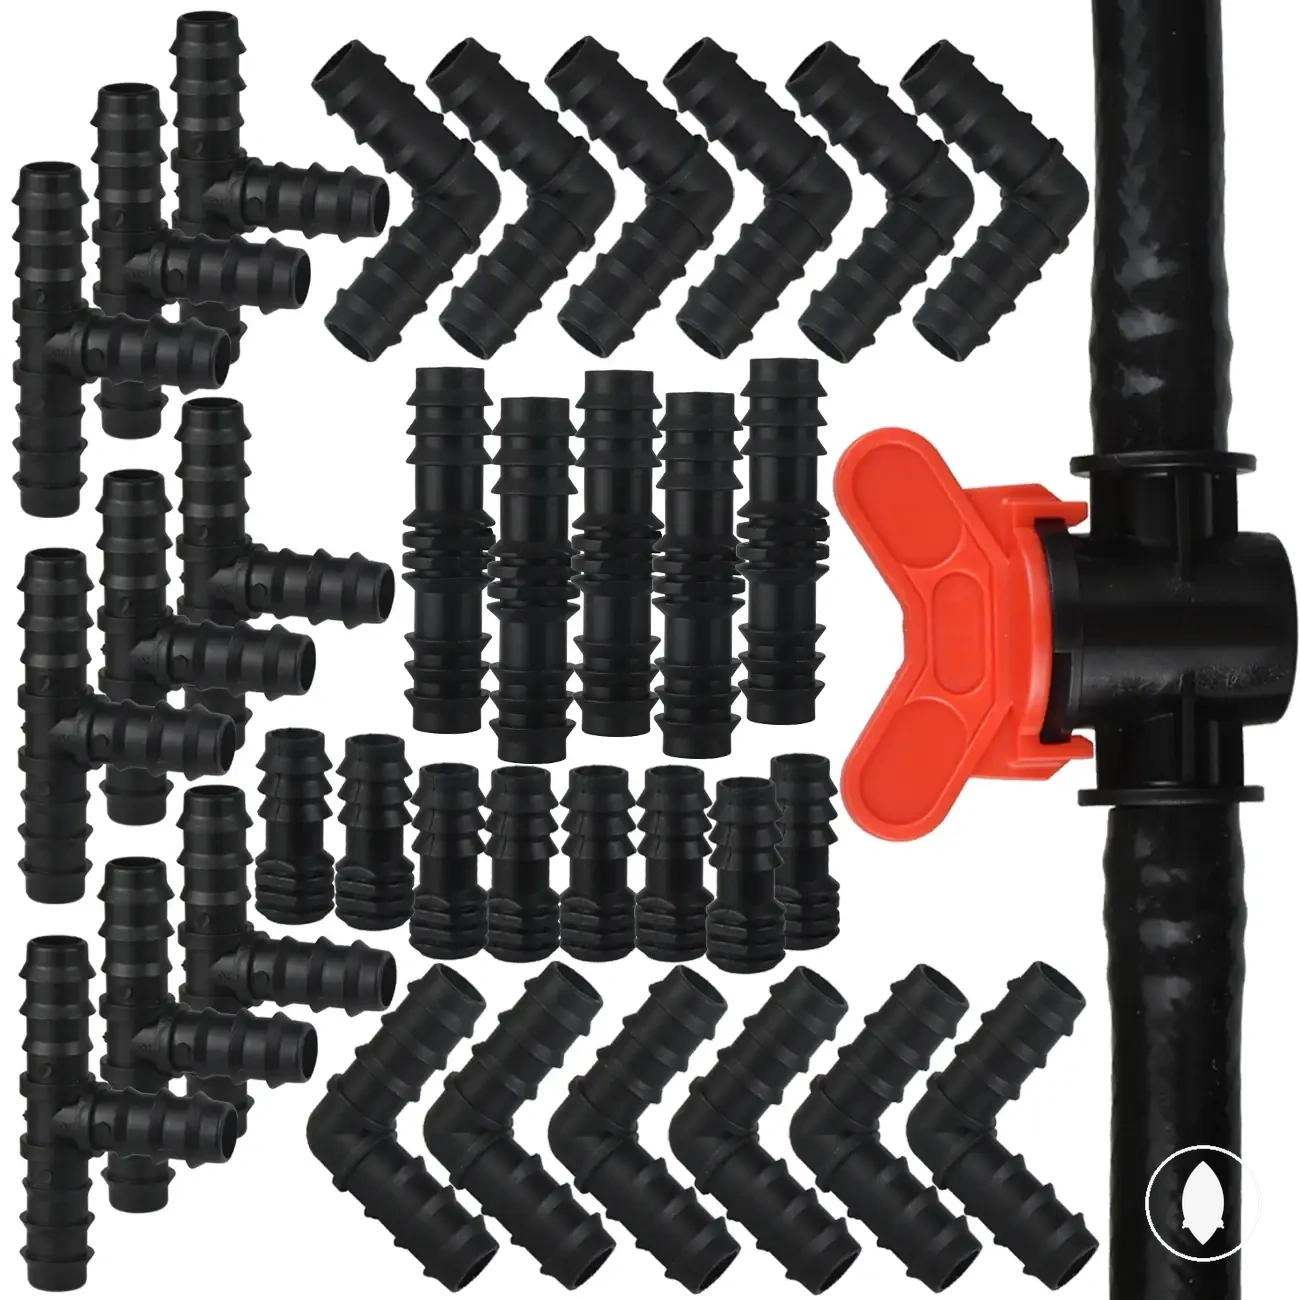
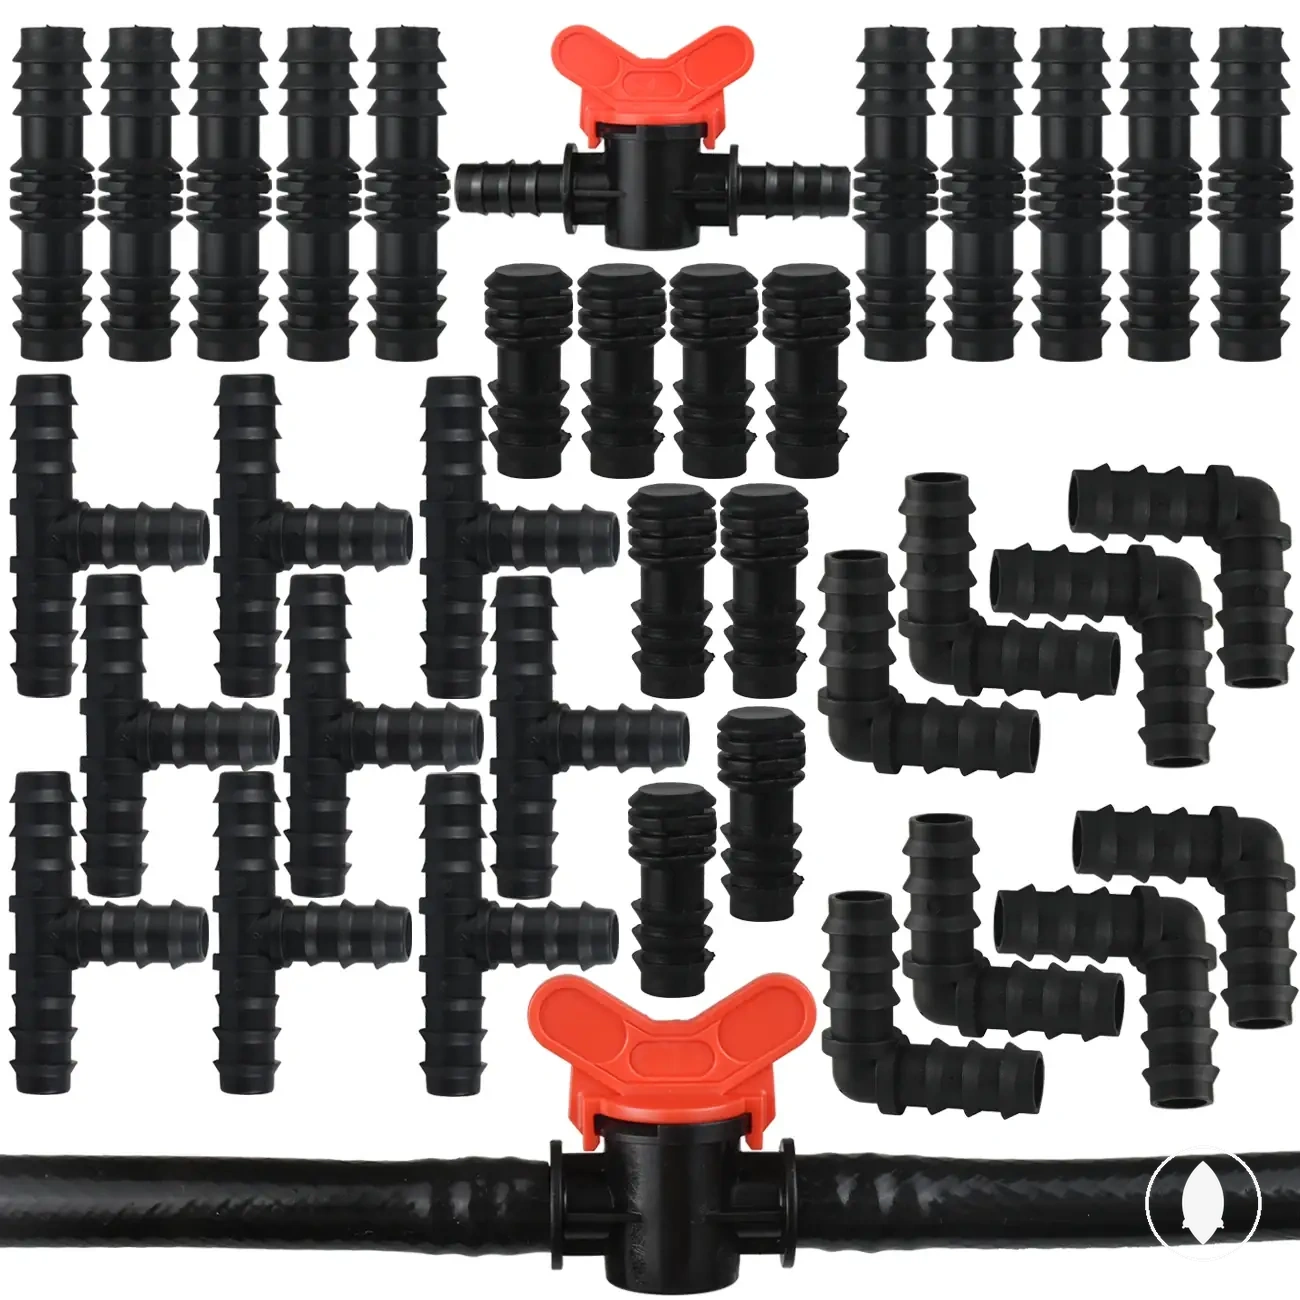
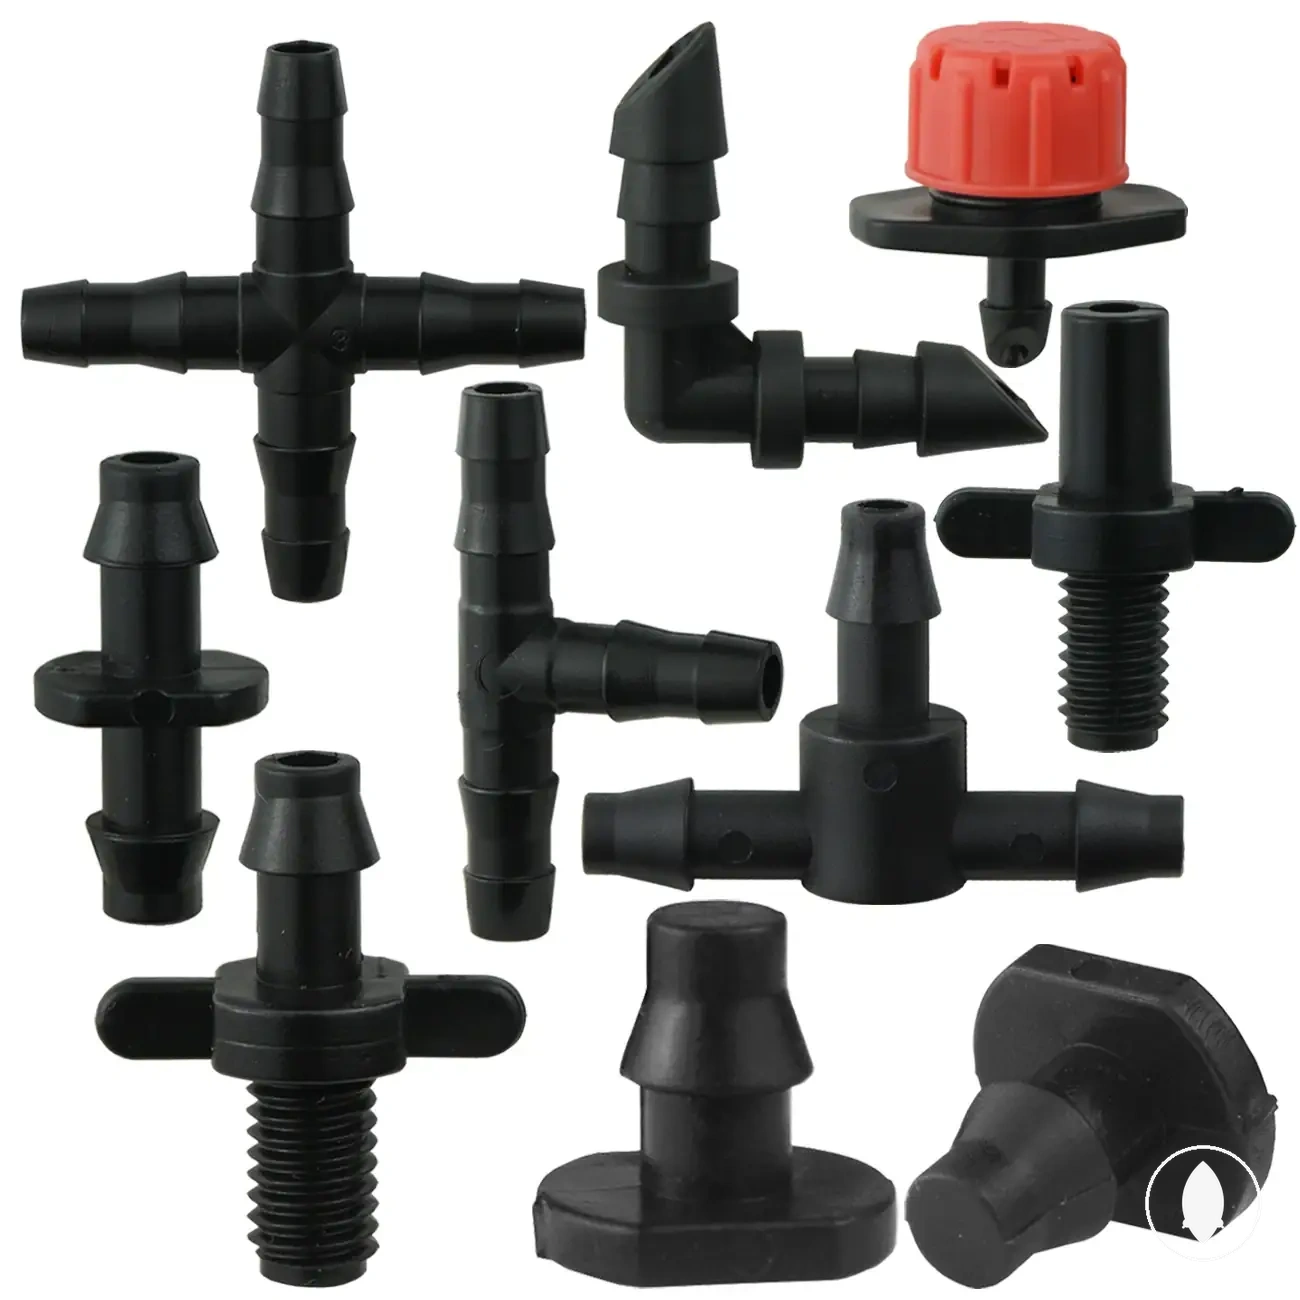
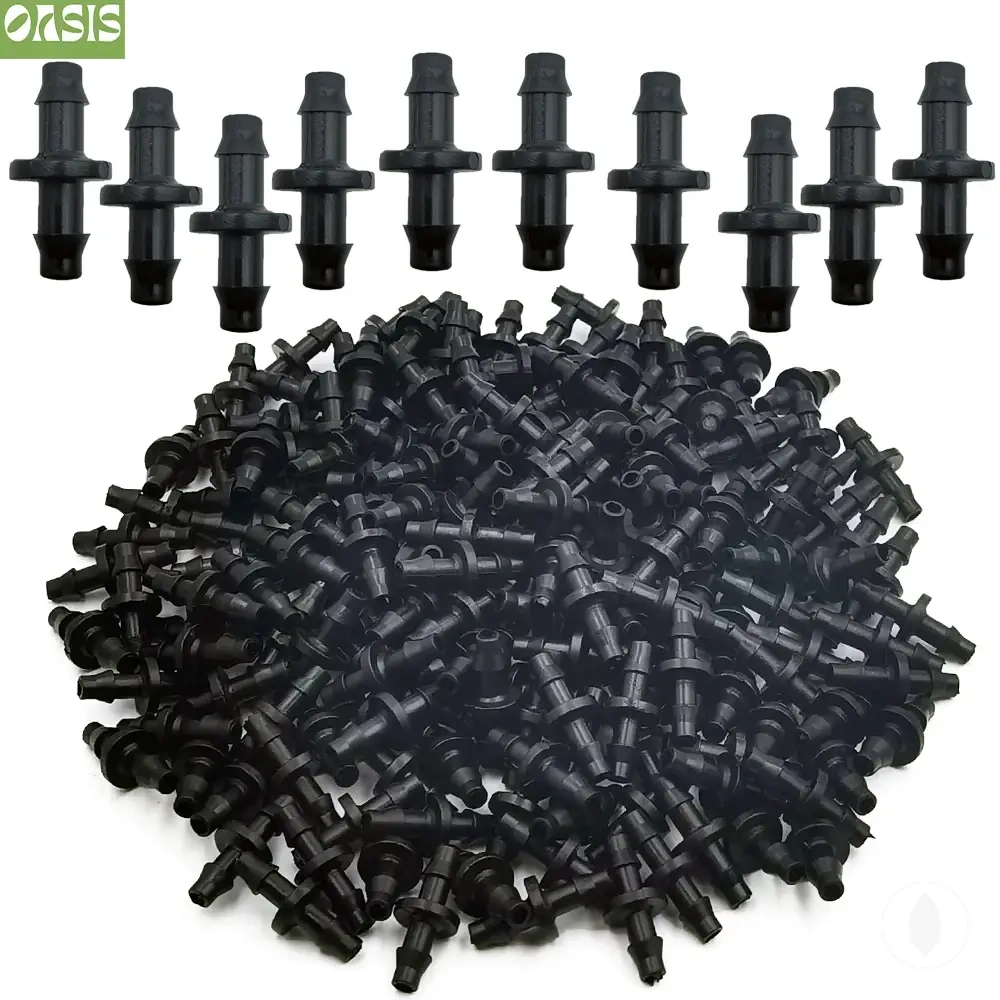
Here are product examples that may make comparison easier. Before buying, always review the compatibility criteria, essential features, and product details.