Drip Irrigation Fitting Removal and Replacement
Drip irrigation fitting removal and replacement is a maintenance task for an existing tubing line when a connector needs to be reused, replaced, or changed after wear, damage, or a layout adjustment. The outcome depends on the fitting type, the tubing condition, and whether the fitting connection can still provide a secure fit after removal.
Removal and replacement are closely connected because taking out a drip irrigation fitting can affect the tubing opening, connector grip, compatibility, and leak risk at the same connection point. A barbed fitting, compression fitting, repair coupling, or replacement connector may each require a different approach. This page is not a full installation guide or a dedicated leak troubleshooting resource.
The maintenance process usually begins by removing the existing connector carefully, inspecting the tubing, checking compatibility, and deciding whether reuse remains appropriate. If the tubing is stretched, cracked, cut, or otherwise damaged, replacement may be a more suitable option than reinstalling the original fitting. That decision creates the starting point for the remaining replacement process.
For broader information about fitting types, compatibility, and related maintenance topics, visit the drip irrigation fittings hub while using this page as a focused guide to removal and replacement.
When Replacement Is Better Than Reusing the Old Fitting
Replacement is usually the better choice when an old fitting no longer provides reliable grip or shows visible wear. The decision should be based on the condition of the fitting body, the tubing, and the connection rather than on convenience. Reuse depends on whether the existing fitting and tubing can still form a secure connection.
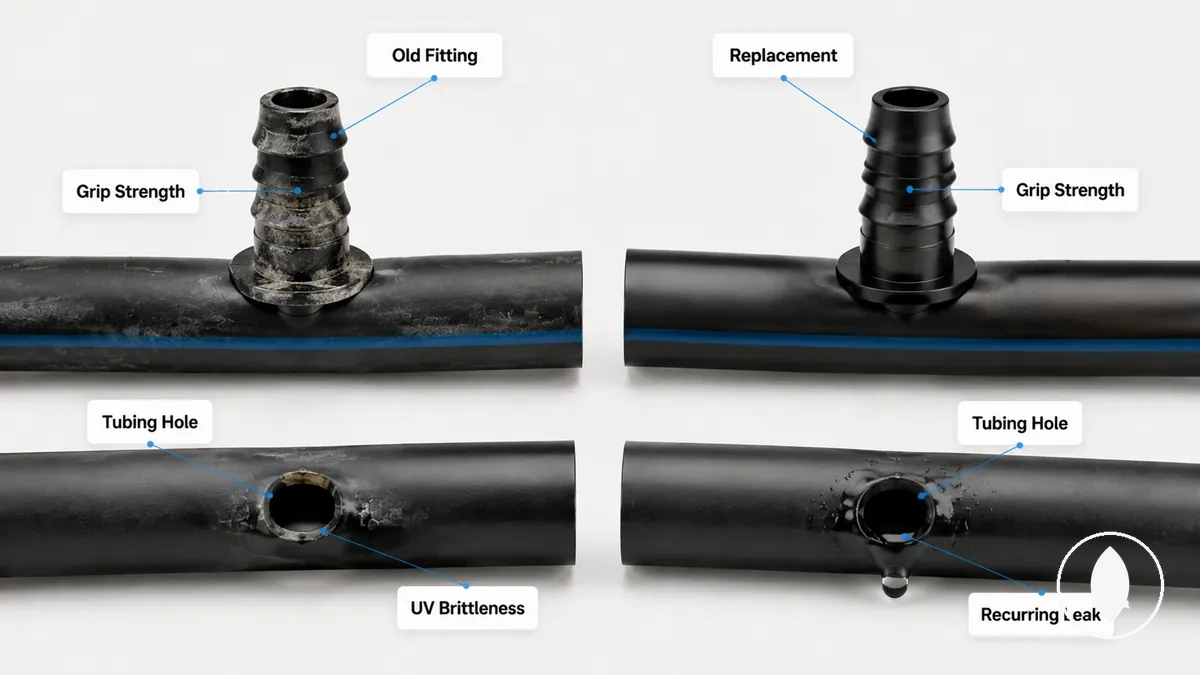
Visible damage often provides the clearest replacement signal. Check for a cracked fitting, UV brittleness, a deformed barb, weakened compression grip, or a damaged connector. Inspect the tubing hole for stretching or enlargement because reduced grip strength can increase leak risk and contribute to recurring failure.
An old fitting may still look usable even though the tubing connection no longer holds reliably because the tubing hole has changed or the connector grip has weakened. In these situations, assess both the fitting and the tubing before deciding on reuse. Apply the same criteria described in maintenance signs for replacement when making the final maintenance decision.
Use the following checklist to assess whether replacement is a better option than reusing the old fitting. Each point helps identify a condition that may affect connection reliability.
- Visible wear: Check the old fitting for surface wear or damage that may reduce holding strength.
- Tubing hole: Inspect whether the opening has enlarged or become misshapen, which may weaken the connection.
- Grip strength: Confirm that the barb or compression grip still holds the tubing securely without slipping.
- Cracked fitting or UV brittleness: Look for cracks, brittleness, or ageing that may reduce durability.
- Deformed barb: Check whether the barb has changed shape enough to reduce secure engagement with the tubing.
- Recurring leak: Repeated leaks at the same connection can indicate that replacement is more appropriate than continued reuse.
Replacement Fit Checks Before Removing the Old Connector
Replacement fit depends on confirming compatibility before the old connector is removed. Check the tubing size, outside diameter, fitting style, and connection role so the replacement connector matches the existing irrigation line as closely as possible. Compatibility should be verified before removing the old connector.
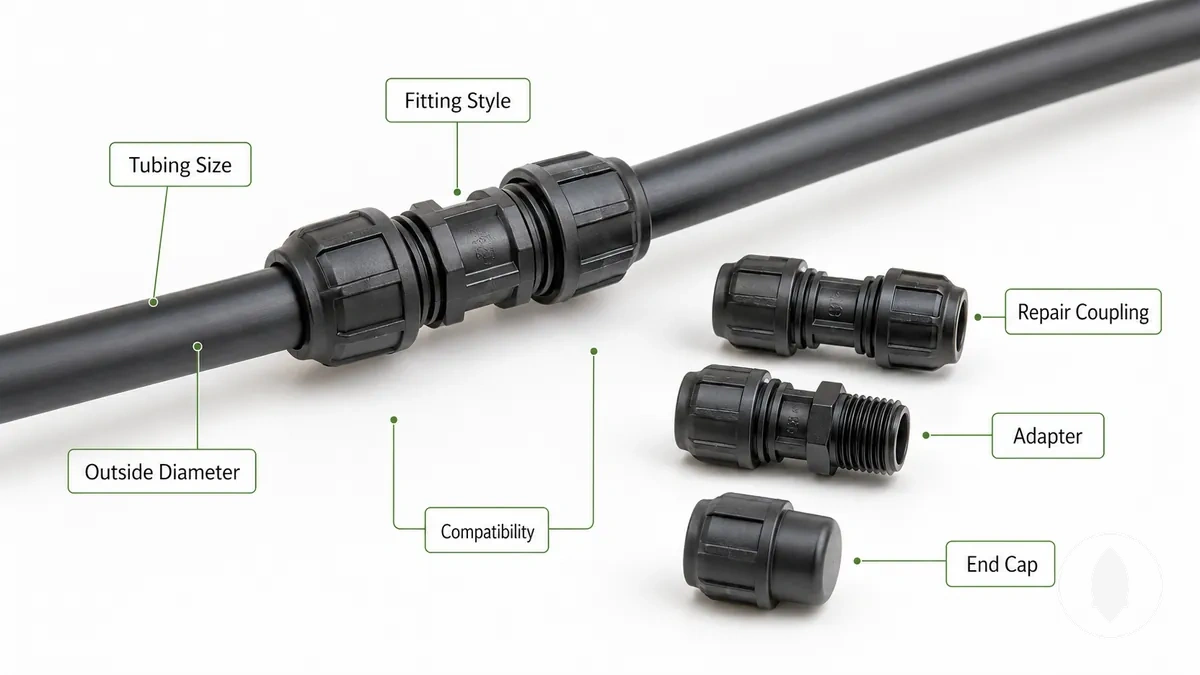
The main fit variables include tubing size, outside diameter, fitting style, and the purpose of the connector within the system. A repair coupling is used for joining cut tubing, an adapter changes the connection direction or thread transition, and an end cap closes the end of a line. Even when the nominal size appears to match, compatibility may vary because of brand differences, metric or imperial sizing, wear, or softened tubing.
Detailed size selection belongs in a dedicated compatibility guide, while this section focuses on confirming what should be checked before replacement begins. For a more complete assessment of sizing and connector fit, see compatibility before replacement.
Use the following criteria to verify replacement fit before removing the old connector. The table links each component with the attribute that should be checked and why it matters.
| Entity | Attribute | Condition to Verify |
|---|---|---|
| Tubing | Outside diameter | Confirm the replacement fit matches the tubing size. |
| Fitting | Fitting style | Match the replacement connector to the existing connection type. |
| Repair coupling | Connection role | Use only when the replacement is intended to join cut tubing. |
| Adapter | Direction | Verify the required thread or connection transition. |
| End cap | Closure | Confirm it is intended to close the end of the irrigation line. |
| Reusable connector | Compatibility | Inspect for wear because tubing condition can influence the final fit. |
How to Remove Drip Irrigation Fittings From Tubing
Remove drip irrigation fittings by protecting the tubing first and using a removal method that matches the connector style and the condition of the tubing. Begin with water shutoff and pressure release before attempting to release the connector. The safest approach depends on the fitting type and the condition of the existing tubing.
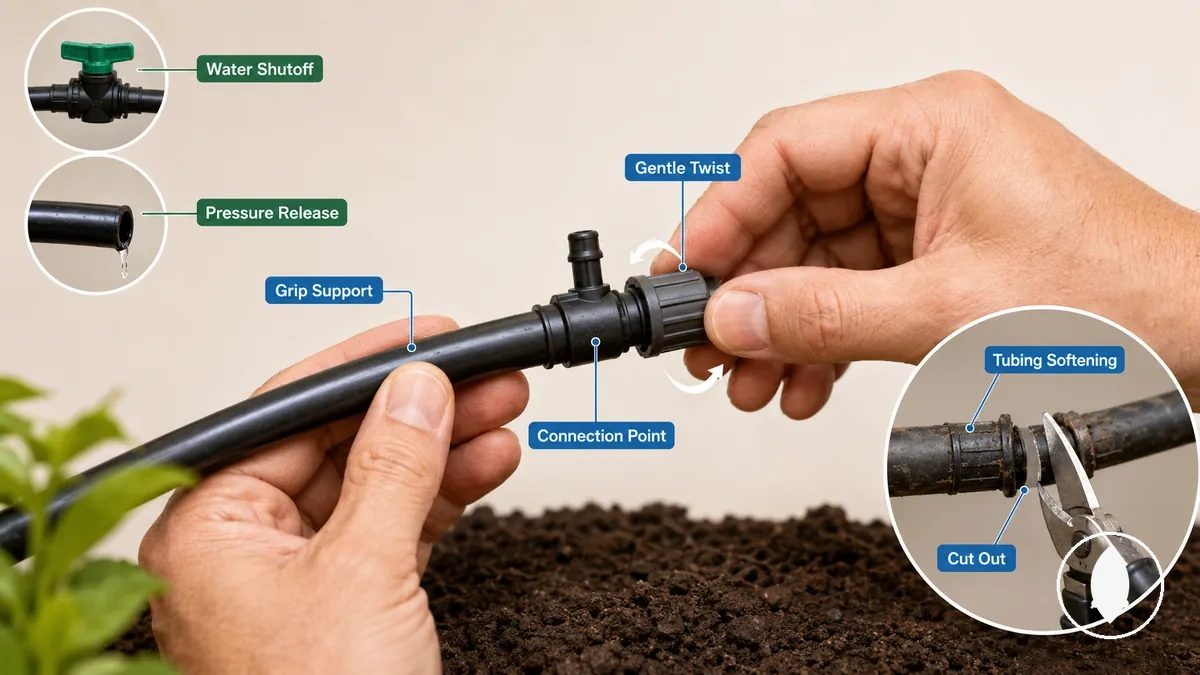
Different connector styles and tubing conditions can require different removal techniques. Tight barbs, brittle tubing, and worn connectors increase the risk of enlarging or tearing the connection point if excessive force is applied. Supporting the tubing and adjusting the removal method can help reduce the chance of damaging the existing tubing.
- Turn off the water supply and allow pressure release before removing the connector. Working on a pressurized tubing line can increase the risk of damaging the connection.
- Support the tubing close to the connection point before attempting removal. Grip support helps reduce stress on the tubing while the fitting is released.
- Use a gentle twist while pulling the fitting out gradually. If the connector does not move easily, stop rather than risking damage to the tubing hole.
- Apply gentle tubing softening when the connector is especially tight. The most suitable removal method depends on the connector style and the condition of the tubing.
- Inspect the connection point after removing the fitting. Replace damaged tubing or a damaged connector if the connection no longer appears suitable for reuse.
- Cut out the fitting only when pulling it is more likely to damage the tubing. Brittle tubing, tight barbs, or heavily worn connectors may make cutting out the fitting a safer option than continued pulling.
Removing Barbed Fittings Without Enlarging the Tubing Hole
Removing a barbed fitting without enlarging the tubing hole depends on preserving the grip between the barb and the tubing while working with the tubing's elasticity. A deeply seated barb can stretch the tubing opening if it is pulled out without controlled movement, increasing the risk of hole enlargement.
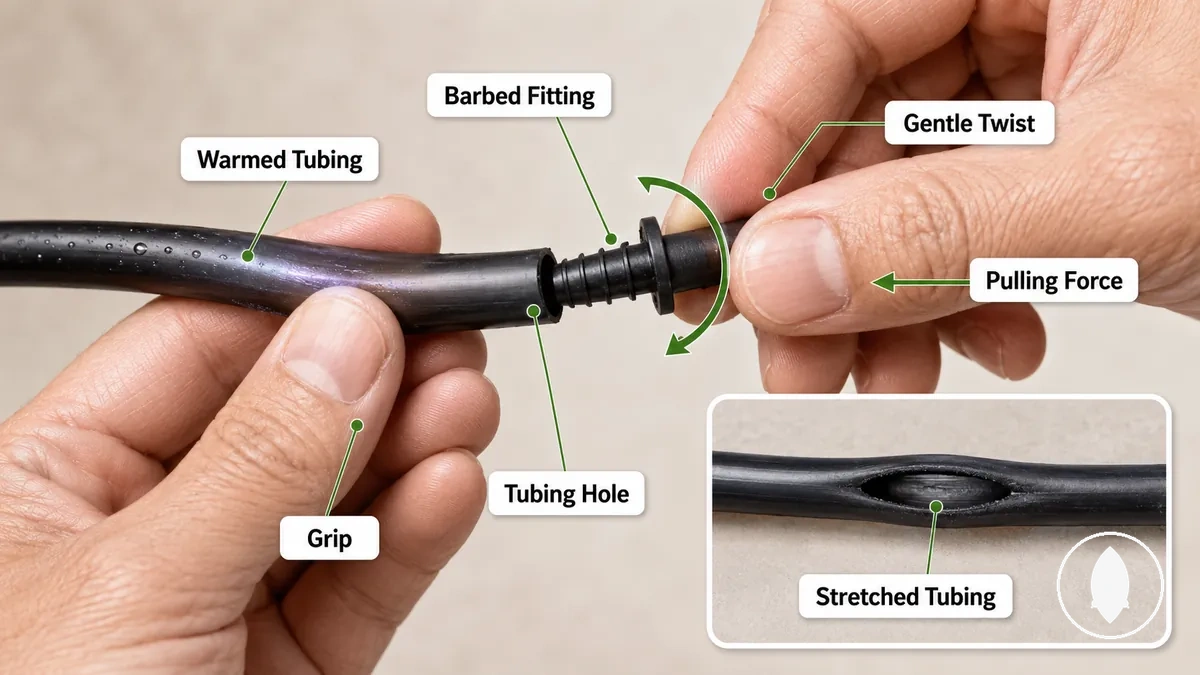
Support the tubing close to the barbed fitting, control the twist, and increase pulling force gradually as the barb begins to release. Warmed tubing may become more flexible and can help when the barb is especially tight. If the tubing is old, stretched, or brittle, replacing the affected tubing segment may be a safer option than continuing to remove the barb through the same tubing hole.
- Grip support: Hold the tubing close to the barb to reduce stress on the tubing hole during removal.
- Twist control: Use a gentle twist that follows the barb's grip before increasing pulling force.
- Warmed tubing: Slightly warmed tubing may improve tubing elasticity and help release a tight barb.
- Stop signal: If the tubing opening begins to stretch or the barb remains firmly engaged, stop removal and consider replacing the tubing segment instead.
Releasing Compression and Drip-Lock Fittings
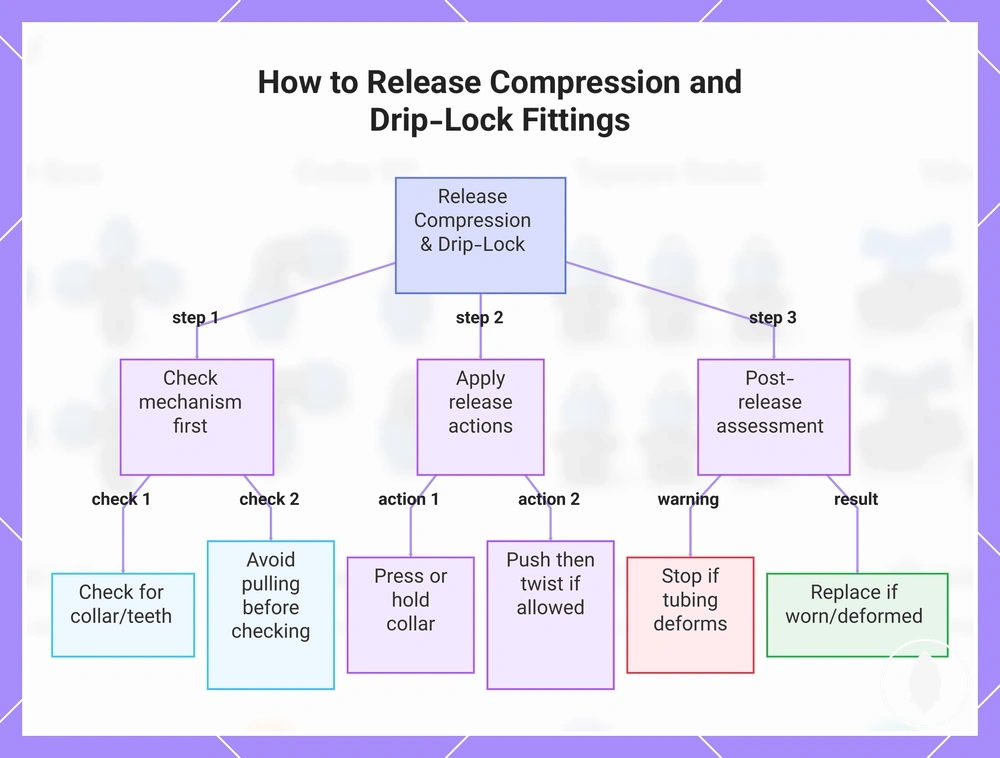
Compression fitting and drip-lock fitting connections should be released through their holding mechanism rather than treated like barbed connectors. These fittings hold tubing with compression, locking teeth, or a collar mechanism, so the release usually depends more on the connector mechanism than on pulling force.
Unlike barbed fittings, compression fitting and drip-lock fitting removal begins by checking the release mechanism before attempting to remove the tubing. A release collar or locking teeth may need to be disengaged first, so avoid pulling before checking the mechanism to reduce the risk of tubing deformation or connector damage.
- Collar release: If a release collar is present, press or hold it before removing the tubing.
- Push before pulling: Push the tubing slightly toward the connector before pulling to help disengage locking teeth when the fitting design requires it.
- Twist: Apply a gentle twist only if the connector design allows that release motion, while supporting the connector body.
- Tubing deformation: Stop if the tubing begins to deform instead of releasing, as the connector mechanism may require a different release action.
- Reuse limits: Reuse depends on the condition of the fitting and tubing. If either shows wear or deformation after removal, replacement may be the more suitable decision.
This chart outlines the step-by-step process to safely release compression and drip-lock fittings without damaging tubing or connectors.
Removing Stuck or Broken Drip Irrigation Fittings
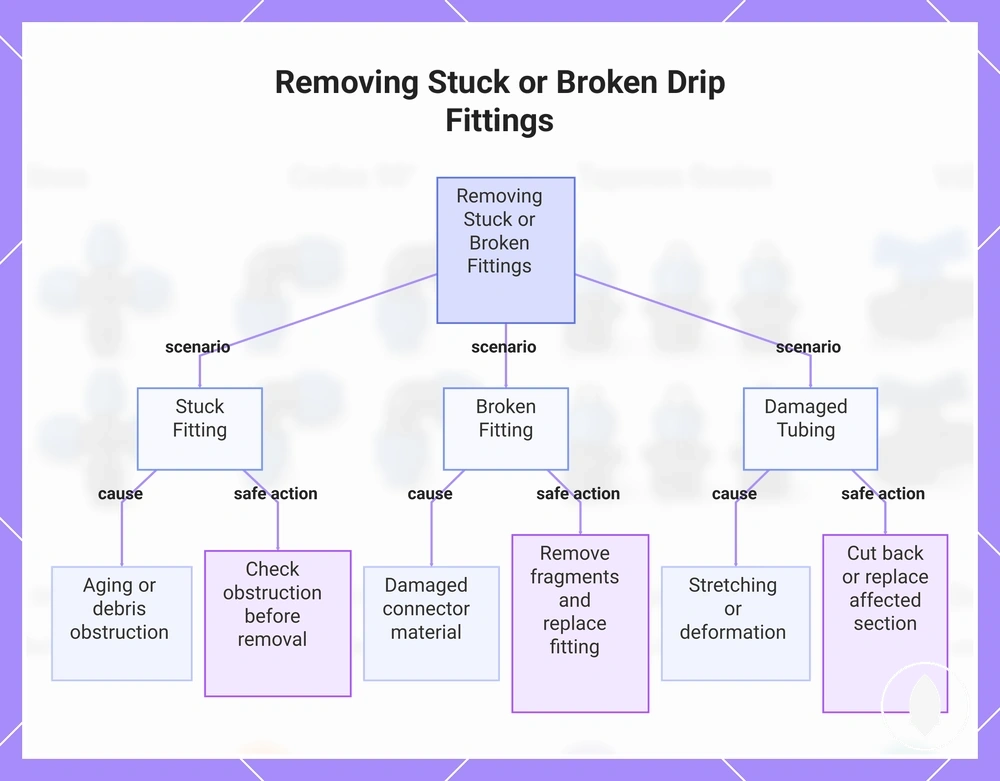
When a stuck fitting or broken fitting cannot be removed, the cause is often related to tubing age, debris, grip deformation, or damaged connector material. Identify the local removal obstacle before continuing so the fitting can be removed carefully or the affected section can be replaced if necessary.
A broken fitting with cracked plastic or a snapped barb may not release cleanly and can leave connector material inside the tubing. If continued removal begins to damage the tubing or increase deformation, stop and cut back the damaged tubing to a sound section before installing a replacement fitting.
- Symptom: A stuck fitting that will not move. Likely cause: Tubing age, debris, or grip deformation. Safe action: Check the obstruction before continuing removal.
- Symptom: A broken fitting with cracked plastic. Likely cause: Damaged connector material. Safe action: Remove loose fragments carefully and replace the fitting if required.
- Symptom: A snapped barb remains inside the tubing. Likely cause: Connector failure during removal. Safe action: Remove remaining pieces carefully before reconnecting.
- Symptom: Damaged tubing no longer holds the connector securely. Likely cause: Stretching or deformation during removal. Safe action: Cut back the damaged tubing before fitting a replacement connector.
- Symptom: Removal causes increasing damage. Likely cause: The connection can no longer be released safely. Safe action: Stop further removal and replace the affected section instead of forcing the fitting free.
This chart shows the main symptoms of stuck or broken drip irrigation fittings, their likely causes, and the recommended safe actions for each scenario.
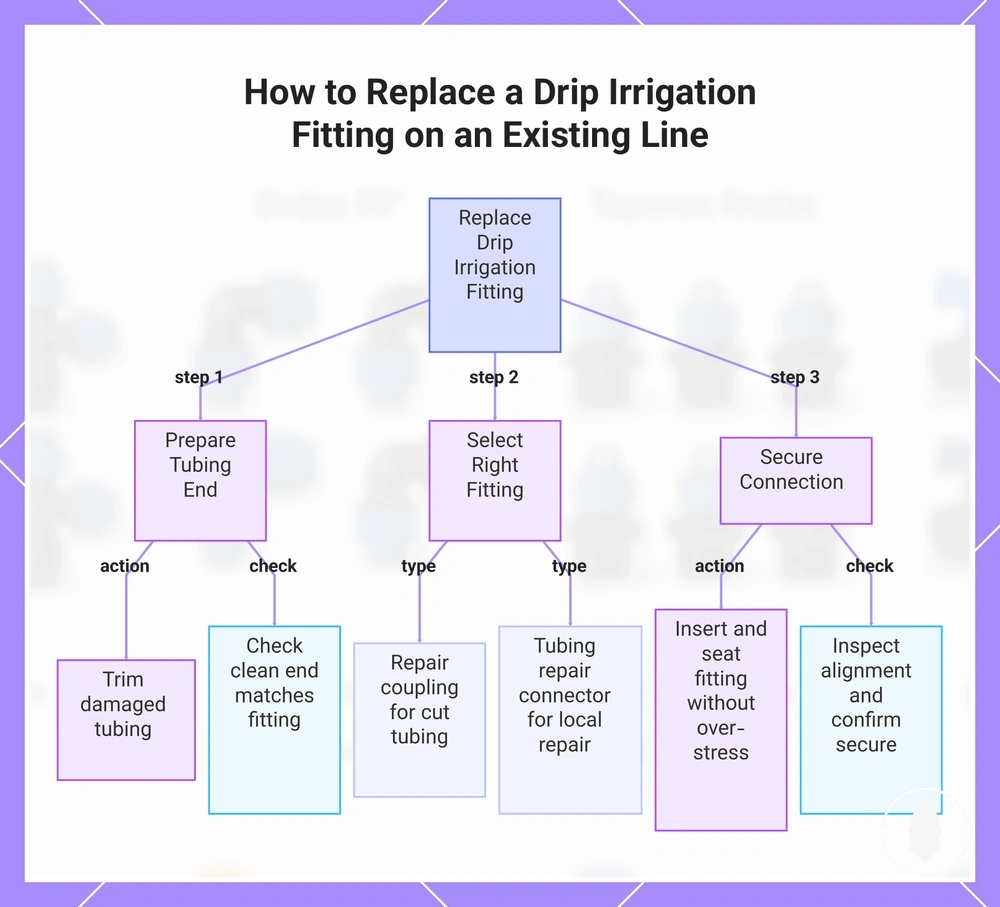
How to Replace a Drip Irrigation Fitting on an Existing Line
Replacing a drip irrigation fitting on an existing line starts with preparing a clean tubing end, selecting a compatible replacement fitting, and creating a secure connection. Replacement quality depends on correct fit, tubing condition, and avoiding unnecessary over-stress on the existing line.
If the tubing end is damaged, trim it back to sound material before installing the replacement fitting. Check that the clean tubing end matches the fitting and that the connector suits the repair role. A secure connection depends on proper alignment and fit rather than force, so choose the correct connector path before installation.
- Trim damaged tubing until a clean tubing end is available.
- Insert or seat the replacement fitting according to its connection design while supporting the existing line.
- Check the fitting alignment and confirm it is fully seated without placing over-stress on the tubing.
- Inspect the connection and adjust the tubing if excessive bending or movement is present.
- Confirm the replacement fitting remains secure before returning the irrigation line to normal operation.
For more detailed guidance on installing replacement fittings, refer to the dedicated installation guide. This section focuses on replacing a fitting on an existing line rather than covering a complete new installation procedure.
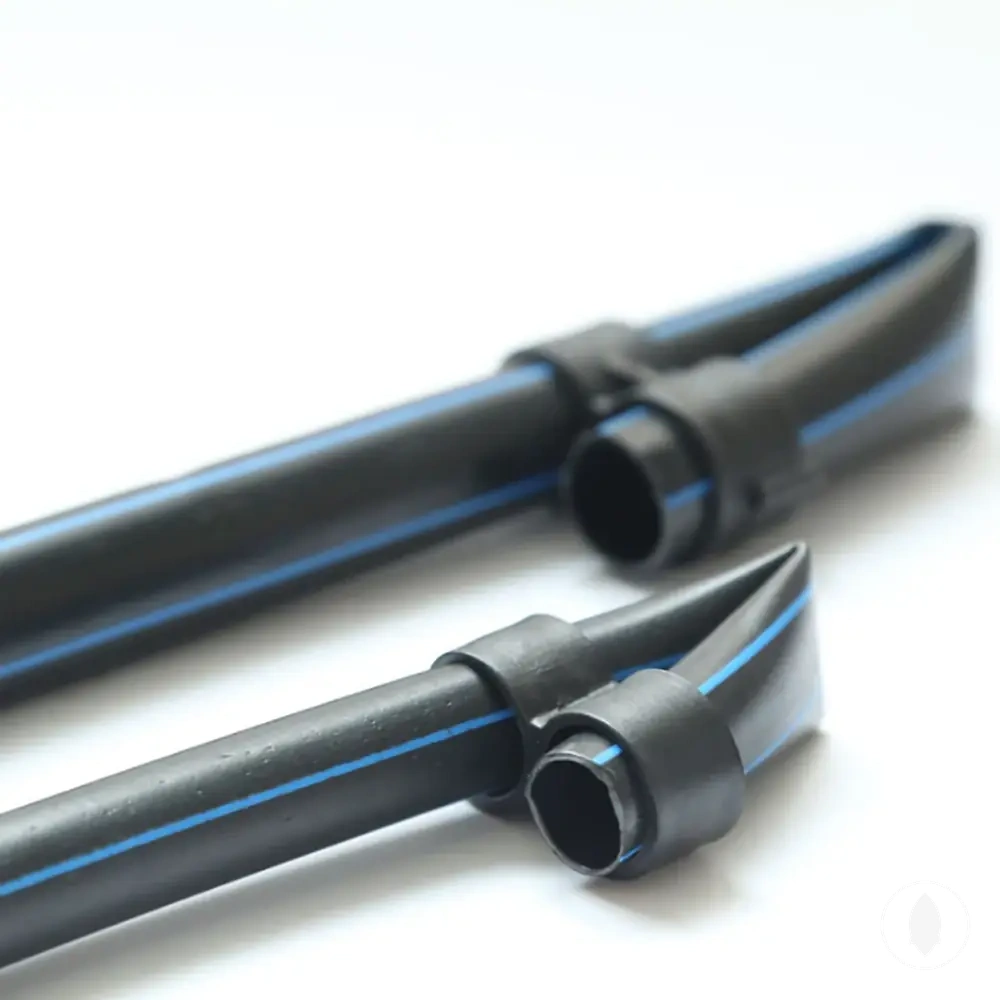
A repair coupling is appropriate when cut tubing must be joined, while a tubing repair connector supports local line repair. An adapter may be used when the connection role changes, an end cap closes the end of a line, and a reusable connector may remain suitable when the tubing condition and fit check support continued use. Select the connector according to the repair requirement instead of using the same fitting for every situation.
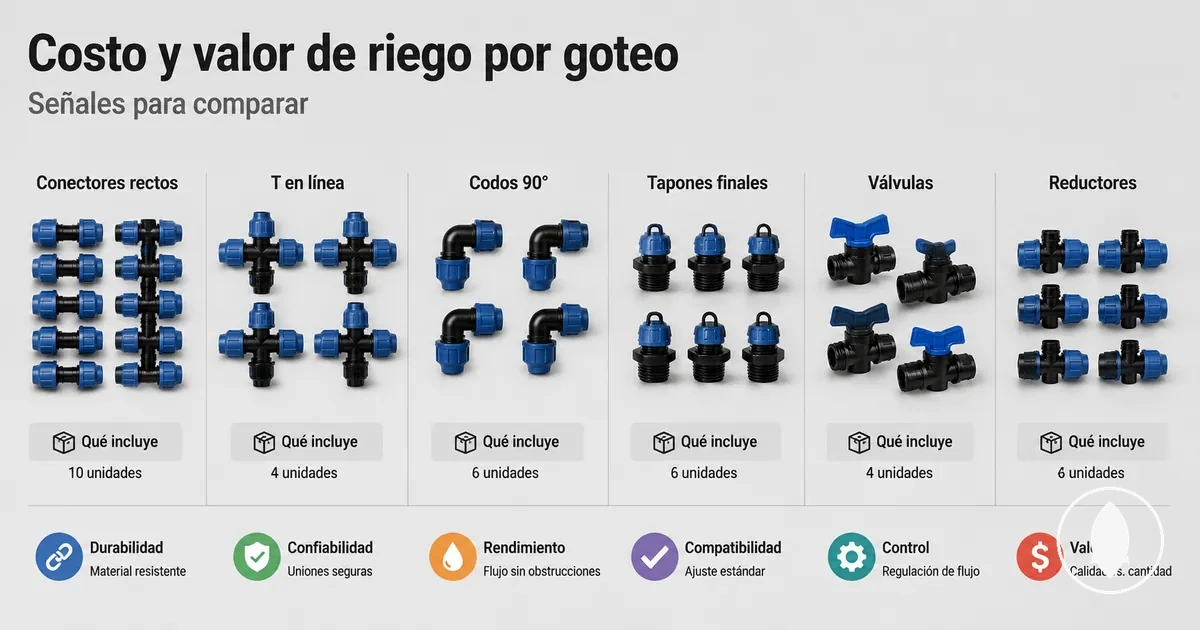
The products below are useful examples for comparing available options. Before buying, check that the compatibility criteria, key features, and product details match your needs.
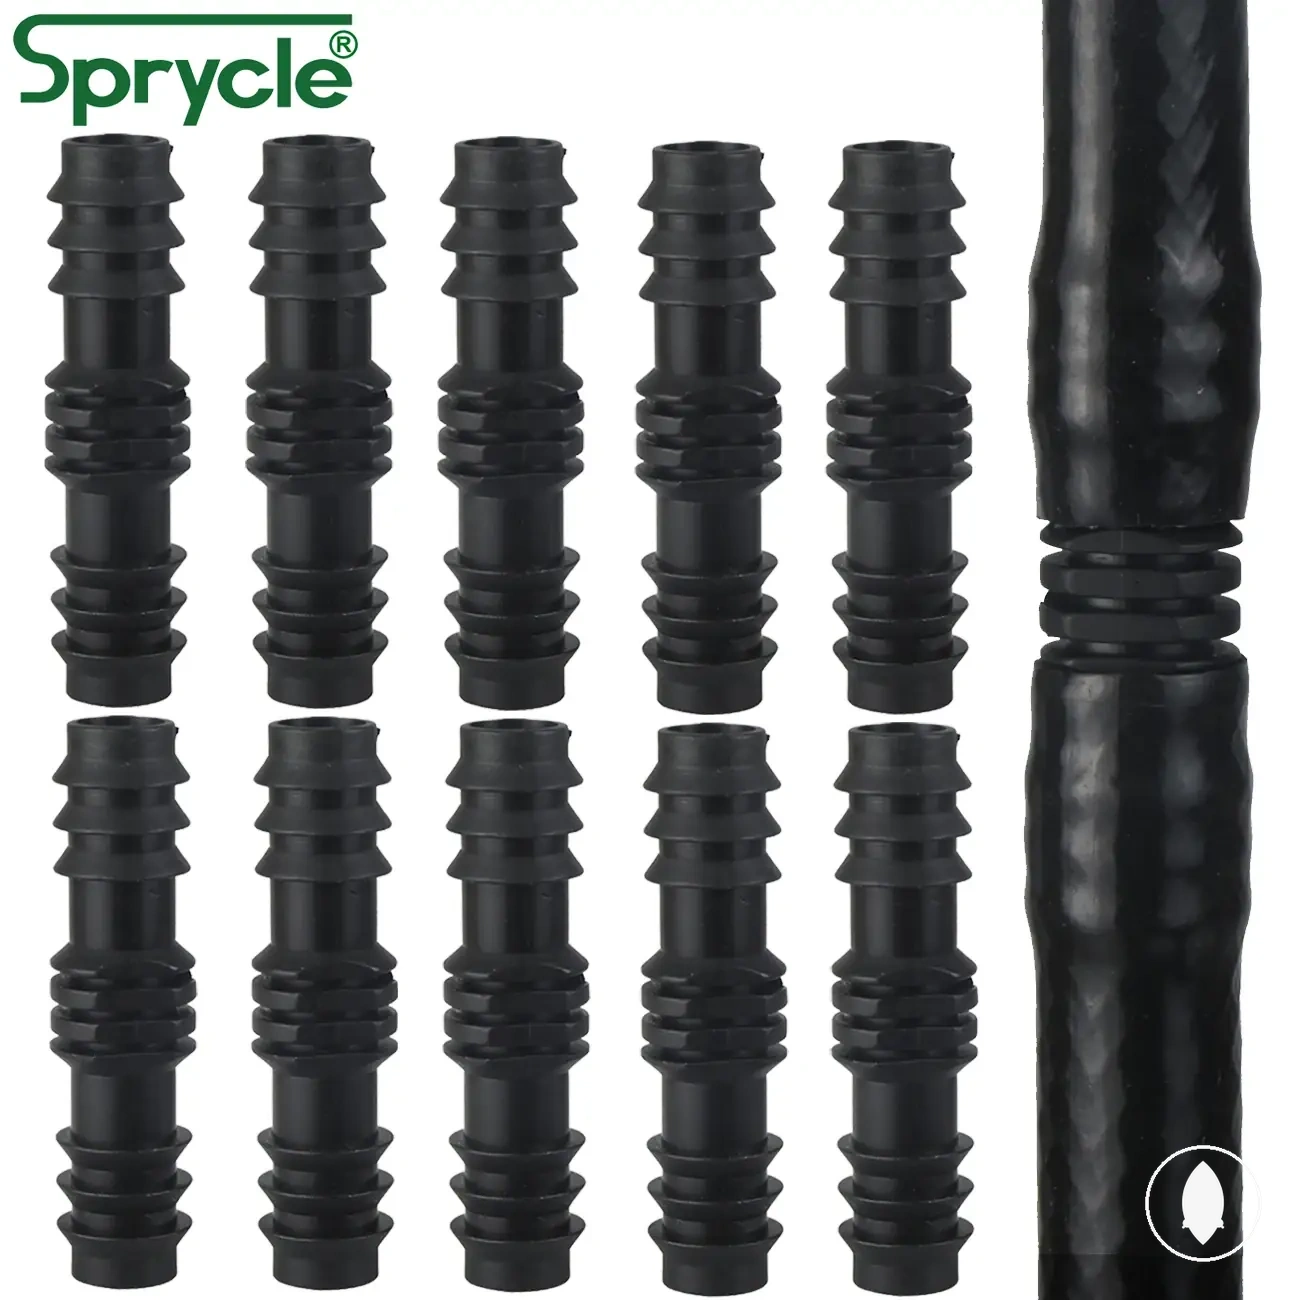
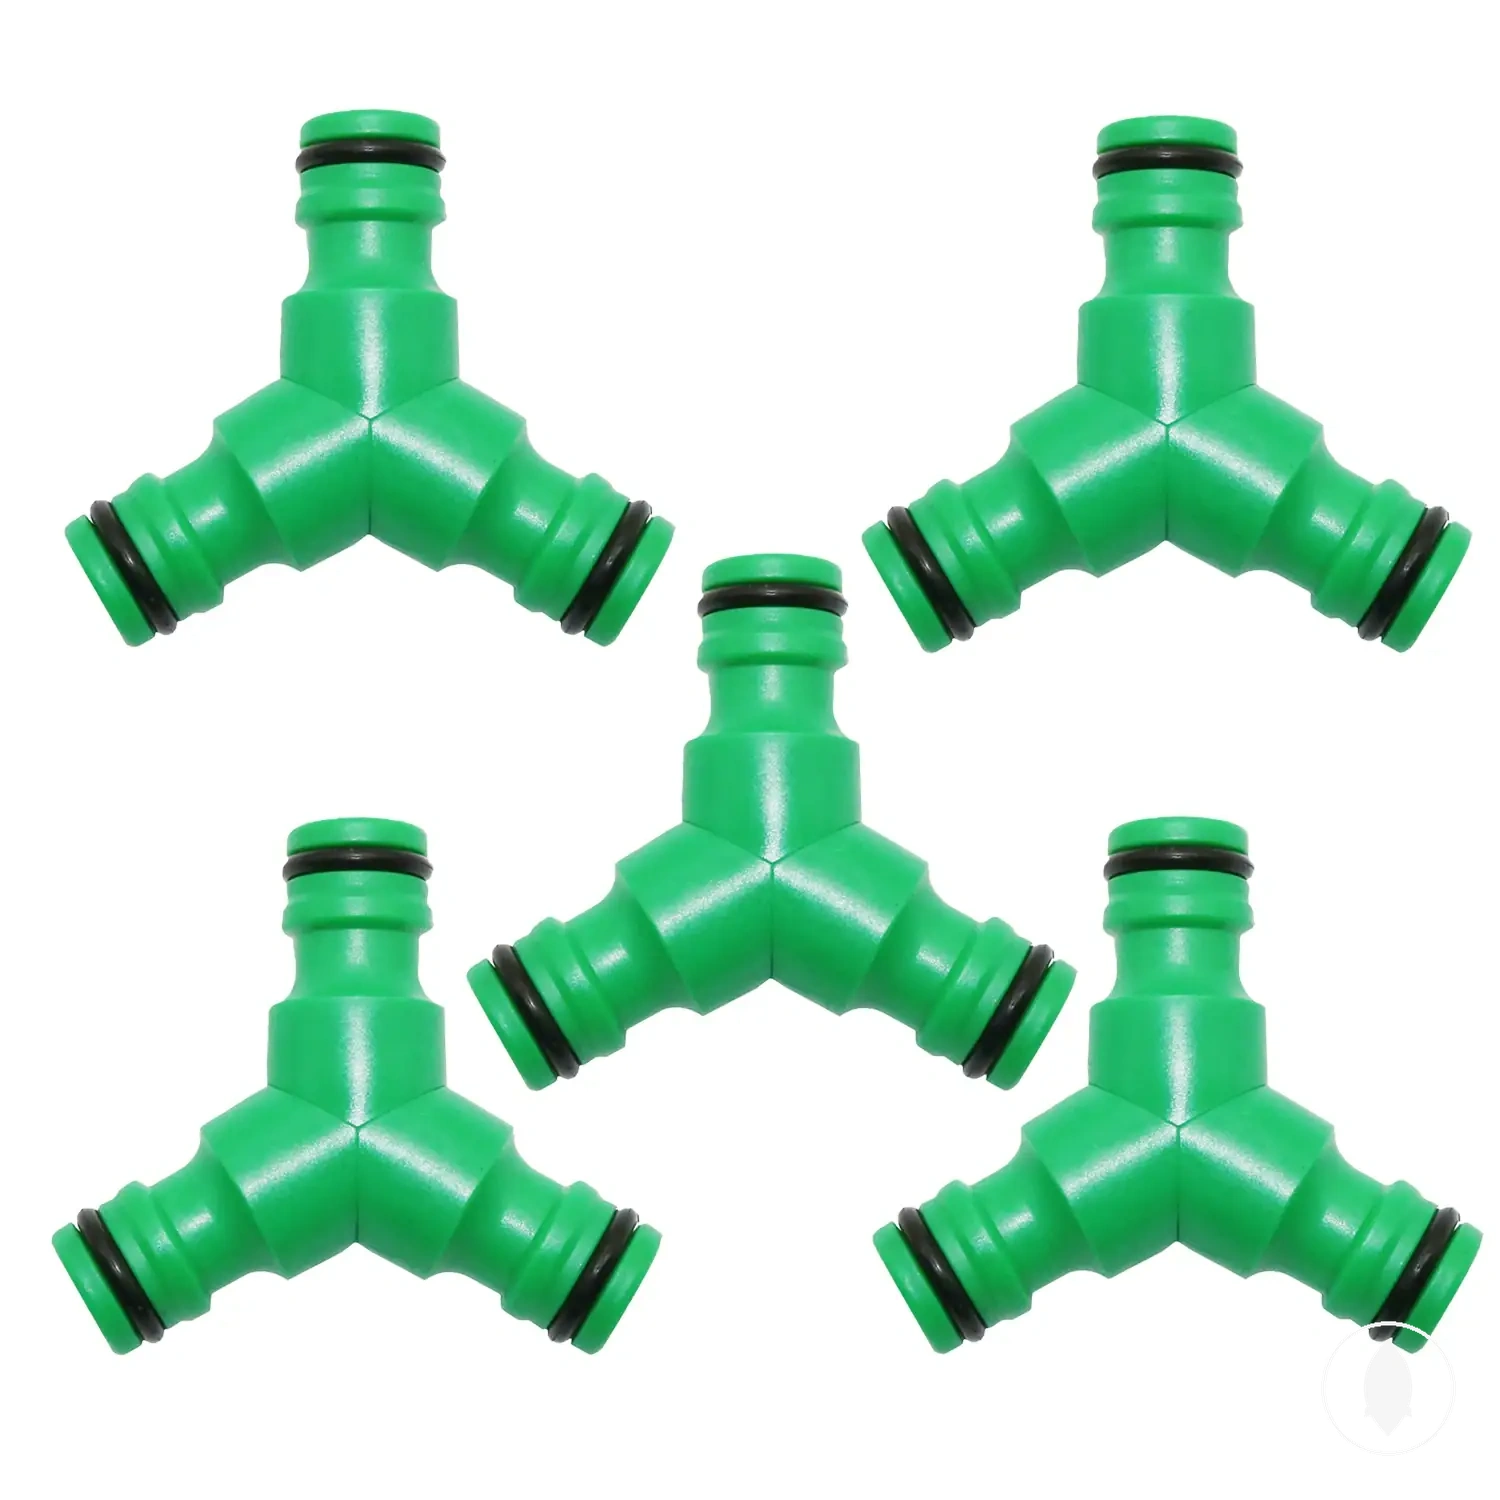
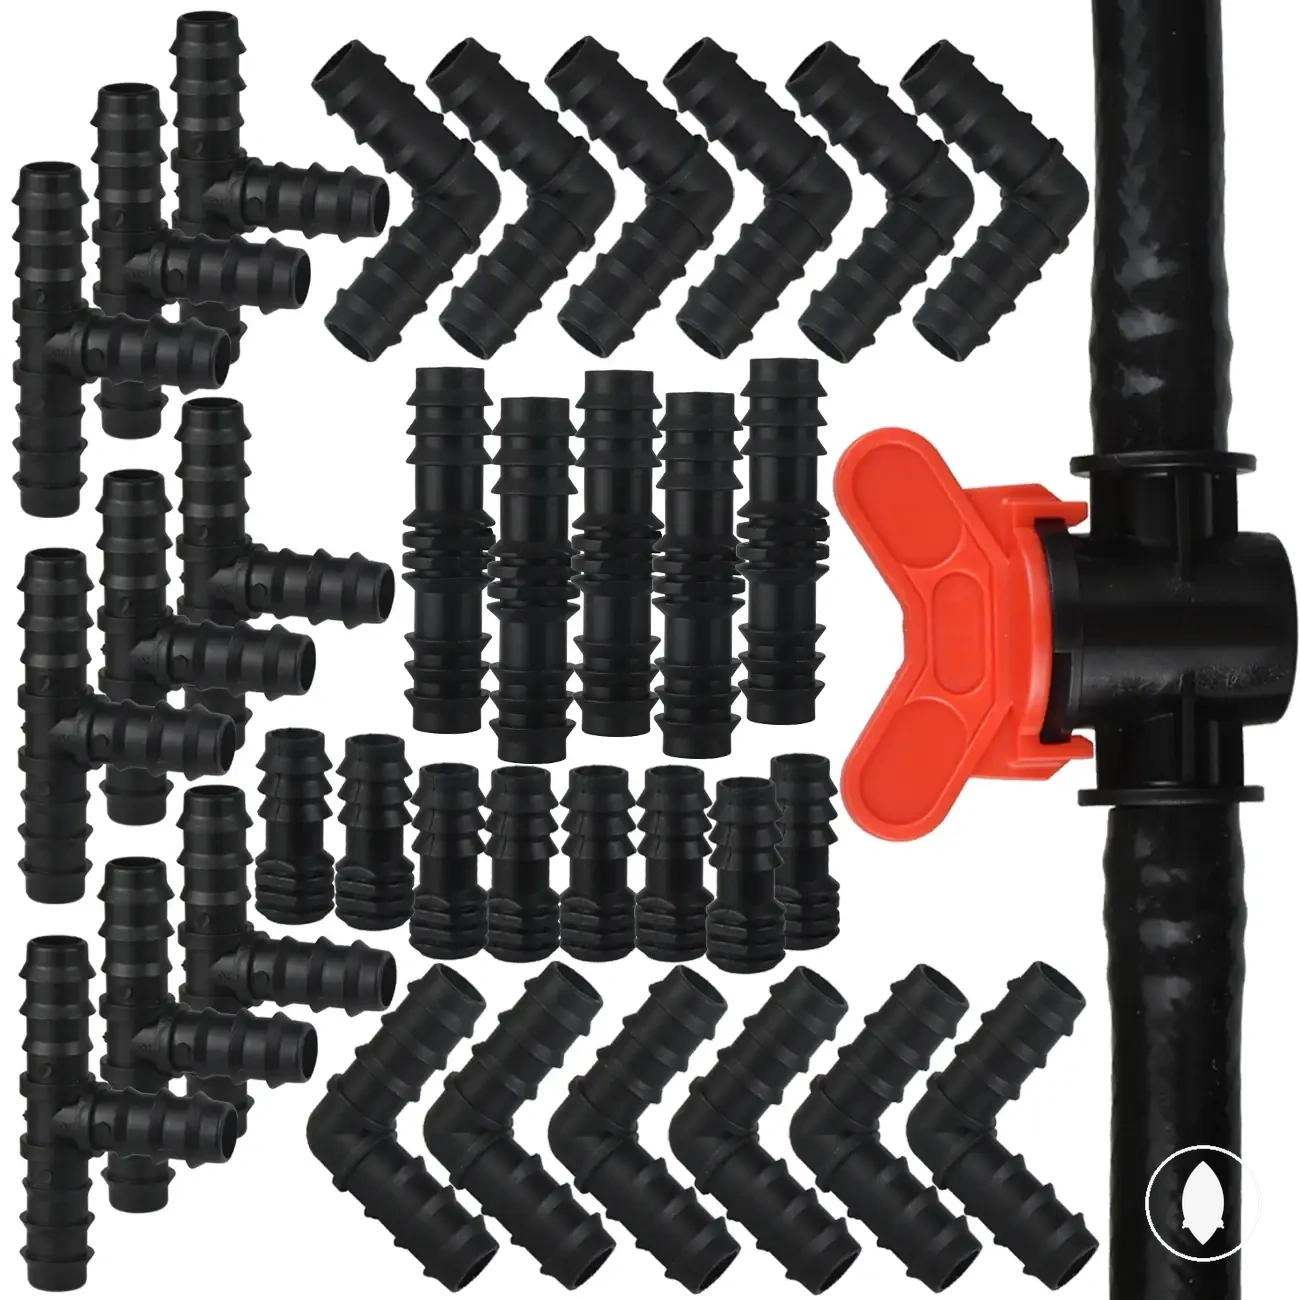
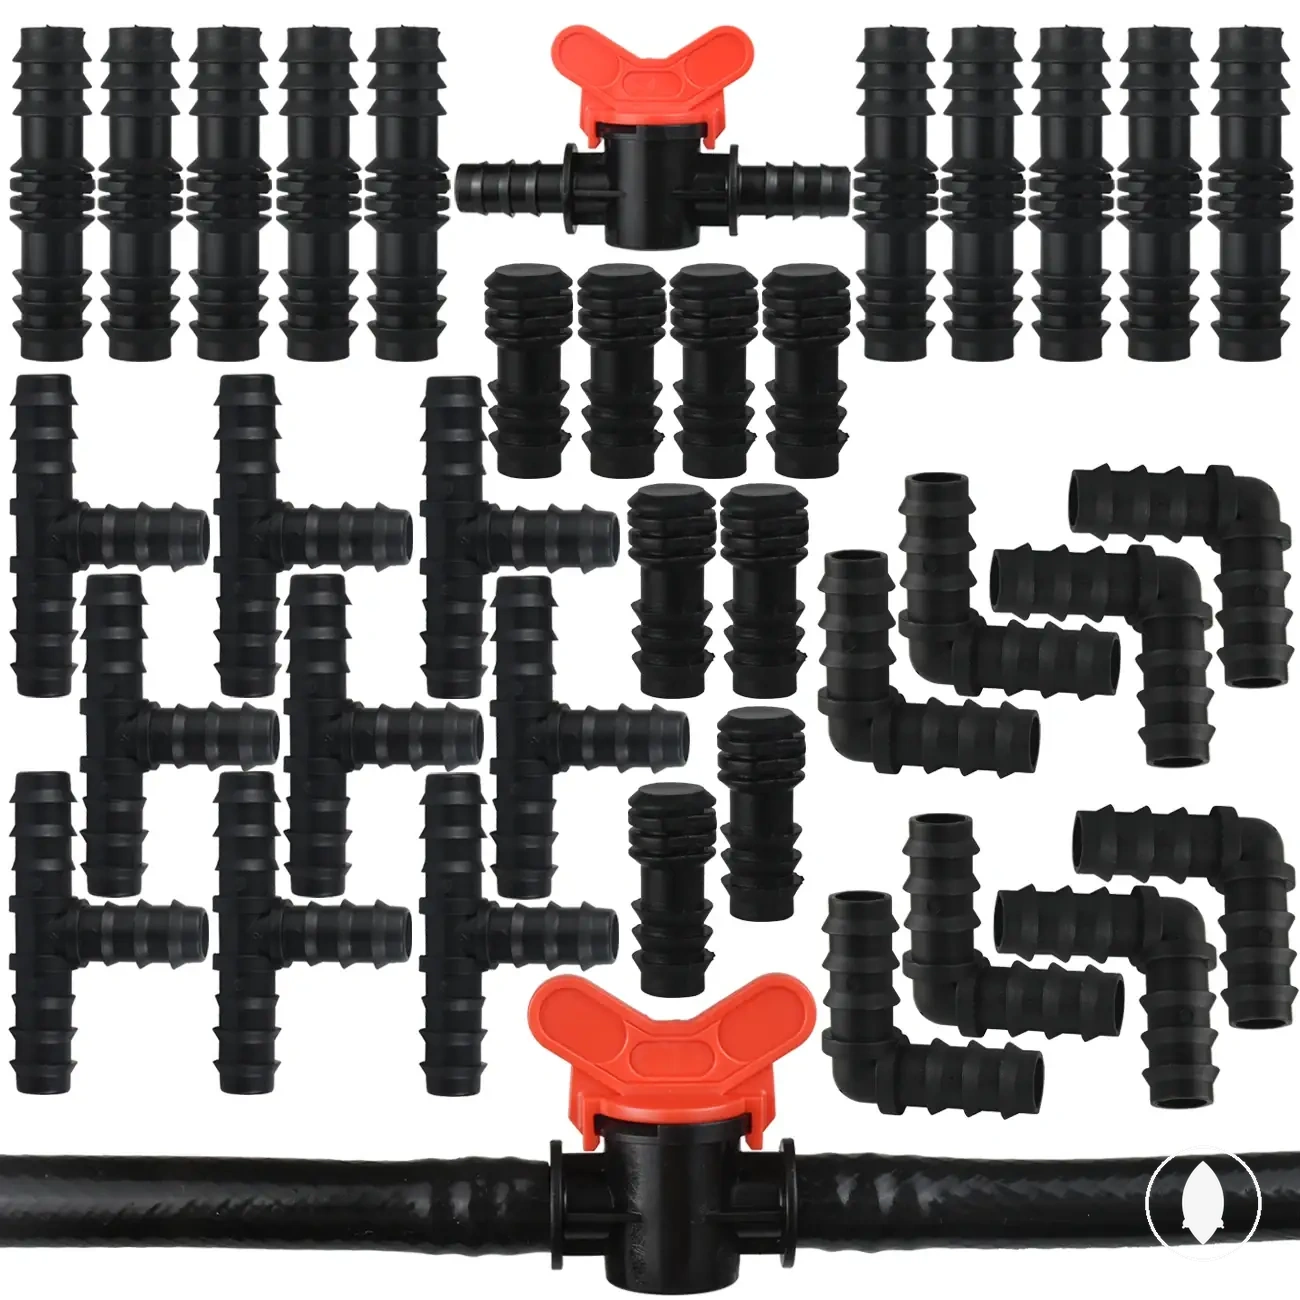
This chart shows the key steps to replace a drip irrigation fitting on an existing line, including preparing the tubing, selecting the right fitting, and securing the connection.
Using Repair Couplings for Cut or Split Tubing
A repair coupling is the appropriate local repair when cut tubing or split tubing can no longer hold the original connector securely. The replacement path changes because the damaged section should be removed and both tubing ends prepared with a clean cut edge before the repair coupling is installed.
Local repair quality depends on matching the coupling diameter, achieving suitable insertion depth, and restoring grip without creating a strained joint. If alignment places stress on the repaired area after installation, adjust the tubing or cut back the damaged section further before completing the repair.
| Condition | Recommended Action |
|---|---|
| Cut tubing with an uneven end | Create a clean cut edge before inserting the repair coupling. |
| Split tubing with a damaged section | Cut out the damaged section before fitting the tubing repair coupling. |
| Coupling diameter does not match the tubing | Select a repair coupling that matches the tubing size before installation. |
| Insertion depth is uneven | Seat the coupling evenly so both tubing ends achieve balanced engagement and grip. |
| Joint becomes strained after assembly | Realign the tubing to reduce the strained joint before returning the repaired line to use. |
| Example: A short split remains after trimming | Cut back the damaged section until both tubing ends are sound, then insert the repair coupling into the prepared ends. |
Using End Caps and Adapters During a Fitting Replacement
An end cap closes an unused line ending, while an adapter changes the fitting interface or connection direction during a fitting replacement. Use an end cap when the repaired line requires line termination, and use an adapter when the replacement changes how one connection joins another, such as a tubing-to-thread transition.
Choose these components only when the old connection role changes as part of the repair. An end cap may be suitable for temporary use or permanent use depending on the repair objective, while an adapter supports a fitting interface change rather than altering the overall irrigation layout. These parts support the replacement task only when the original connection role changes.
| Replacement Situation | Suitable Component |
|---|---|
| Unused line ending after repair | End cap to close the closure point and complete line termination. |
| Connection direction changes | Adapter to provide the required connection direction and fitting interface. |
| Tubing-to-thread transition | Adapter selected for the required tubing-to-thread transition. |
| Temporary use or permanent use after repair | Select an end cap or adapter according to the new connection role rather than as a general system modification. |
Checks After Replacing a Drip Irrigation Fitting
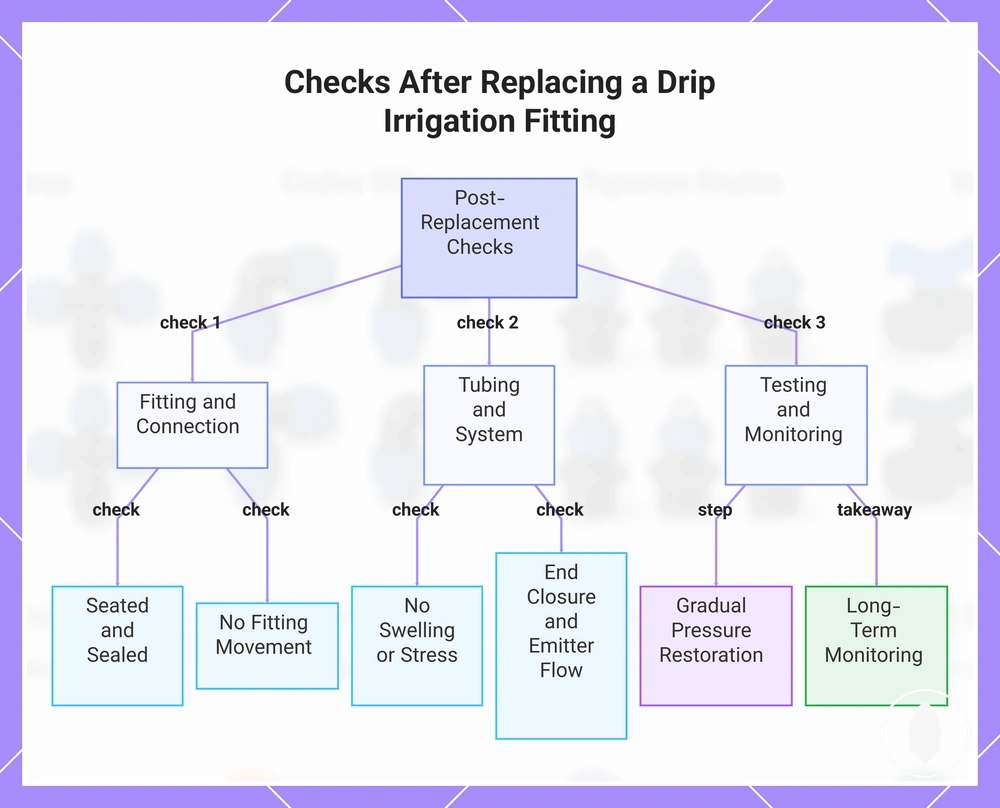
After replacing a drip irrigation fitting, confirm that the replacement is seated, sealed, and stable before returning the system to normal use. A post-replacement check should verify the seated fitting, sealed connection, water flow, and connection grip so early leak signs can be identified before regular operation continues.
Restore water pressure gradually and observe the repaired connection as water flow returns. Check for visible seepage around the fitting, confirm that the fitting does not shift under pressure, and inspect the tubing for swelling or tubing stress. Also verify that the end closure remains secure where applicable and that nearby emitter flow appears consistent with the rest of the line.
If early leak signs or fitting movement appear during the replacement test, treat them as a separate diagnostic path rather than assuming the repair has failed completely. A dry initial check does not guarantee long-term performance, so continue to monitor the connection during normal use. If leakage develops after replacement, continue with leak repairs after replacement for targeted troubleshooting.
- Confirm the seated fitting is fully engaged.
- Check that the sealed connection shows no visible seepage during slow pressure restoration.
- Verify firm connection grip without fitting movement.
- Inspect the tubing for swelling, bending, or excessive tubing stress.
- Confirm the end closure remains secure if the line ends at the repaired location.
- Check nearby emitter flow for normal operation after the replacement.
This chart outlines the essential verification steps and checks to perform after replacing a drip irrigation fitting to ensure a secure, leak-free connection.