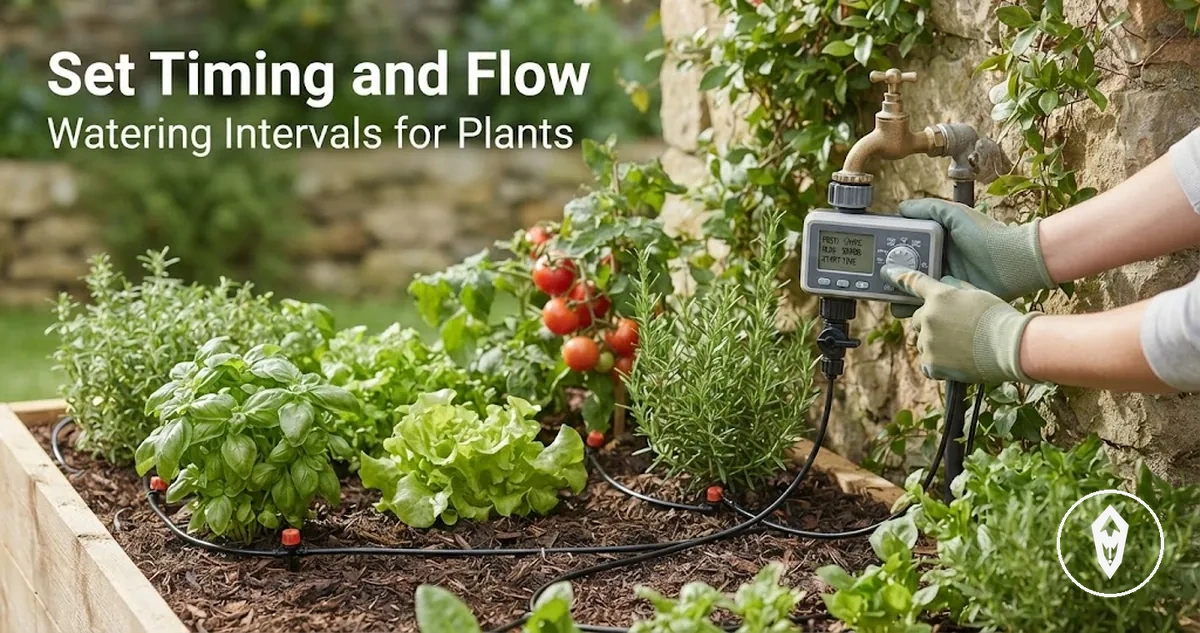
Automatic watering kit timing and flow setup
Automatic watering kit timing and flow setup starts by testing water delivery at the plants before leaving the system on a schedule. For most automatic watering kits, the timer or controller sets when watering starts, while drip emitters control how much water reaches each plant position. Check both settings under normal operating conditions. Watering frequency, cycle duration, and emitter output must work together.
Check both settings under normal operating conditions.
A small container with a fast-draining soil mix may dry sooner than a larger container that holds moisture for longer. Plant position also matters because an emitter near the stem can wet a narrow area, while an outlet near the container edge can leave part of the root zone dry. The suitable configuration moistens the active root area without repeated runoff or standing water. Settings therefore differ according to plant demand, container size, soil mix, emitter output, pressure, and local weather.
This creates a clear starting point for the timing and flow checks below.
Begin with a short test cycle, observe each outlet, and change only one setting at a time. Confirm the result from the soil response rather than from the timer display alone. This creates a clear starting point for the timing and flow checks below.
- Timer or controller setting: Select a watering frequency and cycle duration supported by the controller, then run one manual or scheduled test cycle. Confirmation cue: the timer starts and stops the kit once, and every active line receives water during that cycle.
- Emitter output setting: Place each drip emitter over the intended root area and use flow control or emitter adjustment to balance visibly strong and weak outlets. Where emitters have fixed output, change the outlet position or line arrangement instead of forcing the emitter. Confirmation cue: each plant position receives a steady outlet pattern without one container flooding before the others become moist.
- Container and plant-position check: Compare water spread across small and large containers, and move drip emitters where moisture remains concentrated in one spot. Use more than one outlet only where the container shape or root area requires broader coverage. Confirmation cue: moisture spreads through the intended root zone rather than remaining as a single wet channel.
- Soil-response check: Inspect the soil after the cycle and again before the next scheduled watering. Reduce cycle duration, emitter output, or watering frequency when the mix remains saturated, produces repeated runoff, or shows standing water. Increase one setting gradually when the root zone remains dry beyond the emitter area. Confirmation cue: the soil becomes evenly moist and then begins to drain or dry before the next cycle.
- Overwatering risk check: Repeat the test after changes in weather, plant size, container position, or controller configuration because these conditions can change water demand or delivery. Change only one variable per test so the result remains observable. Confirmation cue: the kit completes its cycle without continuous runoff, pooled water, or persistently saturated soil.
Table of Contents
How timing, duration, and flow work together
How timing, duration, and flow work together determines how much water reaches each plant during a watering cycle. Timing controls watering frequency, duration controls the run time of each cycle, and emitter output controls how quickly water is delivered. These three settings work together, while pressure sensitivity matters only when changes in water pressure alter usable flow.
How timing, duration, and flow work together determines how much water reaches each plant during a watering cycle.
How timing, duration, and flow work together is easier to understand when each setting is viewed as part of the same watering result. The image below illustrates how the timer setting, emitter output, tubing, and water delivery pattern influence soil moisture around a plant.
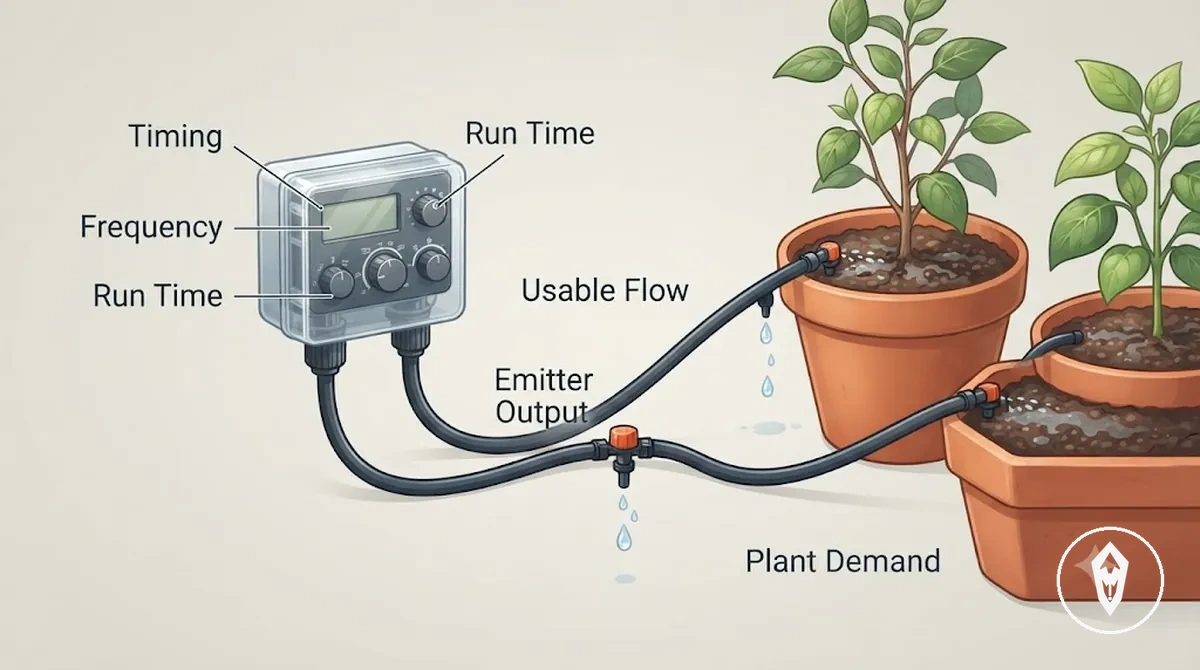
Changing watering frequency increases or reduces the number of watering cycles, while changing run time alters the amount of water delivered during each cycle. Emitter output changes the delivery rate at each outlet. Plant demand should guide these settings because larger plants or fast-draining soil often require a different combination than smaller plants or moisture-retentive containers. The comparison below helps separate these connected variables before making adjustments.
| Setting | What it changes | What to watch |
|---|---|---|
| Timing (frequency) | How often the watering cycle runs | Whether soil dries too much or remains consistently wet between cycles |
| Duration (run time) | How long each watering cycle delivers water | Whether moisture reaches the root zone without repeated runoff |
| Flow (emitter output) | How quickly each emitter delivers water | Whether plants receive even water delivery under the available pressure |
Check soil moisture after a complete watering cycle instead of relying only on timer settings. If changes in water pressure noticeably increase or reduce usable flow, review the timer, flow, and pressure guide before changing the watering schedule.
Timer settings that control watering cycles
Timer settings control when a watering cycle starts, how often it repeats, and how long water flows during each cycle. The key settings include the clock, program mode, start time, watering days, frequency, run duration, and manual run. Together, these settings define the watering cycle, while pressure matters here only if it changes usable flow.
Together, these settings define the watering cycle, while pressure matters here only if it changes usable flow.
Timer settings that control watering cycles are easier to understand when each control is linked to its effect on water delivery. The image below highlights the timer controls, tubing, emitter output, and plant watering pattern used in a typical schedule.
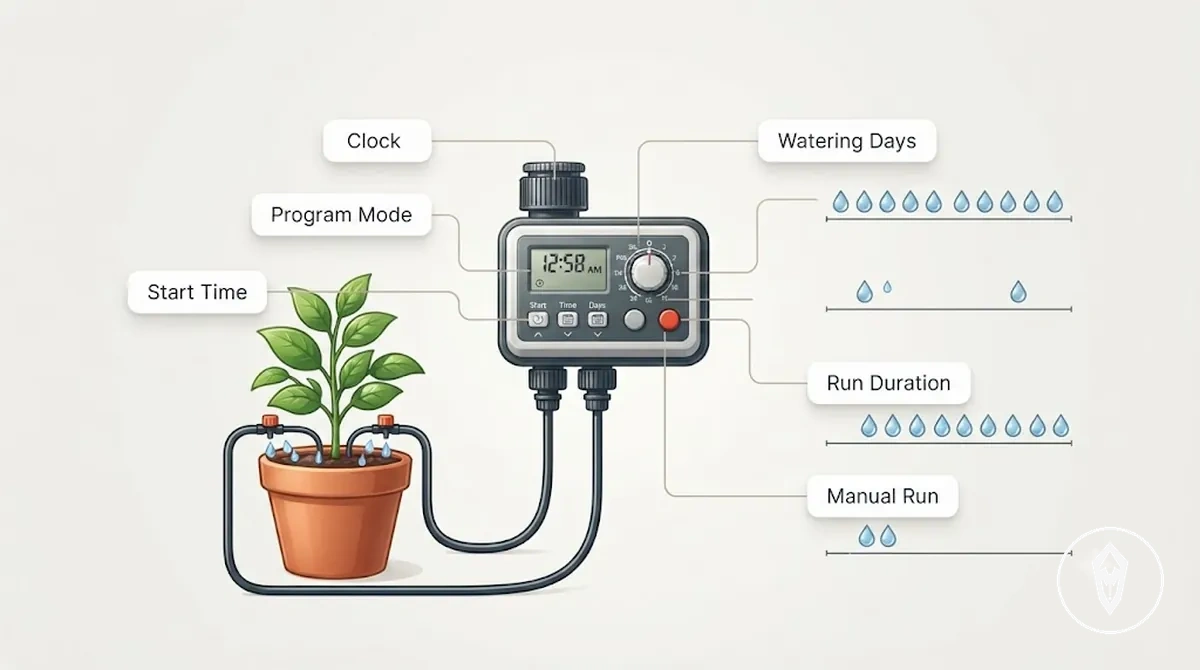
- Clock: Sets the current date and time so programmed watering cycles begin at the intended schedule.
- Program mode: Saves and repeats the selected watering cycle until the settings are updated.
- Start time, watering days, and frequency: Control when watering begins and how often scheduled cycles run.
- Run duration: Controls how long water is delivered during each watering cycle. For example, increasing frequency adds more watering events, while increasing run duration makes each watering event last longer.
- Manual run: Starts a temporary watering cycle for testing or inspection without changing the saved program, making it useful for a local system check.
Flow settings that control water delivery
Flow settings control how water is delivered after the timer starts a watering cycle. Flow control, emitters, and adjustable output determine the drip delivery rate at each outlet, while restriction reduces available flow through the drip line. Pressure affects this section only when pressure loss changes water delivery enough to create uneven delivery between emitters.
Flow settings control how water is delivered after the timer starts a watering cycle.
Flow settings that control water delivery are easier to understand when each component is linked to the water path. The image below highlights flow control, emitter output, tubing, and the resulting water delivery pattern around the plant.
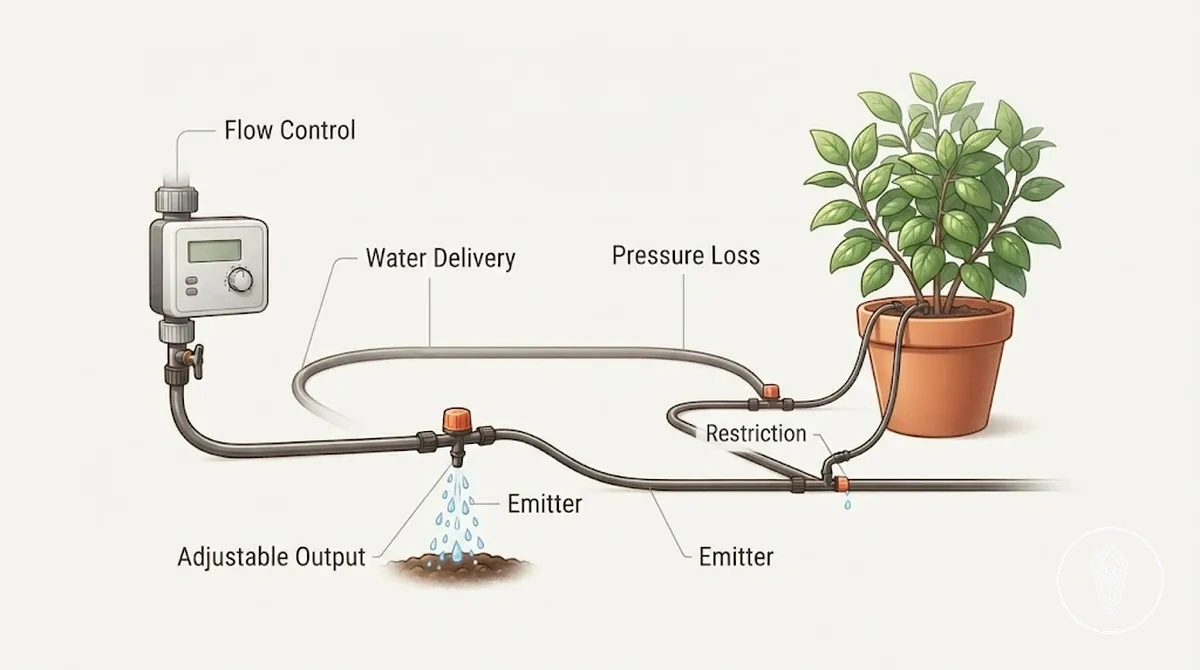
- Emitter type and adjustable output: Different emitters produce different emitter output, while adjustable output changes the flow rate delivered at each emitter.
- Flow restriction: Restriction reduces water moving through the drip line, which can decrease water delivery to downstream emitters.
- Pressure loss and uneven delivery: Noticeable pressure loss along the drip line can cause emitters farther from the water source to deliver less water than those closer to it.
- Flow adjustment and run time: Reducing flow lowers the water delivery rate during a watering cycle, while shortening run time reduces the length of the watering cycle. These adjustments change water delivery in different ways.
Choose a starting watering schedule
Choose a starting watering schedule by matching watering frequency and run time to plant and container conditions rather than following one fixed plan. Plant water demand sets the initial decision, while pot size, soil mix, exposure, season, and emitter output determine whether the starting schedule should be lighter or heavier. This approach provides a safe baseline before fine-tuning.
This approach provides a safe baseline before fine-tuning.
Choose a starting watering schedule by comparing the main conditions that influence water use. The image below highlights the timer setting, emitter output, container, soil, and water delivery pattern used to build an initial watering plan.
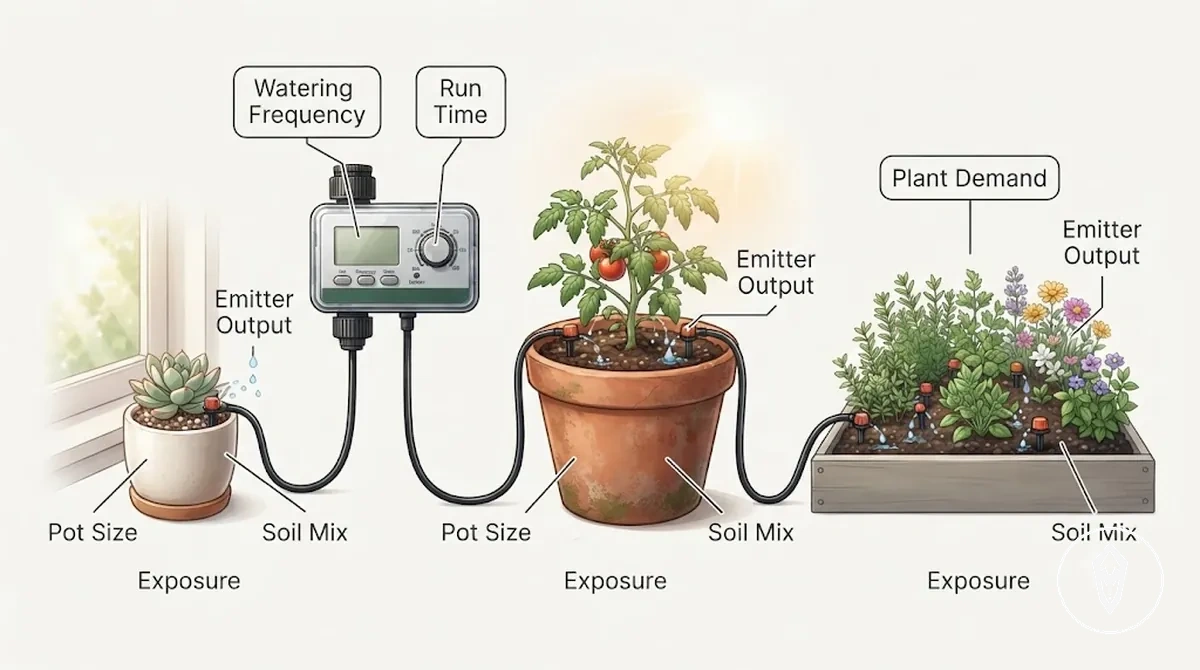
- Plant water demand: Higher plant water demand calls for a higher watering frequency, a longer run time, or both, while lower demand should be confirmed with a soil check before increasing watering.
- Pot size and soil mix: Smaller pots or fast-draining soil mixes usually require more frequent watering checks, while larger pots or moisture-retaining soil mixes often allow longer intervals between watering cycles.
- Exposure and season: Sunny or warmer conditions can increase drying speed, while shaded or cooler conditions may support a longer interval before the next watering cycle.
- Emitter output: Lower emitter output may require a longer run time to reach similar soil moisture, while higher emitter output may allow a shorter run time under comparable conditions.
- Growing situation: Indoor pots often dry more slowly than outdoor containers, while mixed plant groups should begin with a conservative starting schedule and be adjusted after observing each container.
Check soil moisture and plant condition after the first few watering cycles before making changes. Adjust one setting at a time so the effect of watering frequency, run time, or emitter output remains clear.
Set frequency from plant and container needs
Set frequency from plant and container needs by matching the watering frequency to how quickly each container loses moisture. Plant demand, container size, soil drying speed, and heat exposure determine whether the interval should be shorter or longer. This keeps the starting schedule aligned with actual growing conditions.
This keeps the starting schedule aligned with actual growing conditions.
Set frequency from plant and container needs by comparing the conditions that influence water use. The image below shows the timer setting, emitter output, container, soil, and water delivery pattern used to select an appropriate watering interval.
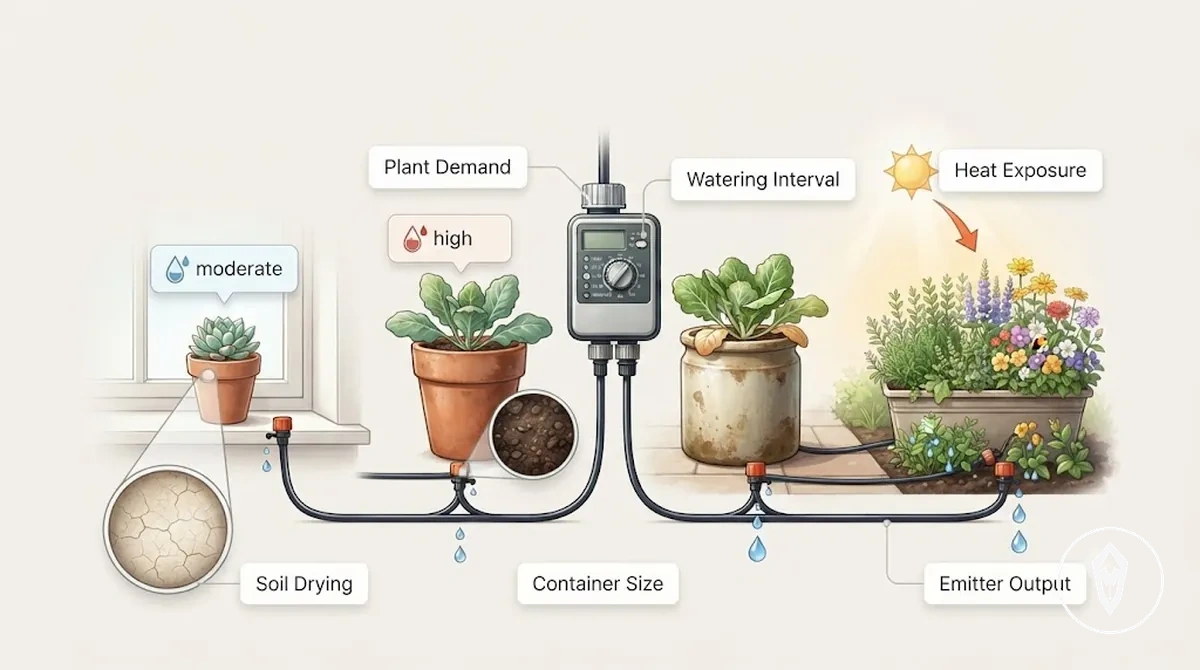
- Plant demand: Higher plant demand supports a shorter watering interval, while lower demand usually allows a longer interval after checking soil moisture.
- Container size: Smaller containers often dry sooner than larger containers, so they typically need more frequent watering intervals.
- Heat exposure and soil drying speed: Greater heat exposure or faster soil drying speed supports a shorter interval, while cooler or shaded conditions may allow a longer interval.
- Mixed containers: When mixed containers have different water needs, adjust emitter output for individual containers instead of using one shared frequency.
Check soil moisture after the first watering cycles and change only the watering frequency if needed. Confirm the result before adjusting another setting.
Set run time from emitter output and soil response
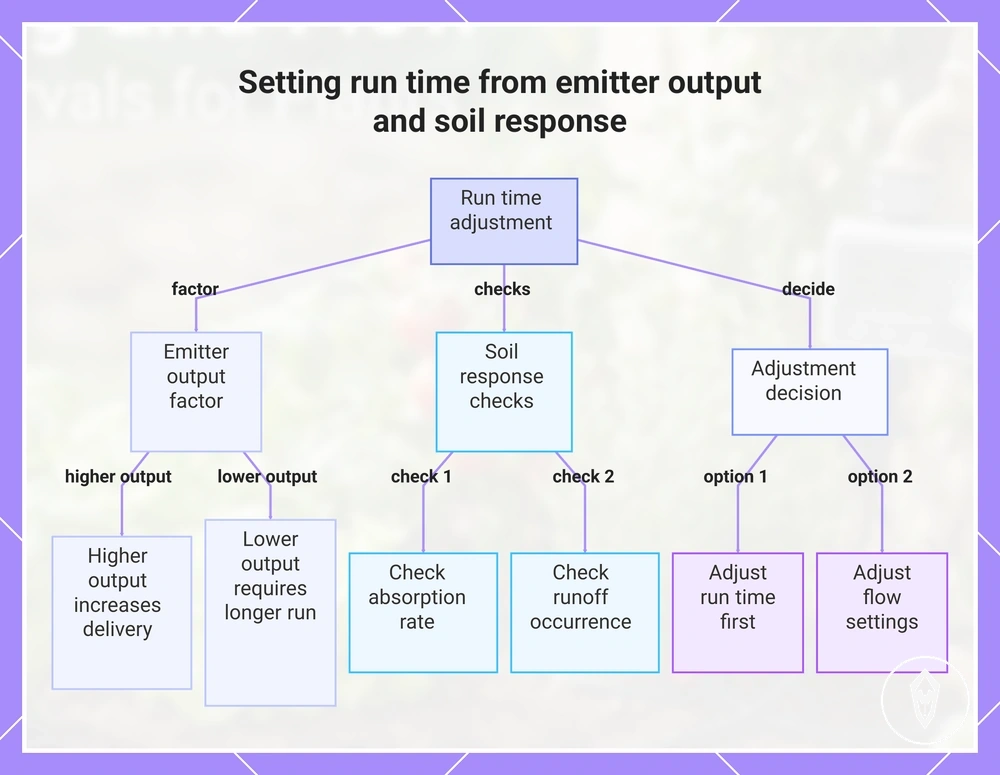
Set run time from emitter output and soil response by changing the cycle duration according to how water reaches the root zone. Emitter output controls the amount of water delivered during each watering cycle, while soil response shows whether absorption is reaching the intended area. Adjust run time when the water amount or moisture reach needs to change before changing flow settings.
Adjust run time when the water amount or moisture reach needs to change before changing flow settings.
A longer run time extends the watering cycle, while a shorter run time reduces the duration of water delivery. For example, if emitter output is suitable but the soil remains dry beyond the root zone, increasing cycle duration can help improve moisture reach. If runoff appears before the root zone receives enough water, check emitter output and delivery conditions before extending the cycle.
- Emitter output: Higher emitter output delivers more water during the same cycle duration, while lower output may require a longer run time to improve soil wetting.
- Absorption: Check whether water moves into the soil instead of collecting on the surface. Slow absorption may require a run time adjustment rather than a change to flow.
- Runoff: Reduce run time when water leaves the root area before the soil can absorb the delivered water.
- Root-zone wetting: Increase or reduce run time based on whether the intended root zone receives enough moisture during the watering cycle.
- Flow adjustment decision: Change run time first when emitter output is suitable but the cycle duration does not match soil response. Change flow settings when the delivery rate itself needs adjustment.
This chart shows the key factors and decisions for adjusting irrigation run time based on emitter output and soil response.
Program the watering timer or controller
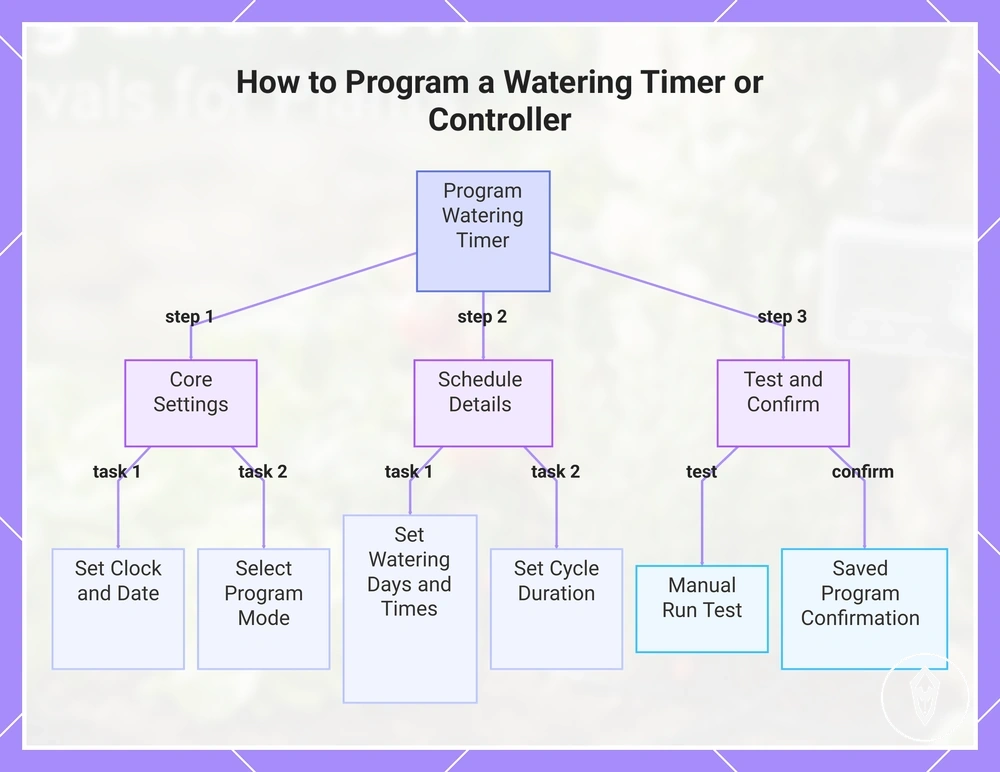
Program the watering timer or controller by configuring the schedule settings that control when the watering cycle runs. Set the clock, date, program mode, watering days, start times, and cycle duration to match the starting schedule selected earlier. Confirm the saved program before relying on the controller to run the watering cycle.
Confirm the saved program before relying on the controller to run the watering cycle.
The watering timer or controller should be configured after the physical system is ready and the watering plan is chosen. For related installation steps, check that the setup is complete before programming the schedule. Follow the controller settings in order and confirm each saved value before moving to the next setting.
- Clock and date: Set the clock and date on the watering timer or controller so scheduled cycles follow the intended time reference. Confirmation cue: the displayed clock and date match the required settings.
- Program mode: Select the program mode used to store the watering schedule. Confirmation cue: the controller shows the selected program is ready for schedule settings.
- Watering days and start times: Choose the watering days and start times that match the starting schedule. Confirmation cue: the controller displays the selected days and start times before saving.
- Cycle duration: Set the cycle duration or run duration for each watering event. Confirmation cue: the saved duration matches the planned watering cycle.
- Manual run: Use manual run to test the programmed cycle and check water delivery through the system. Confirmation cue: the cycle starts correctly before using the saved program.
- Saved program confirmation: Review the saved program after all settings are entered. Confirmation cue: the programmed schedule matches the starting schedule chosen for the plants and containers.
This chart shows the three main stages to configure, test, and confirm the watering schedule on a timer or controller.
Set clock, date, and program mode
Set the clock, date, and program mode on the controller before entering the watering program details. These settings establish the controller time basis and schedule structure used for automatic watering cycles. Confirm the local time settings first because an incorrect clock or date can shift watering to the wrong part of the day.
- Clock setting: Set the clock on the controller to the correct current time. Confirmation cue: the displayed time matches the intended time reference for the watering program.
- Date setting: Set the date on the controller so the watering program uses the correct calendar information. Confirmation cue: the displayed date matches the selected calendar setting.
- Program mode: Select the program mode used for the watering program. Confirmation cue: the controller shows the selected mode before schedule details are entered.
- Manual mode and automatic mode: Use manual mode when checking a cycle and automatic mode when running the saved watering program. Confirmation cue: the selected mode matches the intended controller action.
Set watering days and start times
Set watering days and start times in the controller to match the selected watering schedule. Choose the watering days first, then set the start times that begin each watering cycle. The selected timing should reflect plant needs and local conditions such as heat exposure, because unsuitable timing can increase plant stress when evaporation affects water availability.
- Watering days: Select the watering days that match the chosen schedule. Confirmation cue: the controller displays the selected days before moving to start time settings.
- Interval program: Select the interval program when the schedule uses a repeating frequency. Confirmation cue: the controller shows the selected interval before saving the schedule.
- Start times: Enter the start times after the watering days or interval program is selected. Confirmation cue: the controller displays the saved start times with the selected schedule.
- Heat exposure check: Review the start times when heat exposure or evaporation could affect watering results. Confirmation cue: the schedule avoids timing conditions that may increase plant stress, such as watering during periods of high local heat when evaporation is a concern.
Set cycle duration for each run
Set cycle duration for each run by matching the run time to emitter flow and the way water moves through the soil. Cycle duration controls how long each watering event continues, while soil wetting depth and runoff indicate whether the selected duration is suitable. Confirm the saved duration with a test cycle before leaving the system unattended.
Confirm the saved duration with a test cycle before leaving the system unattended.
A longer cycle duration increases the time available for emitter flow to deliver water, while a shorter run time reduces the length of the watering event. If emitter flow is suitable but water is not reaching the intended soil area, adjust the saved duration before changing the emitter setting. If runoff appears before soil absorption occurs, reduce the duration and check the next test cycle.
- Cycle duration: Set the run time for each watering event after watering days and start times are selected. Confirmation cue: the saved duration matches the planned watering cycle.
- Emitter flow: Check emitter flow during the test cycle to confirm the delivered water amount matches the selected cycle duration. Confirmation cue: water delivery remains consistent without unexpected runoff.
- Soil wetting depth: Check whether soil wetting depth reaches the intended root area after the cycle. Confirmation cue: moisture reaches the required area without relying on excessive cycle duration.
- Runoff check: Reduce cycle duration when runoff appears before the soil can absorb the delivered water. Confirmation cue: the next test cycle shows improved absorption and reduced surface water loss.
- Repeat cycles and saved duration test: Test repeat cycles after saving the duration before leaving the system unattended. Confirmation cue: the saved duration performs as expected across the planned watering events.
Adjust drip emitter and flow control settings
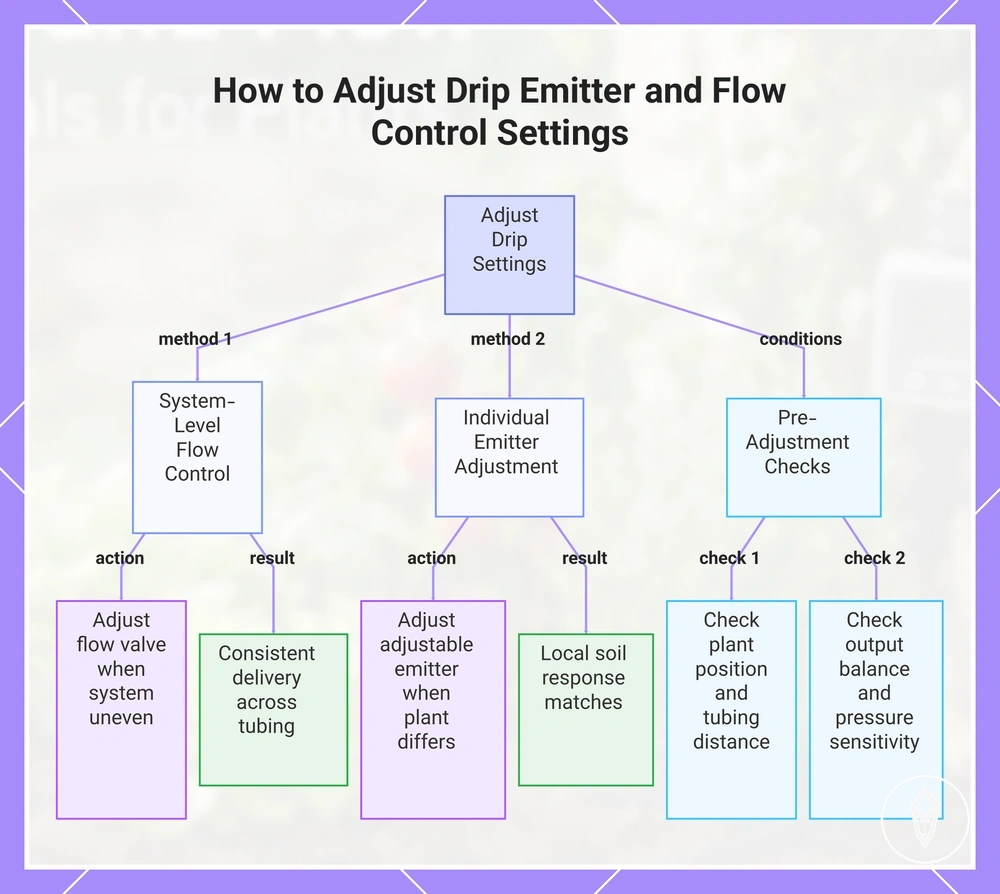
Adjust drip emitters and flow control settings after the timer schedule is set by balancing water delivery at each plant position. Flow control changes the overall delivery through the system, while adjustable emitters refine water output at individual locations. The correct adjustment depends on plant position, tubing distance, output balance, and pressure sensitivity conditions.
Use kit-level flow control adjustments when the full drip line shows uneven delivery.
Use kit-level flow control adjustments when the full drip line shows uneven delivery. Use emitter-level adjustments when one plant position needs a different water output from nearby positions. Change emitter flow instead of the timer when the watering schedule is correct but individual outlets need balancing.
- Flow valve: Adjust the flow valve when the overall system output needs a change. Confirmation cue: the drip emitters show more consistent delivery across the connected tubing.
- Adjustable emitter: Adjust an adjustable emitter when a specific plant position receives too much or too little water compared with other outlets. Confirmation cue: the local soil response matches the intended water delivery.
- Plant position and tubing distance: Check plant position and tubing distance when emitter locations receive different amounts of water. Confirmation cue: output balance improves after emitter adjustment.
- Output balance: Compare emitter delivery before changing multiple settings. Confirmation cue: balanced flow is achieved without creating new uneven delivery points.
- Pressure sensitivity: Review pressure sensitivity when pressure changes create uneven delivery between emitters. Confirmation cue: the adjustment addresses whether the issue affects the whole system or a single outlet.
This chart shows the two main adjustment methods—system-level flow control and individual emitter adjustment—and the pre-adjustment checks needed to balance water delivery.
Match emitter output to each plant position
Match emitter output to each plant position by adjusting water delivery for the container and root area being served. Emitter placement should support soil surface wetting near the plant while allowing moisture to reach the root zone. The correct adjustment depends on plant position, pot size, and how water spreads from the emitter location.
- Plant position: Place the emitter according to the plant position so water reaches the intended growing area. Confirmation cue: soil surface wetting appears close to the active root zone rather than away from the plant.
- Pot size: Match emitter output to pot size because a larger pot may need different water distribution than a small pot on the same line. Confirmation cue: each container receives suitable moisture coverage for its size.
- Root zone: Adjust emitter placement so water reaches the root zone instead of only wetting the soil surface. Confirmation cue: moisture extends into the root area after the watering cycle.
- Emitter placement: Check emitter placement when the wetting pattern does not match the plant position. Confirmation cue: the emitter location supports more even moisture distribution around the plant.
- Larger pot and small pot comparison: A larger pot and a small pot connected to the same line may require different emitter output because their soil areas and root zones differ. Confirmation cue: both plant positions receive balanced water delivery for their container conditions.
Balance flow across multiple plants
Balance flow across multiple plants by checking how water delivery changes between connected plant positions. Balanced flow should match emitter output, plant demand, tubing distance, and line pressure conditions so each plant receives suitable water delivery. Check uneven watering before changing run time or other schedule settings.
Check uneven watering before changing run time or other schedule settings.
When multiple plants share the same line, differences in tubing distance and plant demand can create uneven delivery. Use these checks to decide whether emitter adjustment is needed instead of extending the watering cycle.
- Tubing distance: Check tubing distance when plants farther along the line receive different water delivery from closer plants. Confirmation cue: compare flow delivery between plant positions before making adjustments.
- Emitter output: Compare emitter output when one plant receives more or less water than another connected plant. Confirmation cue: adjust the emitter when uneven watering affects individual plants while the schedule remains suitable.
- Plant demand: Match flow delivery to plant demand because different plant positions may require different water amounts. Confirmation cue: each plant receives suitable moisture for its growing conditions.
- Line pressure: Check line pressure conditions when uneven watering appears across the same tubing line. Confirmation cue: identify whether the imbalance comes from delivery differences or pressure-related variation.
- Uneven watering symptoms: Review emitter adjustment when one outlet shows uneven delivery while other outlets perform as expected. Confirmation cue: local emitter changes improve balance without increasing run time.
Test watering depth and coverage
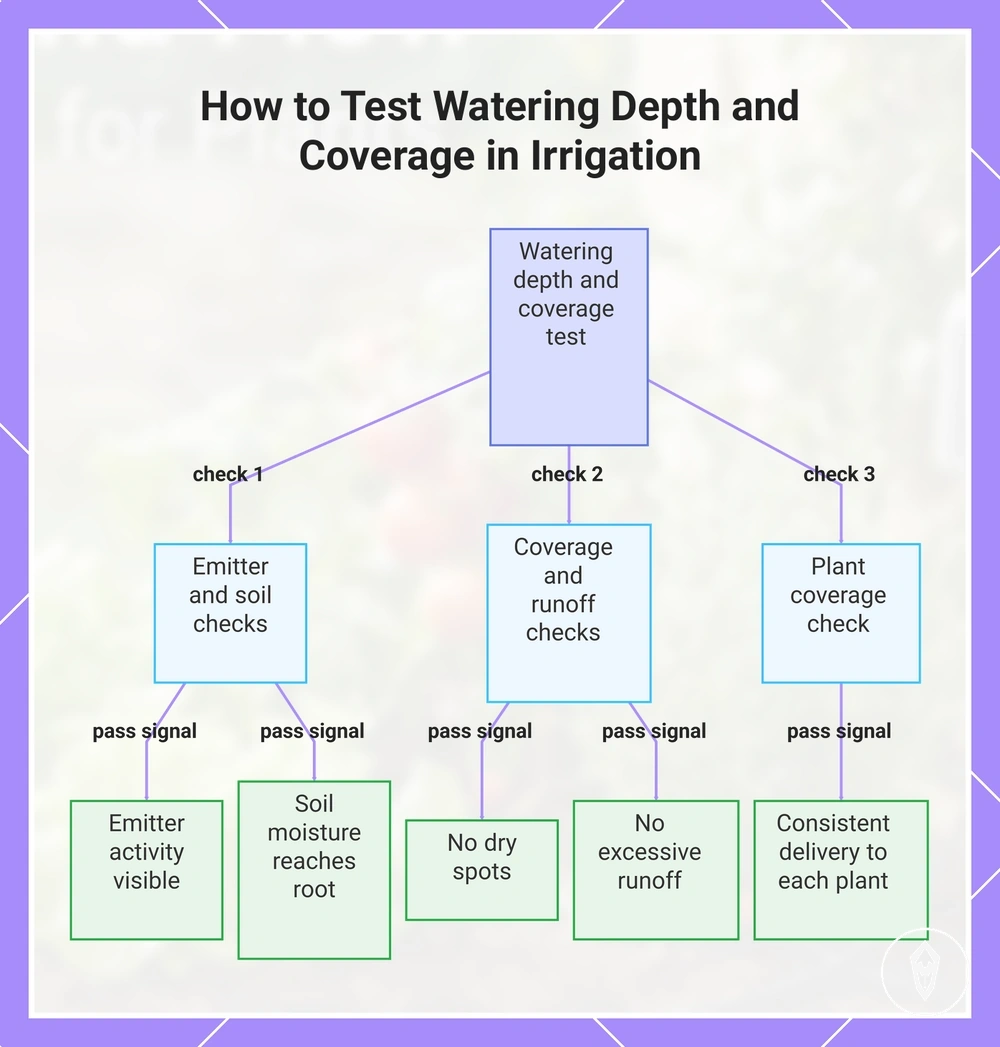
Test watering depth and coverage by running a test cycle and checking how water reaches the intended plant area. The test confirms emitter activity, soil wetting depth, and plant coverage before relying on automatic operation. Adjust the settings if the test shows dry spots, runoff, or uneven coverage.
Adjust the settings if the test shows dry spots, runoff, or uneven coverage.
Check the observable results after the test cycle rather than relying only on the scheduled settings. Use these checks to confirm whether water delivery reaches the required area without creating excessive runoff.
- Test cycle: Run a test cycle to verify that the cycle length provides suitable water delivery for the setup. Pass signal: the cycle completes and water reaches the intended plant area.
- Emitter activity: Check each emitter during the test cycle to confirm that every active outlet delivers water. Pass signal: emitter activity is visible without missed outlets.
- Soil wetting depth: Check soil wetting depth after the cycle to confirm moisture reaches the root area. Pass signal: moisture reaches the required depth without leaving the active area dry.
- Dry spots: Look for dry spots or missed areas after watering. Pass signal: coverage reaches the intended growing area without repeated dry zones.
- Runoff: Check for runoff during and after the test cycle. Pass signal: water is absorbed without excessive surface loss.
- Plant coverage: Review plant coverage across the watering area to confirm consistent delivery. Pass signal: each plant position receives suitable coverage before automatic operation continues.
This chart shows the key checks and pass signals for verifying that an irrigation test cycle delivers water to the intended plant area without runoff or dry spots.
Run a short test cycle
Run a short test cycle to verify the local delivery pattern before relying on automatic operation. Use manual start to begin the cycle, then check emitter output, tubing movement, leaks, dry areas, and runoff during observation. The test should show how water moves through the system without flooding the container.
- Manual start: Start the short test cycle using the controller manual mode. Confirmation cue: water begins moving through the tubing and reaches the active emitters.
- Observation: Observe emitter output during the cycle to check the delivery pattern. Confirmation cue: water reaches the expected area without missed delivery points.
- Tubing movement and leaks: Check tubing movement and visible leaks while water flows. Confirmation cue: tubing remains connected and water stays within the intended path.
- Dry areas: Check for dry areas after the cycle to identify missed coverage. Confirmation cue: areas needing adjustment are visible before normal operation continues.
- Runoff and stop point: Check runoff during the cycle and stop the test at the selected stop point. Confirmation cue: the test reveals the delivery pattern without creating excess water accumulation.
Check soil moisture after water settles
Check soil moisture after water settles to confirm whether water reaches beyond the soil surface and into the root zone. The moisture check should compare surface wetness with root-zone moisture because visible wet soil does not always show deeper water movement. Use the results as a local adjustment signal for the watering setup.
Use the results as a local adjustment signal for the watering setup.
Container drainage, water retention, and plant response provide additional signals after the soil check. Fast-draining mixes may need a different follow-up adjustment from slow-draining mixes because moisture movement and retention can differ between soil conditions.
- Surface wetness: Check soil surface wetness after water settles to confirm where moisture is visible. Confirmation cue: surface moisture appears in the intended watering area without relying only on the top layer.
- Root-zone moisture: Check root-zone moisture to confirm whether water reaches deeper into the growing area. Confirmation cue: deeper moisture is present where the plant requires water access.
- Container drainage: Check container drainage after watering to observe how excess water leaves the container. Confirmation cue: drainage occurs without continued water accumulation.
- Water retention: Compare water retention when different soil mixes are used. Confirmation cue: fast-draining and slow-draining mixes receive follow-up adjustments based on moisture changes.
- Plant response: Observe plant response after the soil moisture check. Confirmation cue: plant condition supports the decision to keep or adjust the watering settings.
Prevent overwatering with timing and flow changes
Prevent overwatering by changing timing settings or flow settings when observable signs show that water delivery exceeds what the plant area can absorb. Wet soil, runoff, and repeated saturation can indicate that watering settings need review. The adjustment path depends on whether timing changes or flow changes better match the observed condition.
Wet soil, runoff, and repeated saturation can indicate that watering settings need review.
Timing symptoms often appear when watering cycles provide more frequent water than the soil can use between events. Wet soil that stays saturated may require shorter cycles or a longer interval between watering events. Runoff after a cycle can also indicate that the watering duration or frequency needs review before increasing other settings.
Flow symptoms often appear when emitter delivery is higher than the plant area requires.
Flow symptoms often appear when emitter delivery is higher than the plant area requires. Lower flow can help when emitter output creates excess water around individual plants, while checking emitter performance helps separate a flow issue from a timing issue. If only specific areas show excess water, review the local emitter setting before changing the full schedule.
| Symptom | Likely setting issue | Check | Adjustment |
|---|---|---|---|
| Wet soil or repeated saturation | Watering frequency or cycle duration may be too high | Check soil condition between watering cycles and review timing changes | Use shorter cycles or a longer interval when soil remains overly wet |
| Runoff after watering | Water delivery may exceed soil absorption | Check cycle duration, soil response, and emitter output | Reduce watering duration or use lower flow when emitter delivery is excessive |
| Yellowing leaves with excess moisture signs | Overwatering conditions may be affecting the plant area | Check wet soil, saturation, and watering pattern | Review timing changes and flow changes before making further adjustments |
| Excess water from individual outlets | Emitter flow may be higher than needed at that plant position | Check emitter output and local moisture conditions | Use lower flow instead of changing the entire watering schedule |
Use overwatering and flow problems when symptoms need broader checks beyond timing and flow changes. Choose the efficient setting adjustment by matching the symptom to the cause: shorter cycles for excess timing, lower flow for excessive emitter delivery, or a longer interval when soil remains saturated between watering events. For efficient watering settings, confirm the adjustment with another observation cycle before leaving the system unattended.
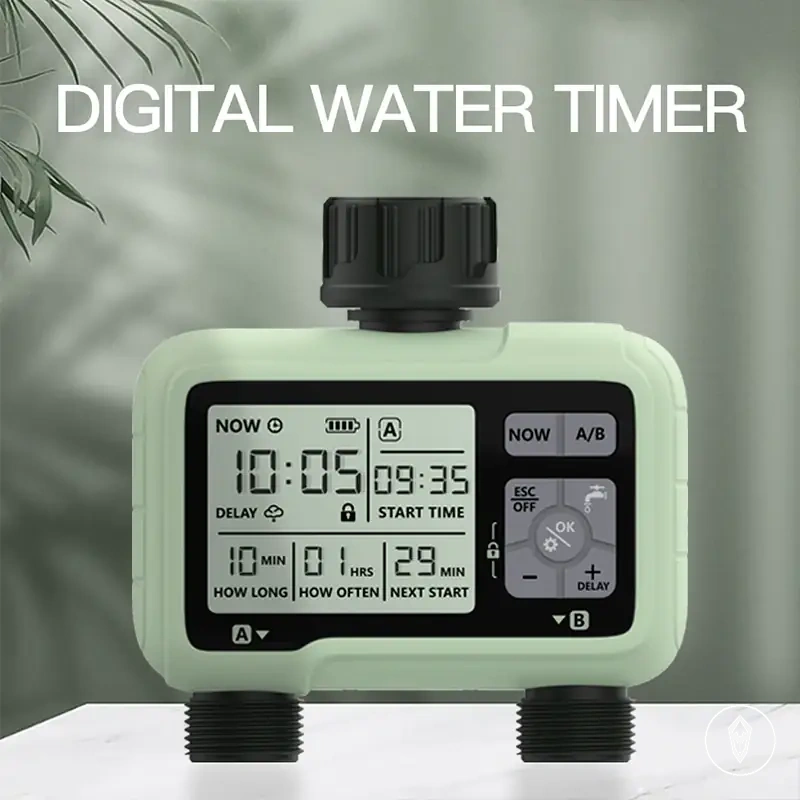
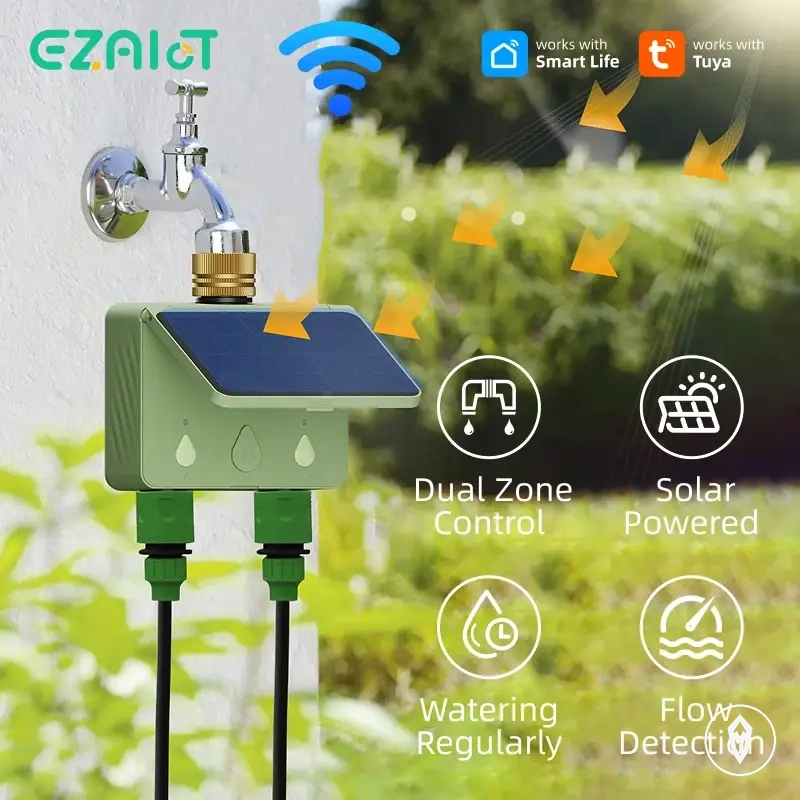
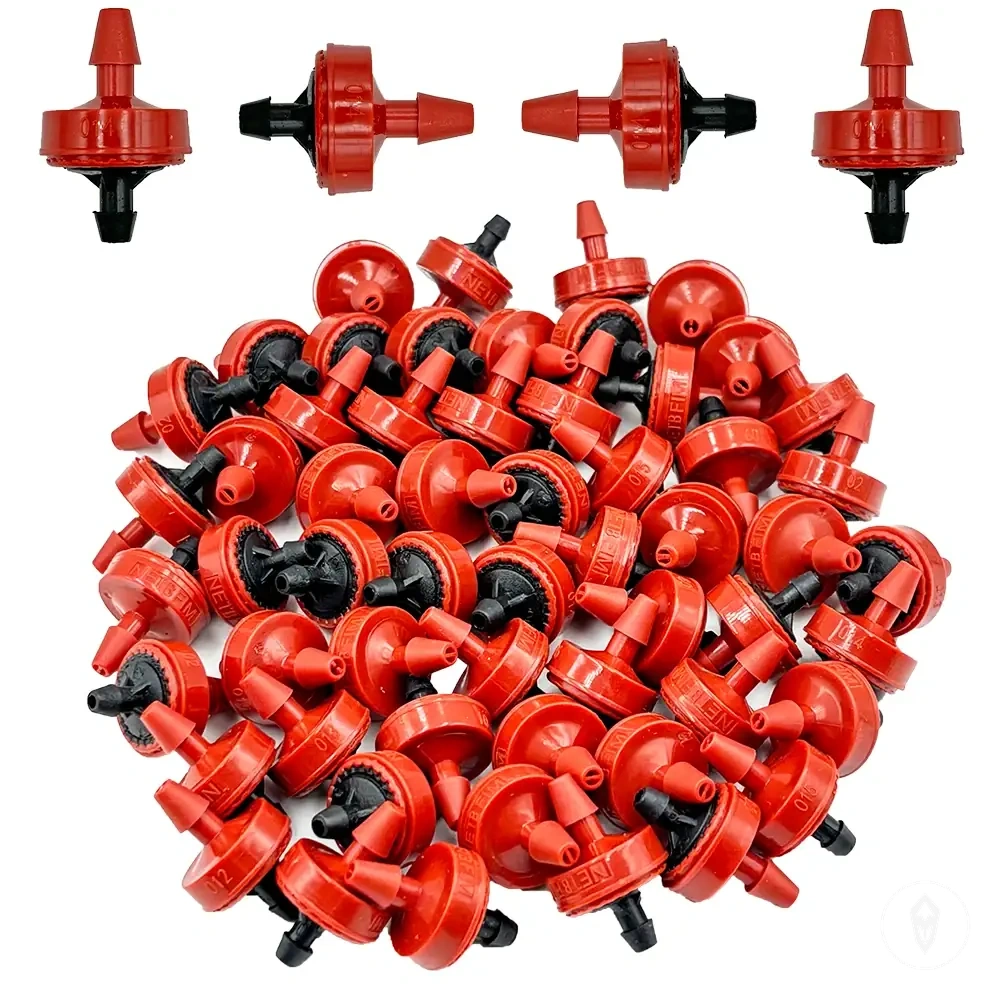
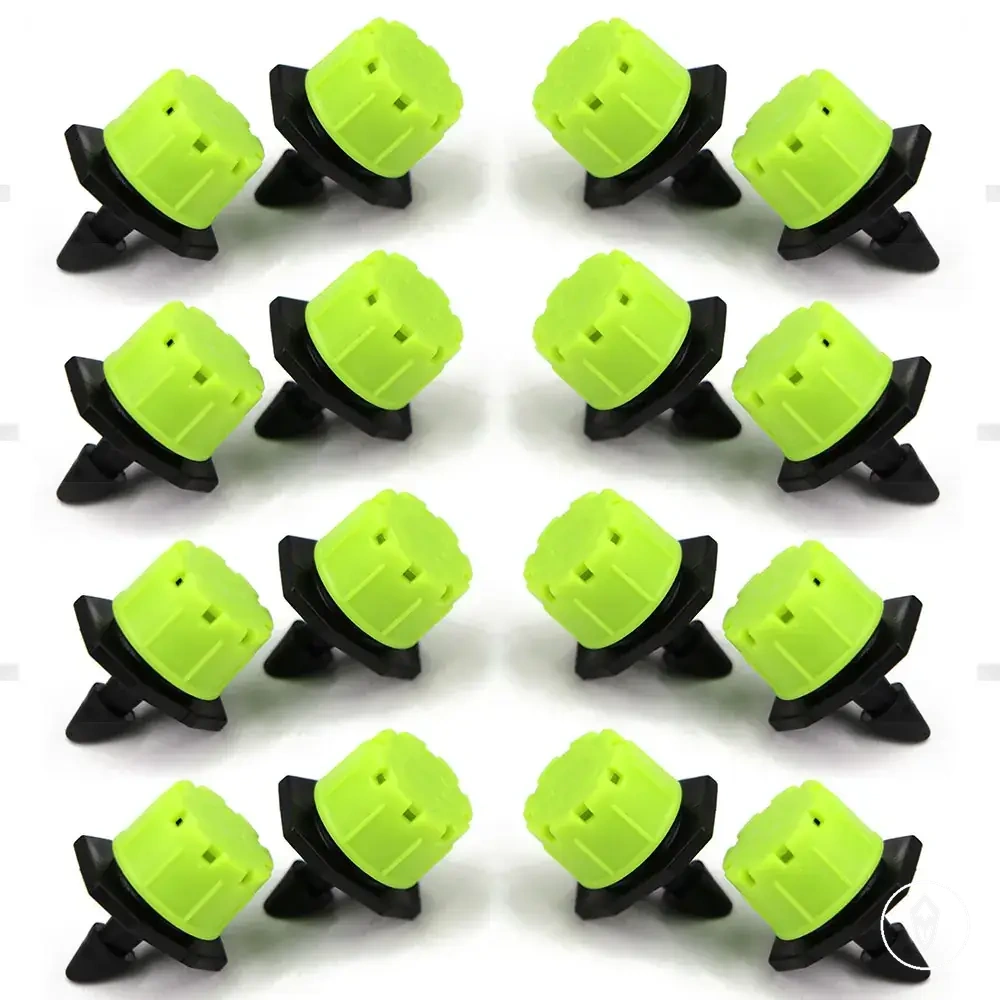
The products below are useful examples for comparing available options.
The products below are useful examples for comparing available options. Before buying, check that the compatibility criteria, key features, and product details match your needs.
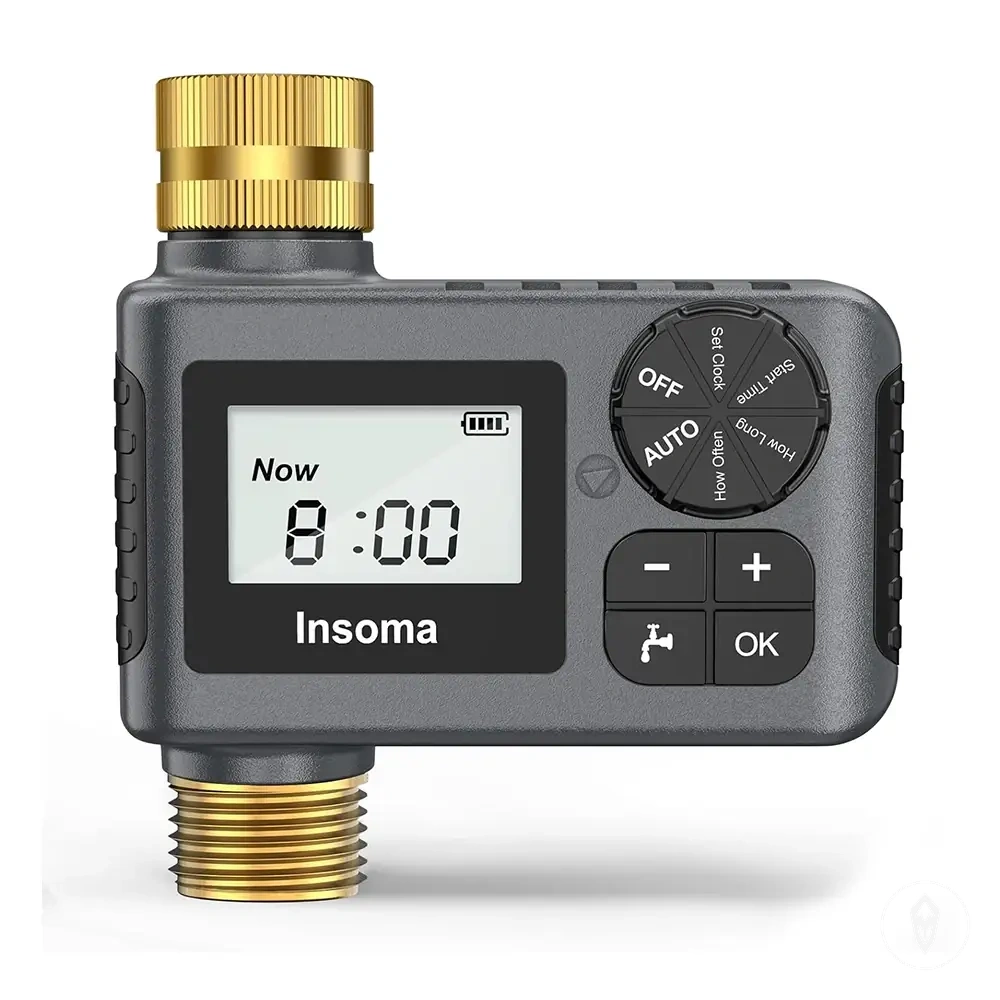
Shorten run time when soil stays wet
Shorten run time when wet soil remains after watering and the cycle duration appears longer than the soil can absorb. Check whether late-cycle runoff or continued moisture between cycles is linked to the watering duration before changing emitter output. The local adjustment depends on whether the issue is cycle duration, flow delivery, or watering frequency.
Wet soil that remains after a watering cycle can indicate that the cycle duration needs review.
Wet soil that remains after a watering cycle can indicate that the cycle duration needs review. If late-cycle runoff appears near the end of watering, shorten run time and observe the drainage response before making further changes. When soil remains wet between cycles, frequency may also need adjustment instead of only reducing the cycle duration.
A flow change affects outlet delivery, while a cycle duration change affects how long water is applied.
Emitter output can create wet conditions when a local outlet delivers more water than the plant area absorbs. Check emitter output when one area stays wetter than others, and consider lower flow when the delivery rate is higher than needed. A flow change affects outlet delivery, while a cycle duration change affects how long water is applied.
| Symptom | Likely setting issue | Check | Adjustment |
|---|---|---|---|
| Wet soil after watering | Cycle duration may be longer than the soil absorption needs | Check soil condition after the cycle and review run time | Shorten run time and observe the next watering response |
| Late-cycle runoff | Water delivery may continue after the soil has absorbed enough moisture | Check when runoff appears during the cycle | Shorten run time before changing other settings |
| Uneven wet areas | Emitter output may differ between plant positions | Check emitter output and local moisture conditions | Use lower flow when the issue is local delivery rather than timing |
| Wet soil between cycles | Watering frequency may be too frequent for the conditions | Check the interval between watering events and drainage response | Use a longer interval when soil remains wet before the next cycle |
Reduce emitter flow when one area gets too much water
Reduce emitter flow when one area receives too much water while other areas remain suitable. A single overwatered area usually points to a local emitter balance issue rather than timer duration. Check the emitter opening, plant position, and uneven distribution before changing settings that affect the wider watering schedule.
Reduce emitter flow when one area receives too much water while other areas remain suitable.
Localized saturation can occur when one emitter delivers more water than the plant position requires. Compare the affected area with nearby areas to identify whether the issue is limited to one outlet or related to broader line balance.
| Symptom | Likely setting issue | Check | Adjustment |
|---|---|---|---|
| One area has localized saturation | Emitter opening may allow more water than the plant position needs | Check the emitter opening and local soil moisture | Reduce emitter flow at the affected outlet |
| One plant position receives excess water | Emitter setting may not match the plant position | Check the plant position and local delivery pattern | Adjust the emitter instead of changing timer duration |
| Uneven distribution between outlets | Line balance may be affecting water delivery | Check multiple outlets for differences in flow delivery | Balance emitter flow where local differences appear |
| All areas receive too much water | Timing or broader flow settings may need review | Check whether excess water occurs across multiple plant positions | Review wider settings instead of only changing one emitter |
Recheck settings after weather or plant changes
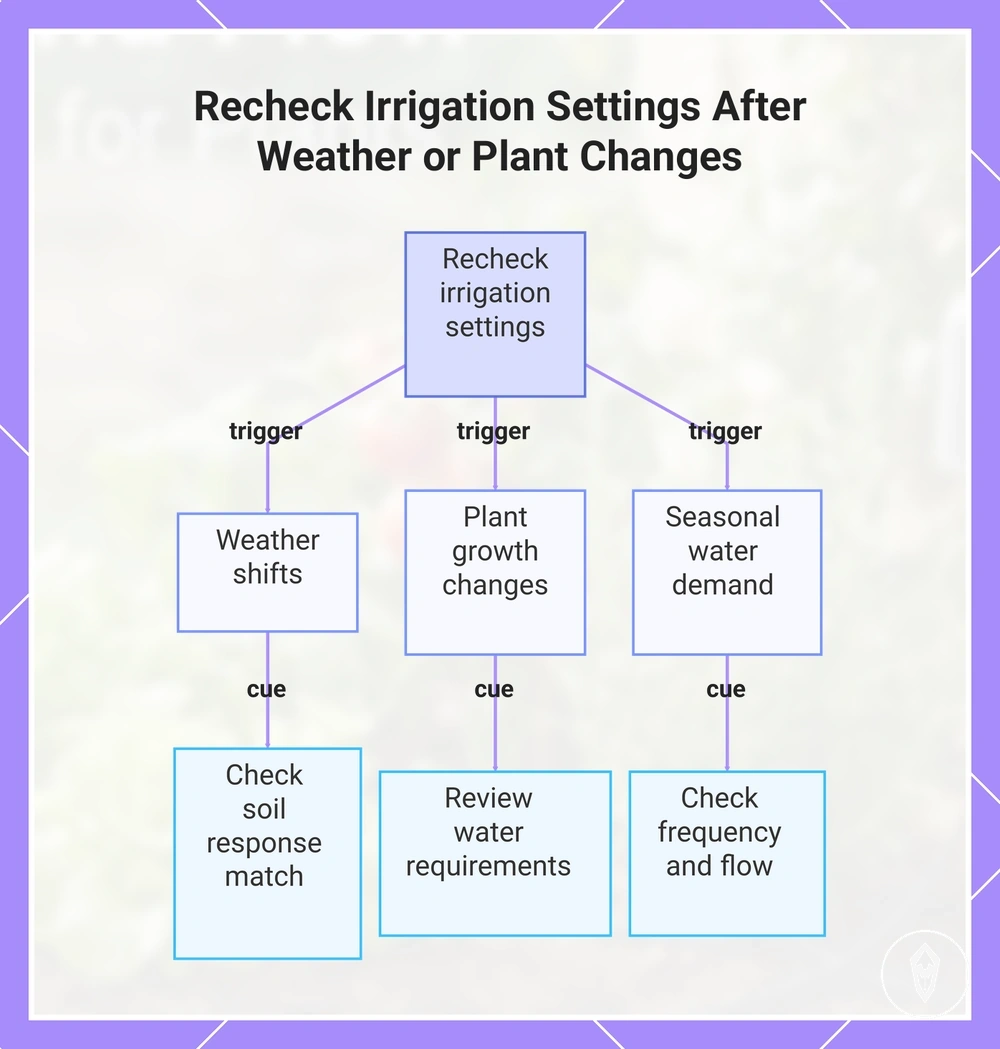
Recheck settings after weather or plant changes when timing and flow no longer match current plant needs. Weather shifts, plant growth, and seasonal water demand can change how soil responds to watering. Review the settings when observed conditions show that previous adjustments may no longer suit the plant environment.
Changes in growing conditions can alter how water moves through the system.
Changes in growing conditions can alter how water moves through the system. Use these checks to identify when timing, flow, or controller settings need review.
- Weather shifts: Check settings after changes in temperature, rainfall, or drying conditions. Confirmation cue: soil response shows whether current watering settings still match the changed environment.
- Plant growth: Review settings as plant growth changes water requirements. Confirmation cue: plant growth and soil response indicate whether water delivery remains suitable.
- Seasonal water demand: Recheck settings when seasonal water demand changes. Confirmation cue: watering frequency and flow settings continue to match current conditions.
- Clogged emitters: Check emitters when water delivery becomes uneven. Confirmation cue: emitter output is checked before changing timing settings.
- Battery status: Check battery status when controller operation does not match expected settings. Confirmation cue: the controller has enough power to apply stored settings.
- Controller memory: Review controller memory when saved settings appear different from expected. Confirmation cue: stored settings match the intended watering program.
Use ongoing maintenance as part of regular setting reviews when conditions continue to change. Continue checking soil response after adjustments so timing and flow settings remain aligned with current plant needs.
Use ongoing maintenance as part of regular setting reviews when conditions continue to change.
This chart shows the three main triggers that require rechecking irrigation settings and the confirmation cues to use.