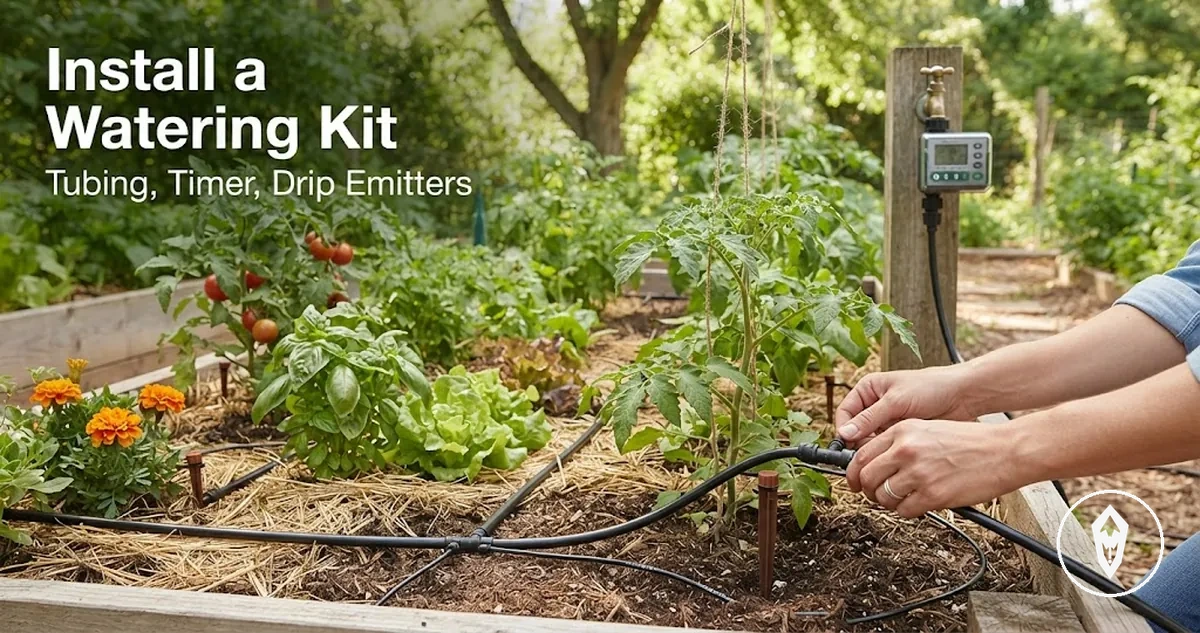
Automatic Watering Kit Installation
Automatic watering kit installation should create a secure water connection, a stable tubing route, correctly positioned emitters, and confirmed water delivery to each intended plant area. The installation is ready for regular use when the connected system operates without visible leaks and water reaches every planned outlet.
automatic watering kits use connected tubing and watering outlets to move water from a source to selected plants.
automatic watering kits use connected tubing and watering outlets to move water from a source to selected plants. Connector fit should remain secure during operation, tubing should follow the intended indoor or outdoor layout without restrictive bends, and emitters should sit at the required watering points rather than between plants.
A loose connection can produce a visible leak, while a restricted route or misplaced emitter can result in weak or uneven delivery.
The correct arrangement is configuration-specific: tubing size should match the supplied fittings, water pressure should be sufficient for delivery to every installed outlet, and outlet placement should follow the plant layout and kit design. A loose connection can produce a visible leak, while a restricted route or misplaced emitter can result in weak or uneven delivery.
Before regular use, run the installed kit and observe every connection and watering point.
Before regular use, run the installed kit and observe every connection and watering point. Each target area should receive water, connection exteriors should remain dry, and tubing should stay stable while the system operates. Where a component does not fit securely or delivery remains uneven, check the kit instructions or product support information for the required connector, tubing, and pressure conditions.
Table of Contents
Parts and Layout Checks Before Installation
Parts and layout checks before installation determine whether the supplied kit and the planned plant layout are ready for assembly. Installation can proceed more confidently when the available parts match the required connections, the tubing can reach every watering point, and the planned layout supports consistent water delivery.
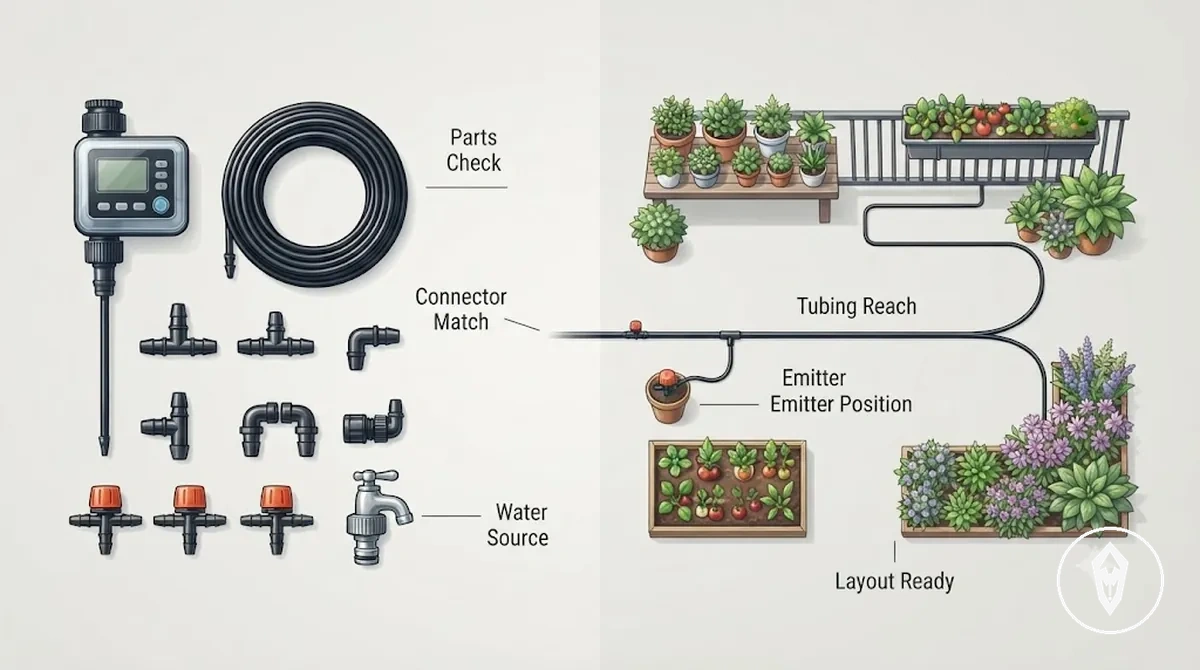
The image helps verify that the supplied components correspond with the intended watering layout. A ready-to-install arrangement has compatible connectors, adequate tubing reach, and emitter positions that match the plant locations, while a layout needing adjustment requires correcting the mismatch before assembly begins.
The image helps verify that the supplied components correspond with the intended watering layout.
Reviewing kit parts before installation helps confirm that each required connector, tubing section, emitter, and water-source fitting is available. If a required part is missing or a connector does not match the supplied tubing, installation may need to pause until the correct compatible component is available.
- Check that the available tubing reaches every planned watering position without excessive stretching or unnecessary slack.
- Confirm that all supplied connectors match the tubing size used in the kit.
- Verify that emitter locations correspond with the planting layout, whether it includes small pot groups, balcony containers, garden beds, or mixed planting areas.
- Ensure the selected water source accepts the supplied inlet fitting before installation starts.
- Review the planned tubing route so sharp bends, unnecessary crossings, and physical obstacles are corrected before assembly.
Timer, Filter, Regulator, Tubing, Connectors, Emitters, and Stakes
Timer, filter, regulator, tubing, connectors, emitters, and stakes each serve a distinct installation role before they are connected. Identifying these parts first helps confirm that the supplied kit supports the planned watering layout and that any optional components are recognised before assembly.
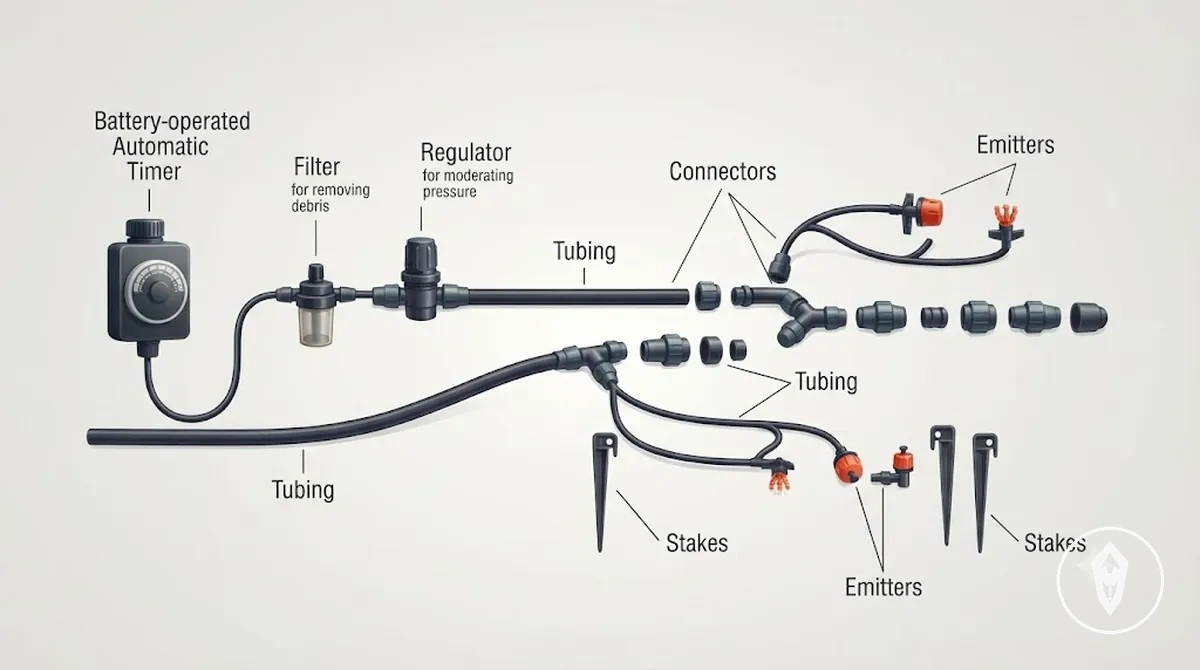
The image labels the main installation parts and shows the function each one performs within the watering system. Optional components, such as a filter or pressure regulator, should be confirmed against the supplied kit before installation.
- Timer: Controls when watering starts and stops if a timer is included with the supplied kit.
- Filter: Reduces debris entering the watering line when the kit includes a filter.
- Regulator: Moderates water pressure when a pressure regulator is supplied.
- Tubing: Forms the main water path from the water source to the watering points.
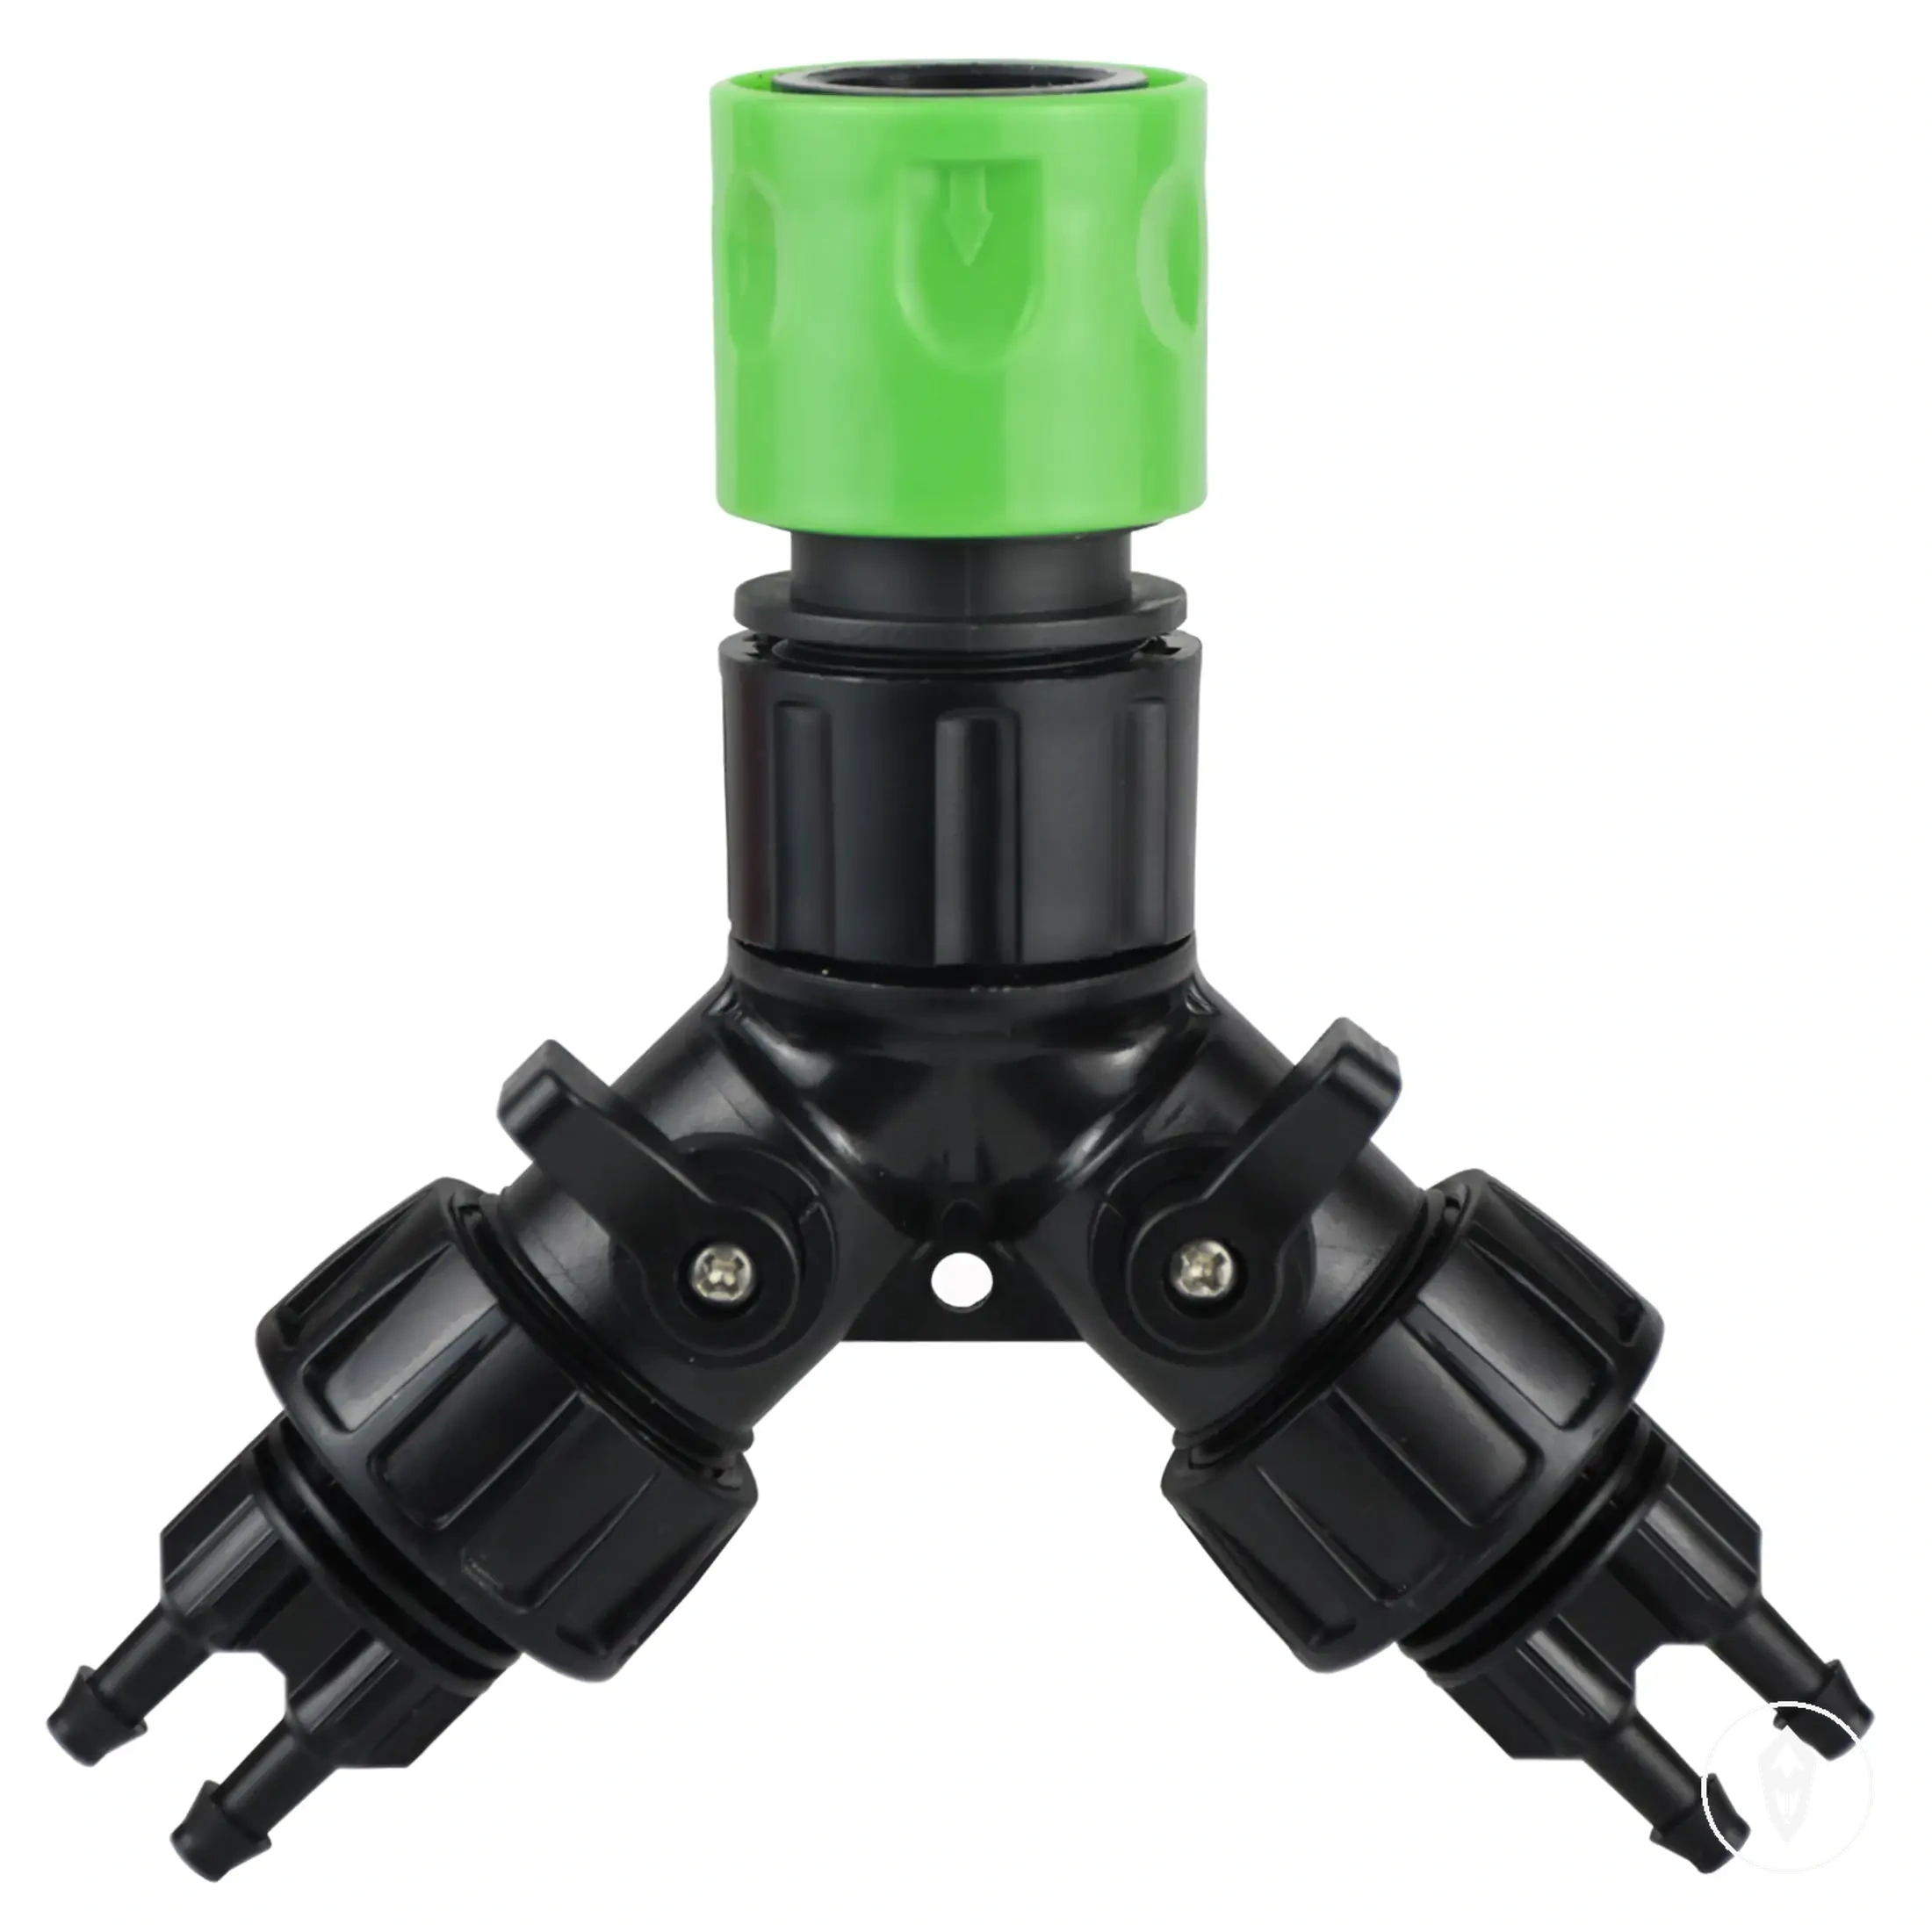
- Connectors: Join or branch tubing sections. Connector size should match the supplied tubing diameter for a secure connection.
- Emitters: Deliver water at the intended plant location. Emitter type should match the planned watering application used by the supplied kit.
- Stakes: Hold tubing or emitters in position to maintain the planned watering layout.
Water Source, Plant Positions, and Tubing Route
A layout is compatible with installation when the available water source can reach every planned plant position through a tubing route that avoids unnecessary strain, sharp kinks, and unreachable emitter locations. If the planned route cannot reach all watering points without excessive tension or repeated obstacles, the layout should be adjusted before installation.
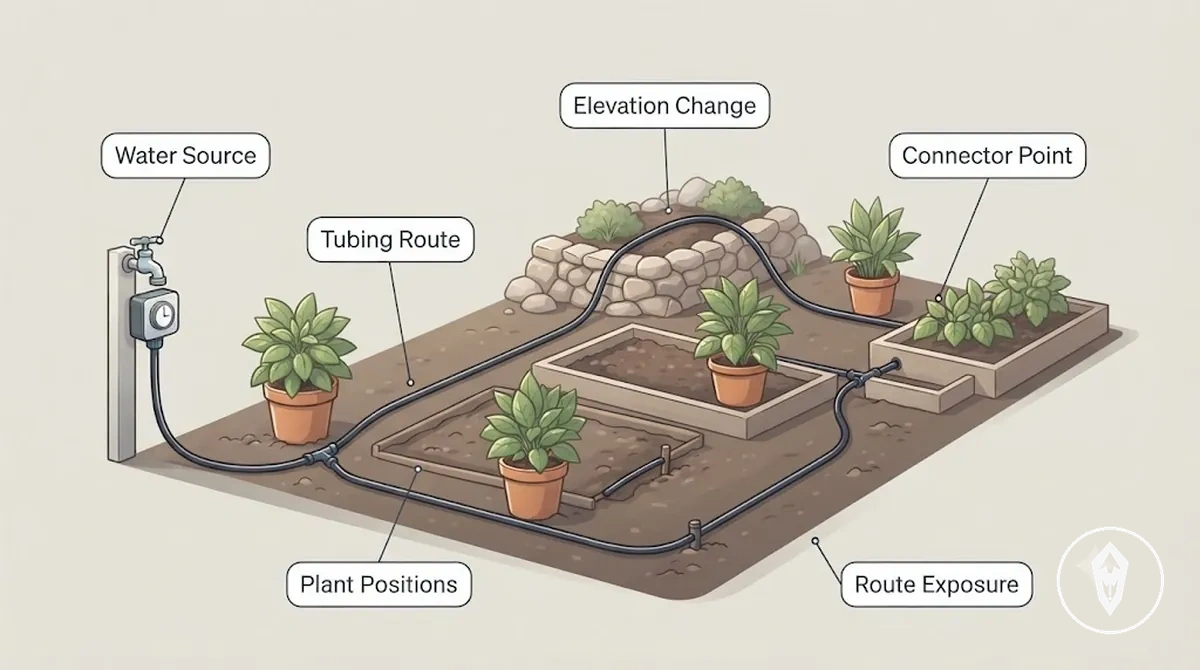
The image clarifies how the water source, plant positions, and tubing route work together to determine whether the installation path is practical. It highlights a route that provides accessible connections and stable tubing placement before assembly begins.
| Layout condition | Installation effect |
|---|---|
| Water source type and access | Installation is more practical when the available water source connects to the supplied inlet fitting without unnecessary routing changes. |
| Distance to plant positions | A longer route may require repositioning the tubing so every planned emitter location remains reachable without excessive strain. |
| Elevation changes | If the route includes changes in elevation, the installation should be checked to confirm the planned water path remains suitable. |
| Plant spacing | Emitter locations should align with plant positions so the tubing reaches each watering point without overstretching. |
| Connector points | Branch connections should be placed where the supplied tubing can divide cleanly with minimal bending. |
| Route exposure | If the planned path crosses exposed areas or obstacles, rerouting may produce a cleaner and more secure installation. |
If the planned layout cannot reach all intended watering areas with the supplied tubing or available connection points, the limitation is usually a kit coverage or kit selection issue rather than an installation technique issue.
Connecting the Timer and Water Source Assembly
Start installation by connecting the timer and water source assembly first, because this connection forms the stable starting point for the remaining tubing layout. A correctly aligned first connection helps the assembly seat evenly and allows visible fit checks before the rest of the system is attached.
A correctly aligned first connection helps the assembly seat evenly and allows visible fit checks before the rest of the system is attached.
The image demonstrates the correct connection order and shows how the timer, washer, and any supplied filter or pressure regulator fit together before the tubing is installed.
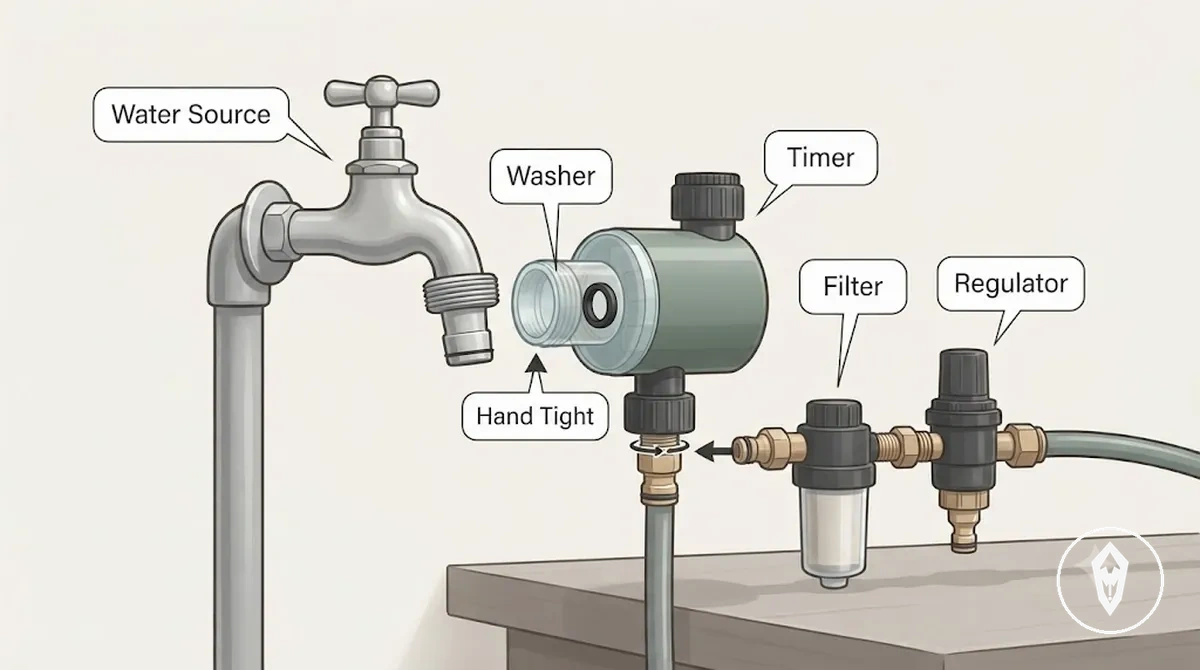
- Turn off the tap or prepare the reservoir outlet before making the first connection.
- Place the supplied washer inside the threaded inlet when a washer is included, then align the timer squarely with the threads to reduce the risk of cross-threading.
- Thread the timer onto the tap or compatible reservoir fitting by hand until it seats evenly. If resistance occurs immediately, remove the timer and realign the threads before tightening again.
- Install a filter or pressure regulator only when one is supplied or required for the selected assembly, positioning it in the intended connection sequence.
- Hand-tighten each threaded connection until it feels secure without forcing it, then confirm that the timer remains correctly oriented for easy access to its controls and outlet.
- Open the water supply gradually and inspect the assembly for visible leaks, uneven thread engagement, or movement before connecting the remaining tubing.
If the water source is indoors or located near finished surfaces, monitor the first connection carefully during the initial water test because even a minor leak can affect nearby areas. Do not assume the available water pressure is suitable without confirming that the supplied components are assembled as intended.
Laying the Main Tubing Line
Lay the main tubing line first so it creates a practical route from the water source to the watering area before any branch connections are added. A clear, accessible path establishes the physical route for the installation and helps later branch connections follow the planned layout with fewer adjustments.
Lay the main tubing line first so it creates a practical route from the water source to the watering area before any branch connections are added.
The image demonstrates how the main tubing should follow a smooth route while avoiding unnecessary bends, obstacles, and difficult access points before branch lines are installed.
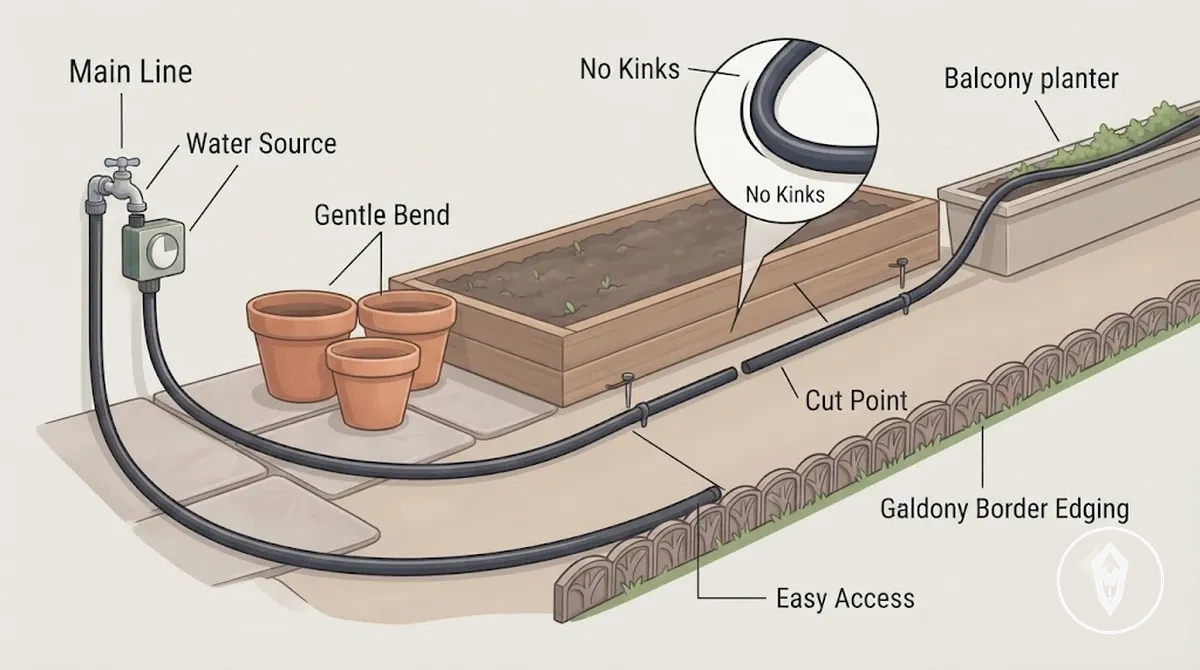
- Unroll the main tubing and position it from the water source toward the watering area without stretching it tightly.
- Choose a route with gentle bends that reaches pots, raised beds, balconies, or garden edges without creating sharp corners.
- Confirm the planned path before cutting the tubing so the finished length reaches each required area without unnecessary excess or tension.
- Keep the tubing accessible for future adjustments and avoid routing it where foot traffic, garden tools, or moving objects could damage it. If you need more guidance on selecting compatible components, refer to tubing and connector setup.
- Where the route includes elevation changes, support the tubing so it follows the intended path without unnecessary strain. Water flow may differ with kit design and layout, so avoid avoidable restrictions such as tight corners.
- Inspect the completed route and straighten any visible kinks before installing branch connections because tight bends can restrict water movement through the main line.
- The route follows the planned watering area without unnecessary detours.
- No visible kinks or sharp bends remain.
- Cut points match the confirmed layout.
- Elevation changes are gradual and the tubing remains supported.
- The tubing stays accessible for future inspection and adjustment.
Connecting Branch Tubing and Fittings
Connect branch tubing and fittings after the main tubing line is in place so each branch creates a reliable watering path to individual plants. Reliable branch connections depend on matching the tubing size to the fitting, selecting the appropriate fitting type for the required direction, and placing branches according to the spacing between plants.
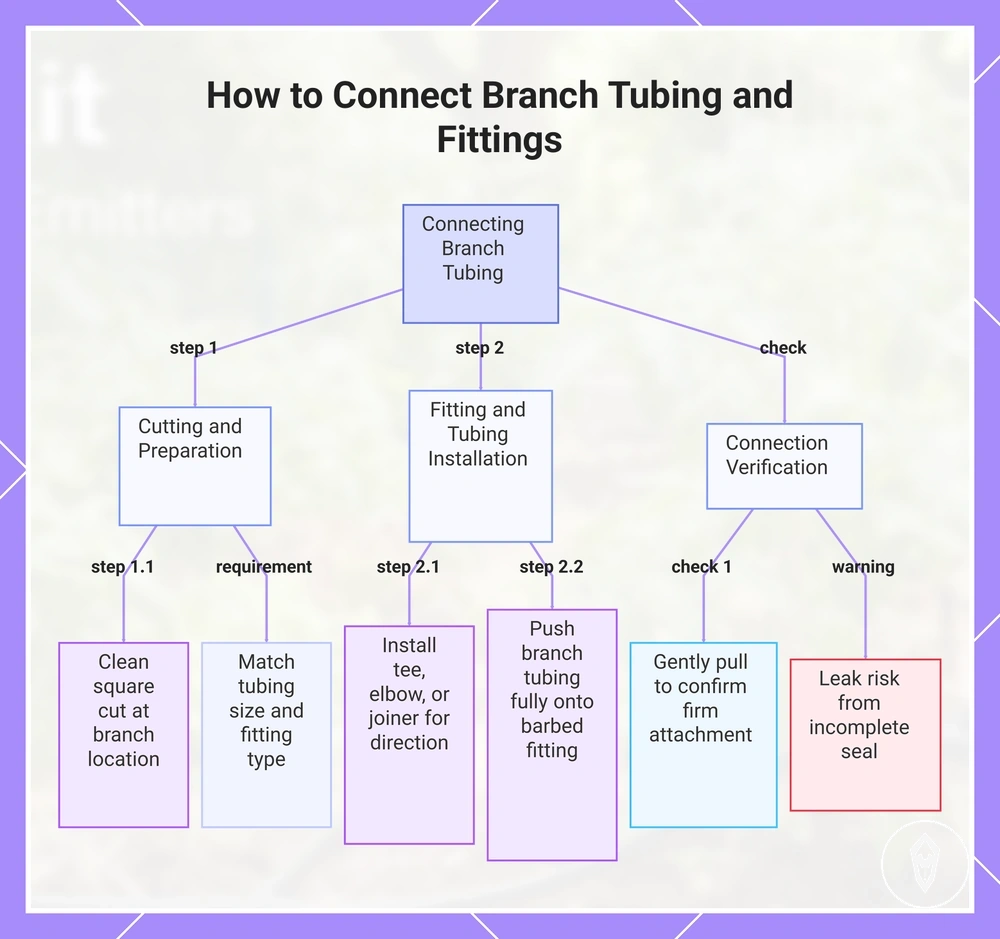
- Cut the main tubing with a clean, square edge at each planned branch location so the fitting seats evenly without leaving rough edges.
- Install the fitting that matches the branch direction, using a tee to divide the line, an elbow to change direction, or a joiner to reconnect a straight section.
- Push the branch tubing fully onto each barbed fitting until it is completely seated. Full insertion provides a more secure connection than a partially inserted fitting.
- Align each branch with its intended direction so the tubing is not twisted or placed under unnecessary tension after installation.
- Check each connection by pulling the tubing gently. The tubing should remain firmly attached with no visible gap between the tubing and the fitting.
- If the kit uses harder tubing or installation takes place in cooler conditions, warming the tubing slightly or applying firm hand pressure may help the tubing seat correctly when the tubing material and fitting design support that method.
- Use clean, square cuts before inserting fittings.
- Match each fitting to the required branch direction.
- Confirm every fitting is fully seated before turning on the water.
- Inspect each connection because leak risk can increase if tubing material or fitting design prevents a complete seal.
This chart shows the main steps and checks for connecting branch tubing and fittings, including cutting, installation, and verification to ensure a leak-free connection.
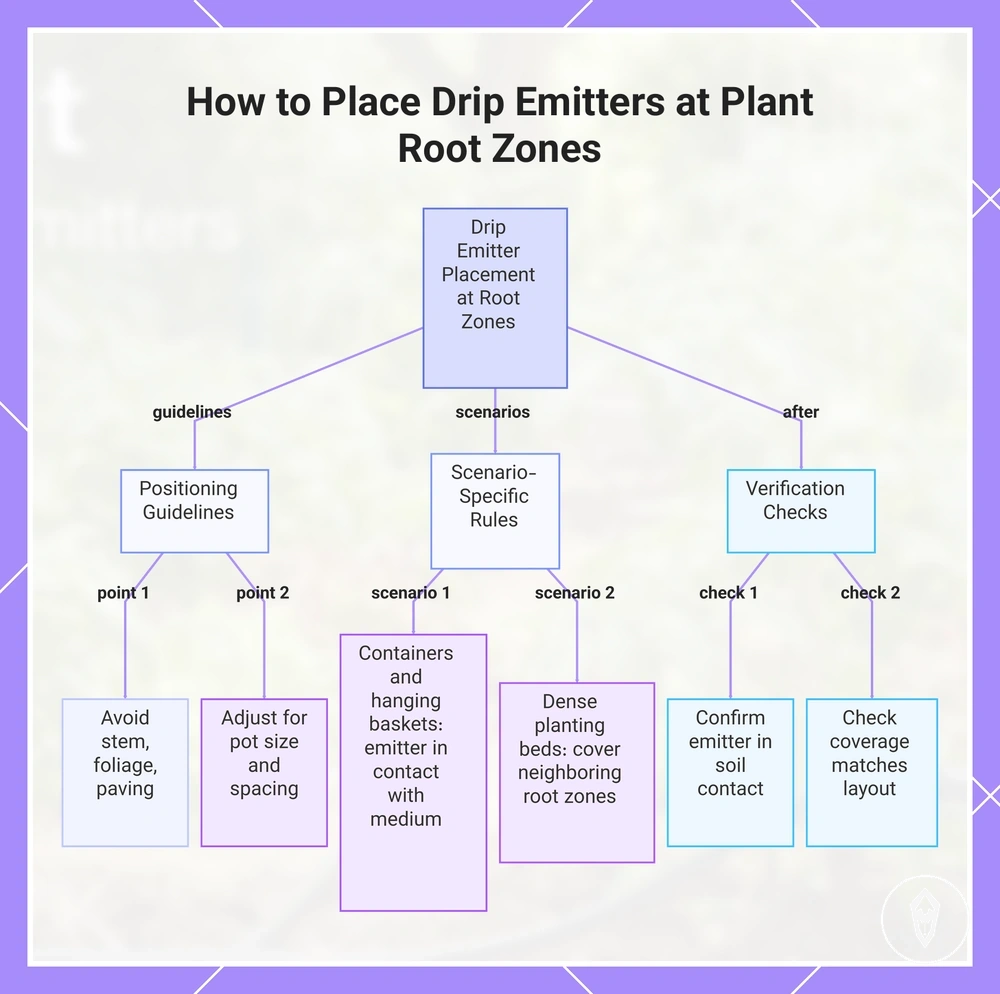
Placing Drip Emitters at Plant Root Zones
Place drip emitters so water reaches the plant root zone rather than leaves, paving, empty soil, or container edges. Effective emitter placement depends on pot size, plant spacing, root spread, emitter flow, and whether one or more delivery points are needed to cover the intended rooting area.
- Position each drip emitter so water is delivered into the root zone while keeping it away from direct stem contact, foliage, paving, and exposed soil outside the planting area.
- For containers, place the emitter where water can spread through the growing medium instead of collecting around the container edge. Larger pots may require more than one delivery point to improve root-zone coverage.
- For hanging baskets, keep the emitter in firm contact with the growing medium so water enters the basket rather than running over the side.
- In dense planting beds, position emitters so neighbouring root zones receive coverage without concentrating all water in one location.
- Where plants have different spacing or different root spread, adjust the emitter position or use one or more delivery points according to the planting layout and the emitter flow provided by the kit.
- After positioning each emitter, confirm it remains in contact with the soil and has not shifted onto mulch, paving, or bare ground where water would miss the intended root zone.
- Water reaches the intended root zone.
- Emitters remain clear of leaves and direct stem contact.
- Container and hanging basket emitters stay in contact with the growing medium.
- Emitter placement matches plant spacing and root spread.
- Each plant has the required number of delivery points for the installation layout.
This chart shows the key guidelines, scenario-specific rules, and verification steps for placing drip emitters to ensure water reaches plant root zones effectively.
Securing Tubing, Stakes, and End Caps
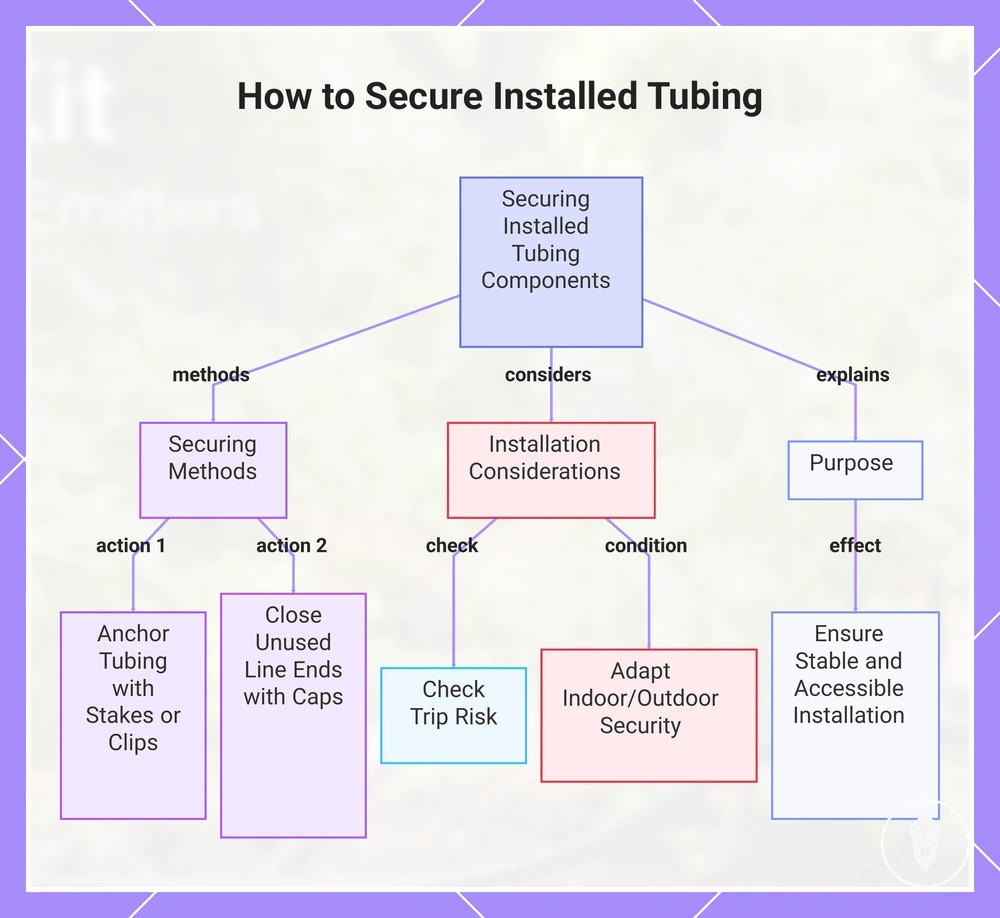
Secure the installed tubing before testing so the route, emitter positions, and line ends remain stable during use. Physical stability helps reduce movement, accidental disconnection, and uneven water delivery while keeping the installation accessible for later inspection.
- Anchor exposed tubing with stakes or clips wherever the line changes direction, crosses open ground, or could shift during normal use.
- Secure the tubing firmly enough to hold its planned route without placing unnecessary strain on fittings or changing emitter positions.
- Close every unused line end with a correctly fitted end cap so water remains within the irrigation path. Leave any intended flush point accessible instead of permanently blocking it.
- Check that exposed tubing does not create an unnecessary trip risk where people regularly walk or work around the installation.
- Position secured tubing to limit unnecessary movement caused by sun exposure or routine garden activity while maintaining access for later inspection of fittings, emitters, and line ends.
- For indoor installations, secure tubing more firmly where leakage could affect surrounding surfaces. For outdoor installations, give additional support to exposed routing that may move because of weather or foot traffic.
- Stakes or clips keep loose tubing in position.
- End caps close unused line ends securely.
- Flush points remain accessible.
- Exposed tubing is secured to reduce movement and trip risk.
- The completed installation remains accessible for later checks.
This chart shows the main methods and considerations for securing installed tubing, stakes, and end caps to ensure stability and access.
Flushing and Testing the Installed Watering Kit
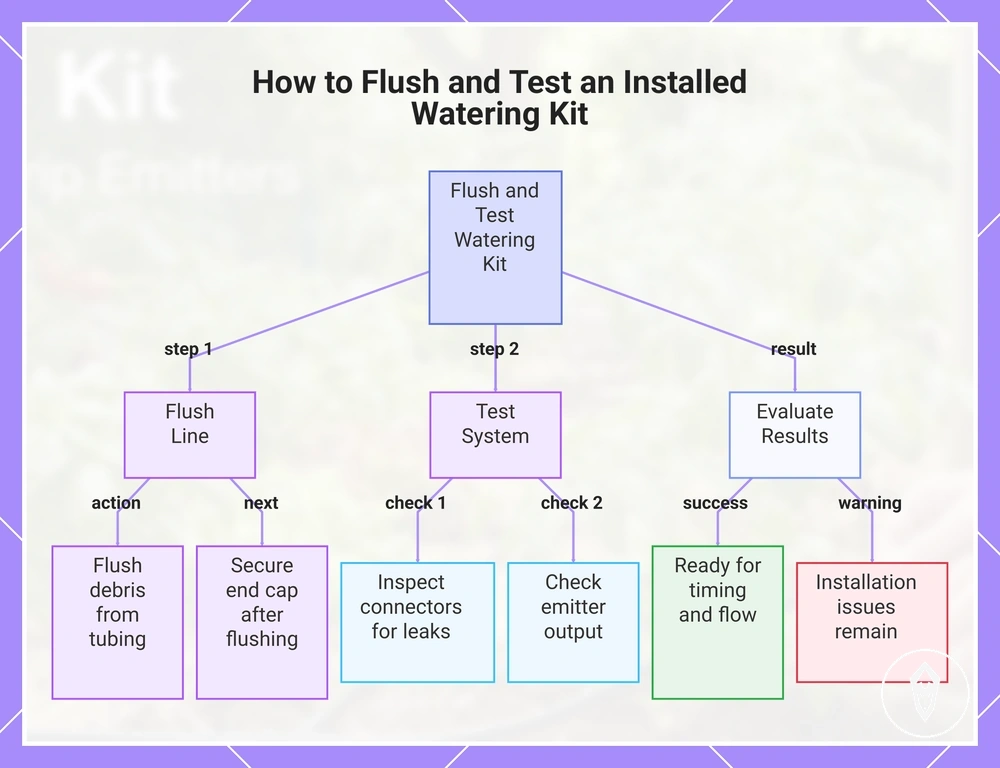
Flush and test the installed watering kit before regular use so debris, connection problems, and uneven water delivery are identified before timing and flow adjustments. The first test confirms whether the installation is ready to move to timing and flow setup or whether installation-related issues still require attention.
- Leave the line end open at the planned flush point and briefly turn on the water so debris is flushed from the tubing before closing the system.
- Fit the end cap securely after flushing so water remains within the irrigation line during the test.
- Activate the timer or water supply and allow water to move through the complete installation.
- Inspect connectors and fittings for visible leaks. If water escapes from a connection, stop the test and reseat the affected connection before continuing.
- Check each drip emitter for water output. Every intended delivery point should produce water, although the output pattern may differ according to emitter type, operating pressure, and the installed layout.
- Observe the system while it is running to confirm pressure remains suitable for the installed layout and that each plant receives water within its intended root zone.
- Pass: The tubing has been flushed, the end cap is secured, connectors remain dry, emitters deliver water, and plant-level coverage is consistent across the installed layout.
- Fail: Debris remains in the line, connectors leak, one or more emitters produce no output, or water delivery is noticeably uneven because of the current installation.
If the installation passes these checks, it is ready to set timing and flow after installation.
If the installation passes these checks, it is ready to set timing and flow after installation .
This chart outlines the flushing and testing steps needed to verify a watering kit installation and determine if it is ready for timing and flow adjustments.
Leaks, Loose Connectors, and Blocked Emitters
Leaks, loose connectors, and blocked emitters found during the first test usually result from incomplete fitting, debris inside the line, unsuitable pressure for the installed layout, or parts that are not fully seated. Confirm the visible symptom first, then inspect the matching connection or outlet before making a local correction.
| Symptom | Likely cause | Local check and correction |
|---|---|---|
| Water leaks from a connector | The tubing is not fully inserted, the connector is loose, or the tubing end is uneven. | Confirm the leak starts at the fitting, then reseat the tubing, tighten the connection if the fitting design allows, or recut the tubing end before reconnecting. |
| A connector slips from the tubing | The tubing or fitting is not fully seated, or the connector is unsuitable for the tubing material or fitting design. | Check that the tubing is inserted completely and that the connector matches the installed components before reconnecting. |
| An emitter produces little or no water | Debris may be blocking the outlet, or water is not reaching the emitter because of the current installation. | Compare the affected emitter with nearby emitters, then flush the affected line or replace the blocked emitter if flushing does not restore water output. |
| Uneven water delivery between plants | Pressure behaviour, emitter type, the supplied regulator, or the installed layout is affecting water distribution. | Confirm connectors remain secure, emitters are unobstructed, and the regulator is installed correctly before making layout-specific adjustments. |
If these local checks do not resolve the problem, use the broader guide to fix installation problems.
Uneven Watering During the First Test
Uneven watering during the first test is a signal to inspect the physical installation before changing timing or flow settings. Differences in output may come from plant position, emitter placement, blocked outlets, branch distance, tubing bends, pressure variation, or branch layout.
- Plant position: Confirm each emitter releases water at the intended root zone rather than beside the plant or onto an unrelated area.
- Emitter output: Compare nearby emitters of the same type. A silent or visibly weaker outlet indicates a local delivery problem rather than a scheduling issue.
- Branch distance: Check whether lower output occurs mainly at more distant branch ends, which points to a route or pressure-distribution issue within the installed layout.
- Tubing bends: Inspect sharp bends and compressed sections. A restricted section supports a physical-flow cause when output improves after the tubing route is restored.
- Clogged outlets: Inspect emitters with little or no visible output for debris, then flush or clear the affected outlet according to the emitter design.
- Pressure-sensitive parts: Confirm the supplied regulator and related fittings are installed in their intended positions. Uneven output across multiple branches may indicate pressure behaviour linked to the kit type, emitter design, or layout.
Do not judge the installation by a universal water volume because expected output differs by kit type, operating pressure, emitter design, and layout. Move to scheduling and flow adjustment only after emitter positions, tubing routes, outlets, connections, and pressure-related parts pass these basic physical checks.
Installation Mistakes to Correct Before Regular Use
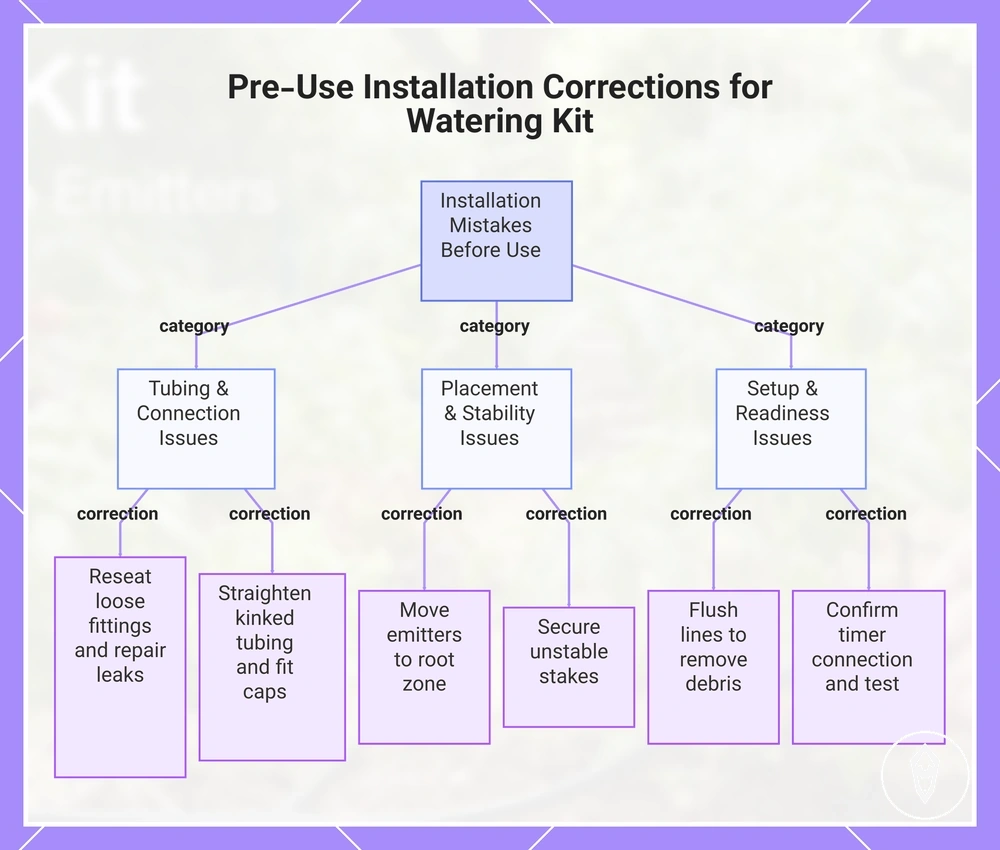
Installation mistakes should be corrected before the automatic watering kit is left to run regularly. Regular use should begin only after the physical layout, connections, emitters, and first test are acceptable.
Installation mistakes should be corrected before the automatic watering kit is left to run regularly.
Small installation errors can cause leaks, leave plants dry, overwater nearby pots, or make unattended watering unreliable when the layout, pressure, or kit configuration does not support consistent delivery.
- Loose fittings: Reseat or tighten the affected connection because visible water loss can reduce delivery elsewhere and worsen during unattended operation.
- Kinked tubing: Straighten or reroute the restricted section because reduced flow beyond the bend can leave downstream emitters with less water.
- Misplaced emitters: Move each emitter to the intended root zone because incorrect placement can leave one plant dry while directing excess water into another pot or soil area.
- Missing end caps: Fit the missing end cap because an open tubing end allows water to escape instead of reaching downstream emitters.
- Unstable stakes: Secure loose stakes because moving tubing can shift emitters away from their intended watering positions.
- Unflushed lines: Flush the tubing because retained debris can restrict or block affected emitter outlets.
- Poor timer connection: Confirm the timer is fitted securely and activates the water supply during the first test because an unstable connection can make scheduled watering unreliable.
- Unresolved leaks: Repair visible leaks before regular use because ongoing water loss can reduce delivery within the installed layout.
The kit is ready for regular use only when these visible mistakes are corrected and the first test confirms acceptable water delivery for the installed layout, operating pressure, and kit configuration.
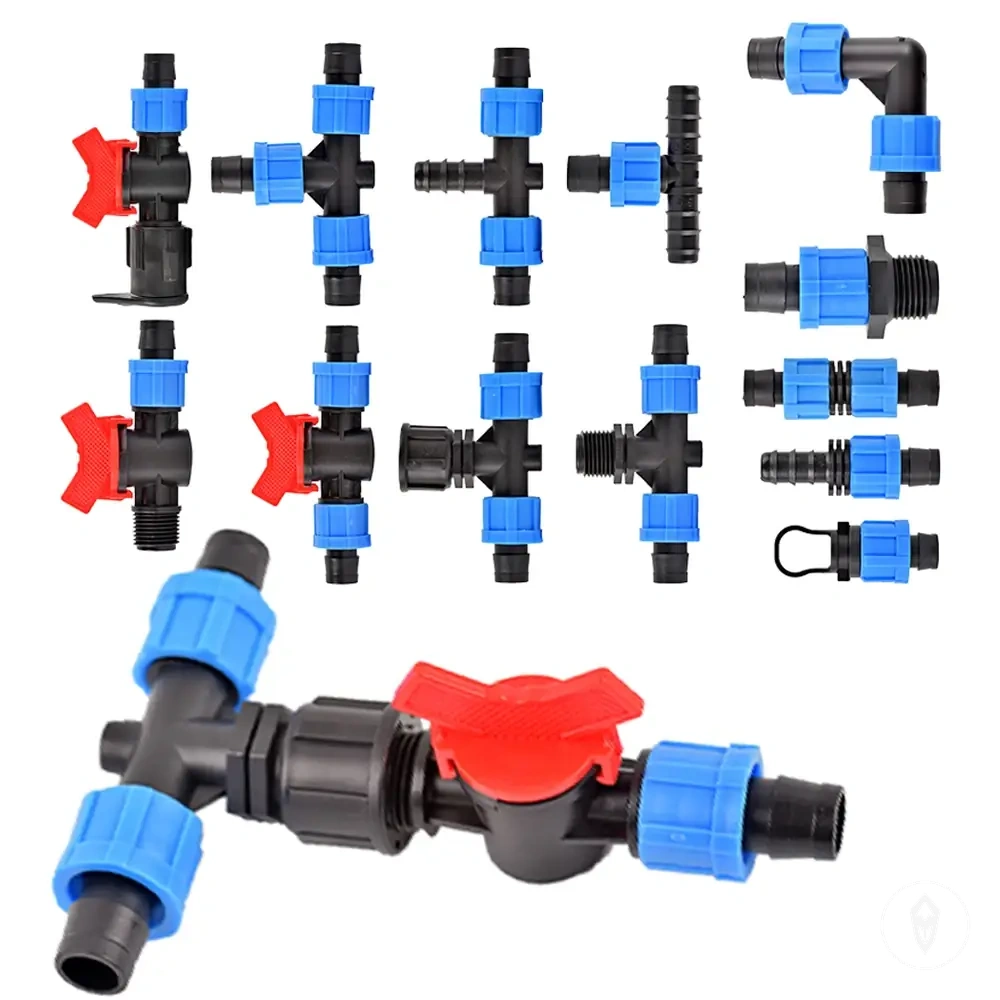
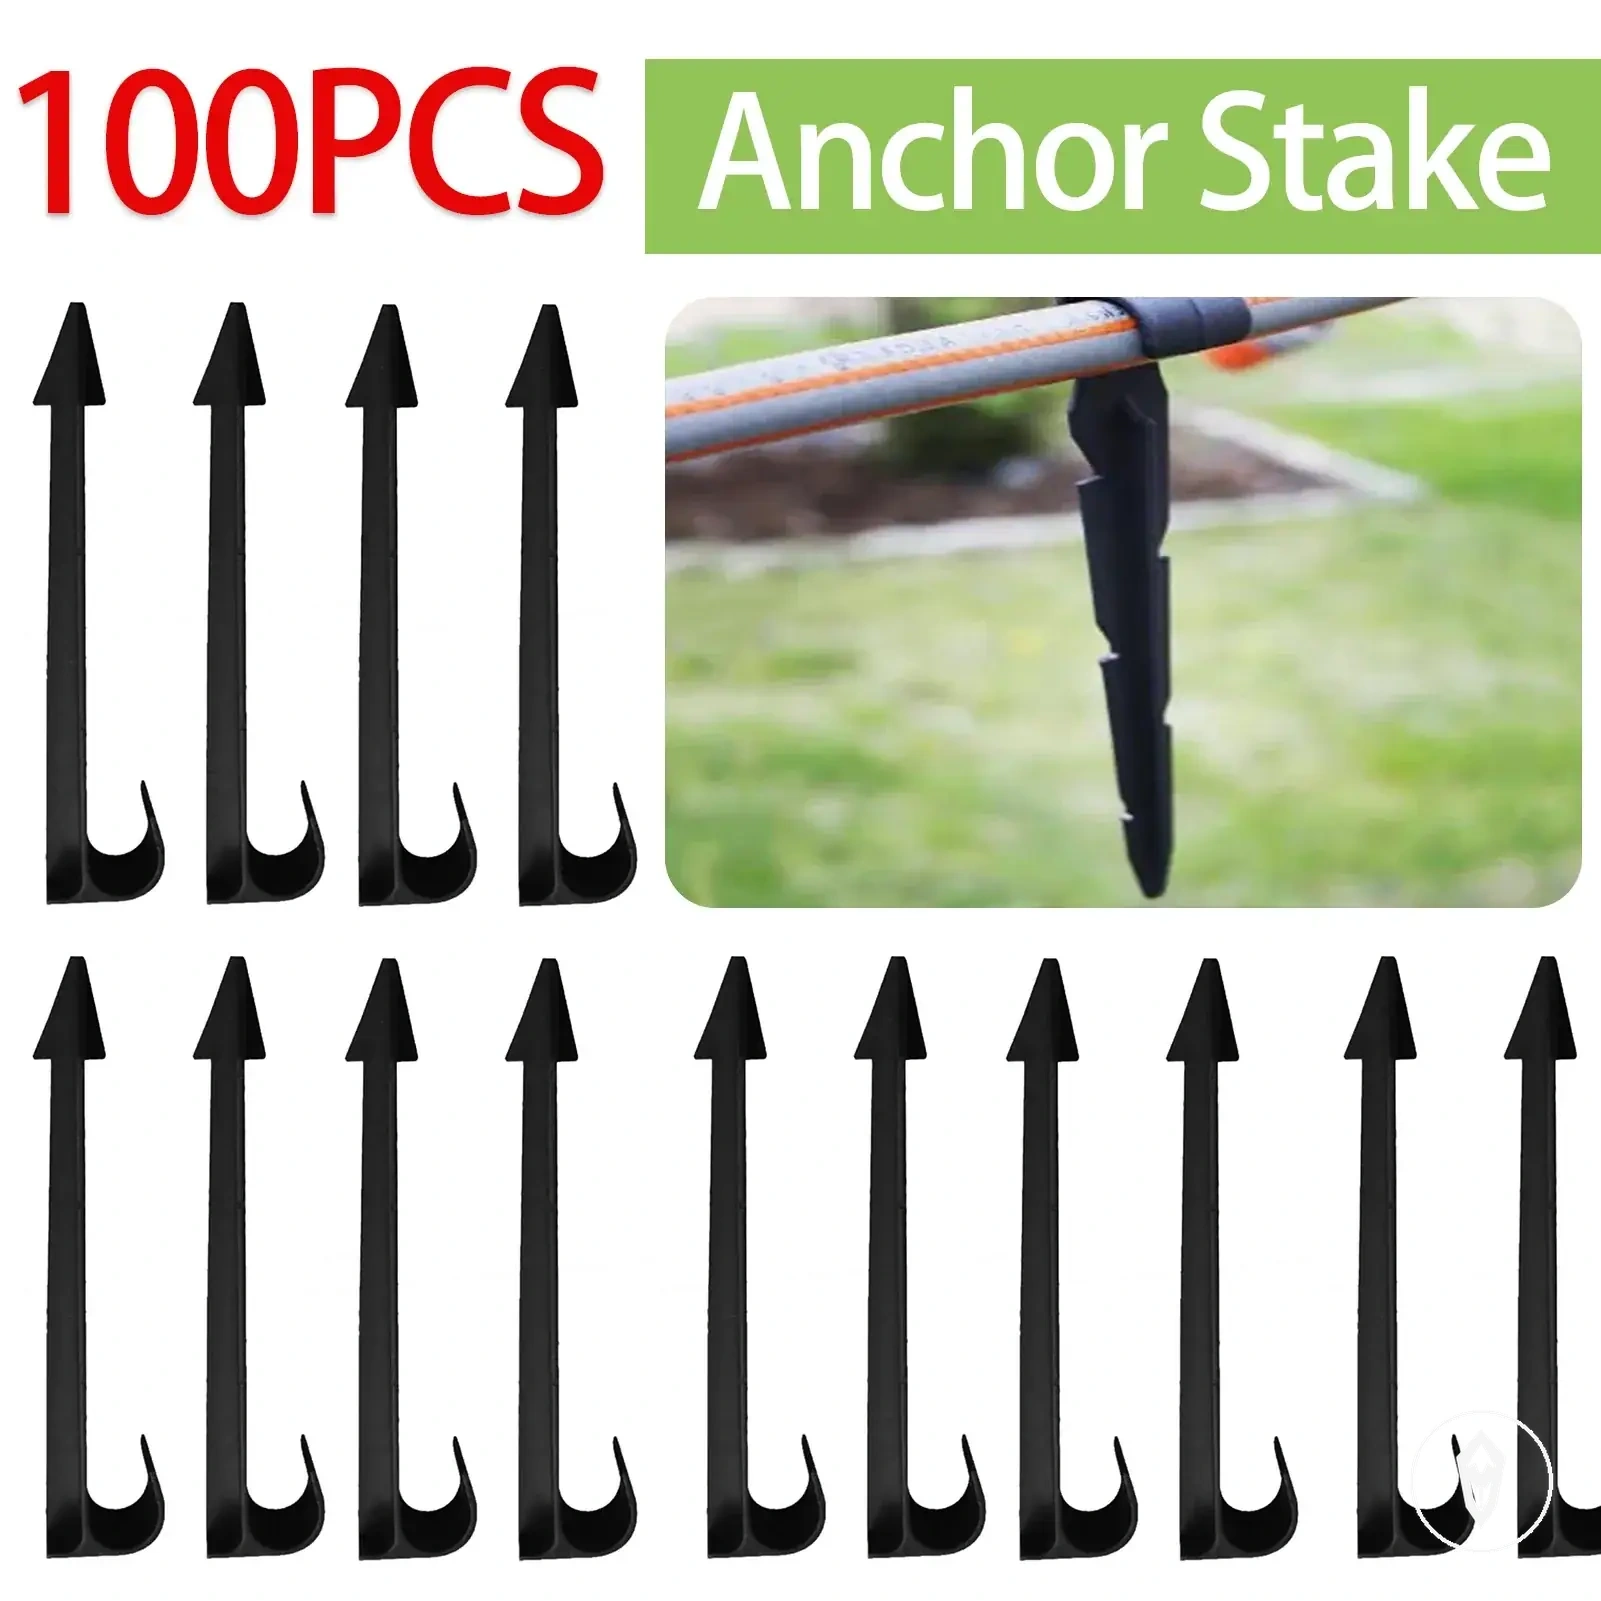
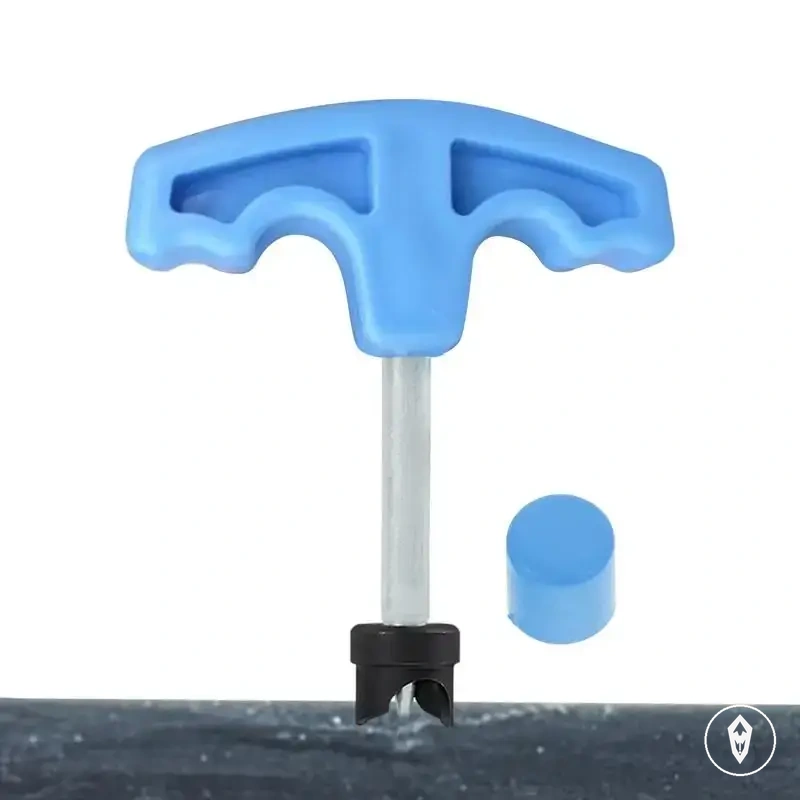
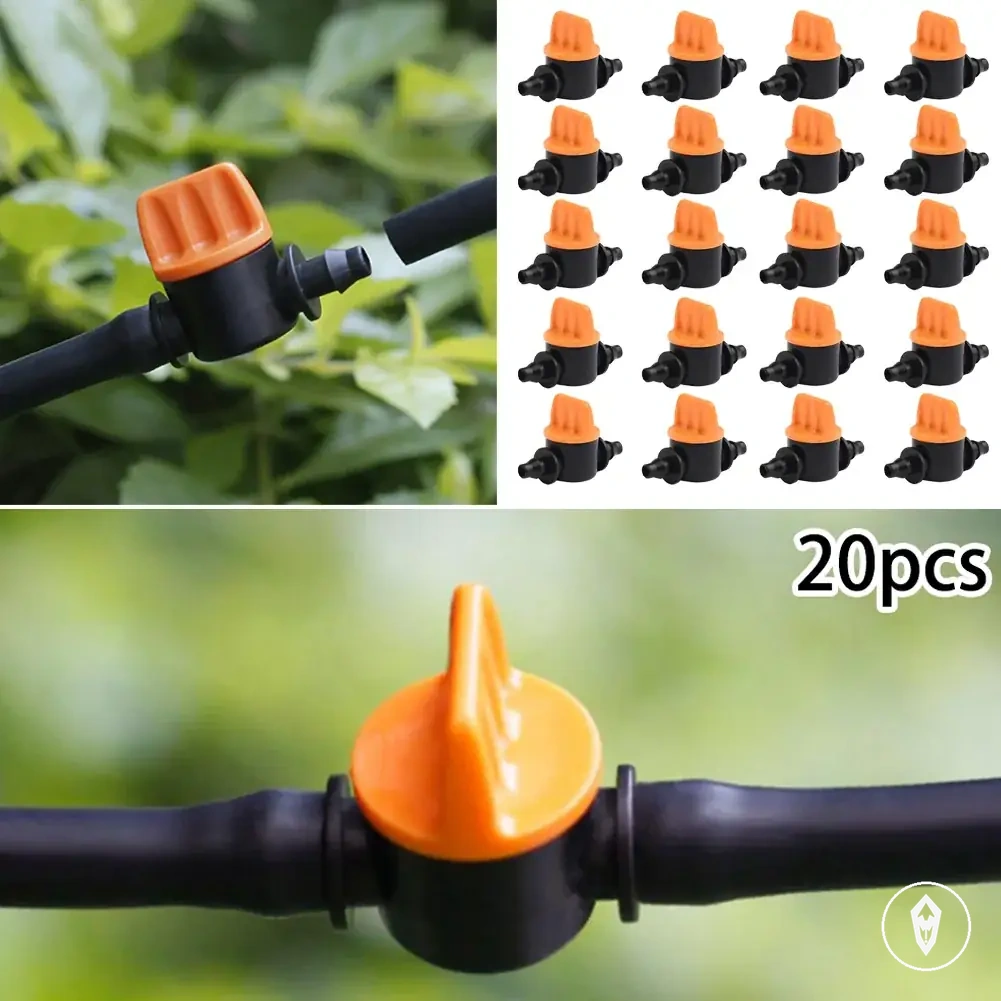
The products below are useful examples for comparing available options. Before buying, check that the compatibility criteria, key features, and product details match your needs.
This chart shows the main categories of installation mistakes and the corrective actions needed before the automatic watering kit can be used regularly.